SOCIAL MEDIA

Thursday, 19 December 2019

Stampin' Up! Artisan Design Team Blog Hop - Dec - Tags

Hello Crafty Friends,


Welcome to the final Stampin' Up! 2019 Artisan Design Team Blog Hop. It has been an absolutely mind blowing year and I feel so honoured to have been given this amazing opportunity.  I am extremely appreciative for all the support we have received and feel immensely grateful to call all the ladies on the Team, my very special friends.  


We are going out with a bang so be sure to hop all the way through as we have so many incredibly inspiring ideas using the Tags Tags Tags Bundle and the Mini Curvy Keepsake Bundle or both! Here's a sneak peak....

No photo description available.

The creations I have to share with you today were inspired by one of my daughters favourite first books - the very hungry caterpillar. She read (sucked on and maybe even ate) the book to the point I swear it was growing things on the torn page edges lol. Knowing that it is still a favourite for children today, I decided to create a caterpillar inspired projects using the Mini Curvy Keepsake Bundle.


To create the Caterpillar, I have die cut the Mini Curvy Keepsake Box from Bermuda Bay and Granny Apple Card. The face has been constructed from different sized circle dies and punches. A few Glitter enamel dots in Granny Apple Green and Coastal Cabana have been added to the body and eyes. 


The hungry Caterpillar has to have an Apple to eat, right? Lol. The apple has been die cut from Poppy Parade card with the stamped and die cut leaves from the Rooted in Nature Stamp Set adhered to the top along with a strip of Soft Suede card that I have used to mimic the stem.


The matching card incorporates a bit of punch art and was inspired by a creation made by my super talented friend and fellow West Australian demo Rachel Lewsley from My Paper Haven. The die cut circles that make up the body have been stamped with a 'splatter' stamp from the Rare Blessings Stamp Set to give the "skin" a little depth.  Little black die cut hearts were used for the feet (turn then upside down) and glitter enamel dots for the centre of the eyes. A few die cut stitched stars were added to the top left of the card along with a White Bakers Twine bow.


That is all from me today. Thank You Stampin' Up! for a year I will never forget. Extra special thanks to our inspirational leader, Lauren Alarid, the super talented Concept Art Team, all the Ladies on the 2019 ADT and all those who supported and encouraged us on our Artisan journey.

Up next in this Blog Hop is my super talented friend, Jennifer Picard with her uber cute creations.


Blog Hop Participant List


I am super excited to introduce the incoming 2020 Artisan Design Team!!! 

Image may contain: 16 people, including Rochelle Blok, Lauren Garcia Alarid, Tammy Wilson, Manuela Geiswinkler, Hélène Den Breejen, Narelle Farrugia and Jan Clothier, people smiling

2020 Artisan Design Team Blog Roll

Thursday, 14 November 2019

Stampin' Up! Artisan Design Team Blog Hop - Nov - Toile Tidings

Good Day Crafty Friends

Welcome to the Stampin' Up! Artisan Design Team Blog Hop for November. This month we have the pleasure of showcasing the TOILE TIDINGS SUITE. This traditional patterned and coloured suite is full of goodies, including two stamp and die bundles, DSP, Ribbons, Embellishments AND coordinating wrapping paper. You can find all the coordinating products on Page 7 of the 2019 Holiday Catalogue.

I have a couple of projects to share with you today.  I decided to make a few decor items for my house to show the versatility of this suite - My house is going to have a very Red & White feel this year which is perfect as I have a White Christmas Tree.

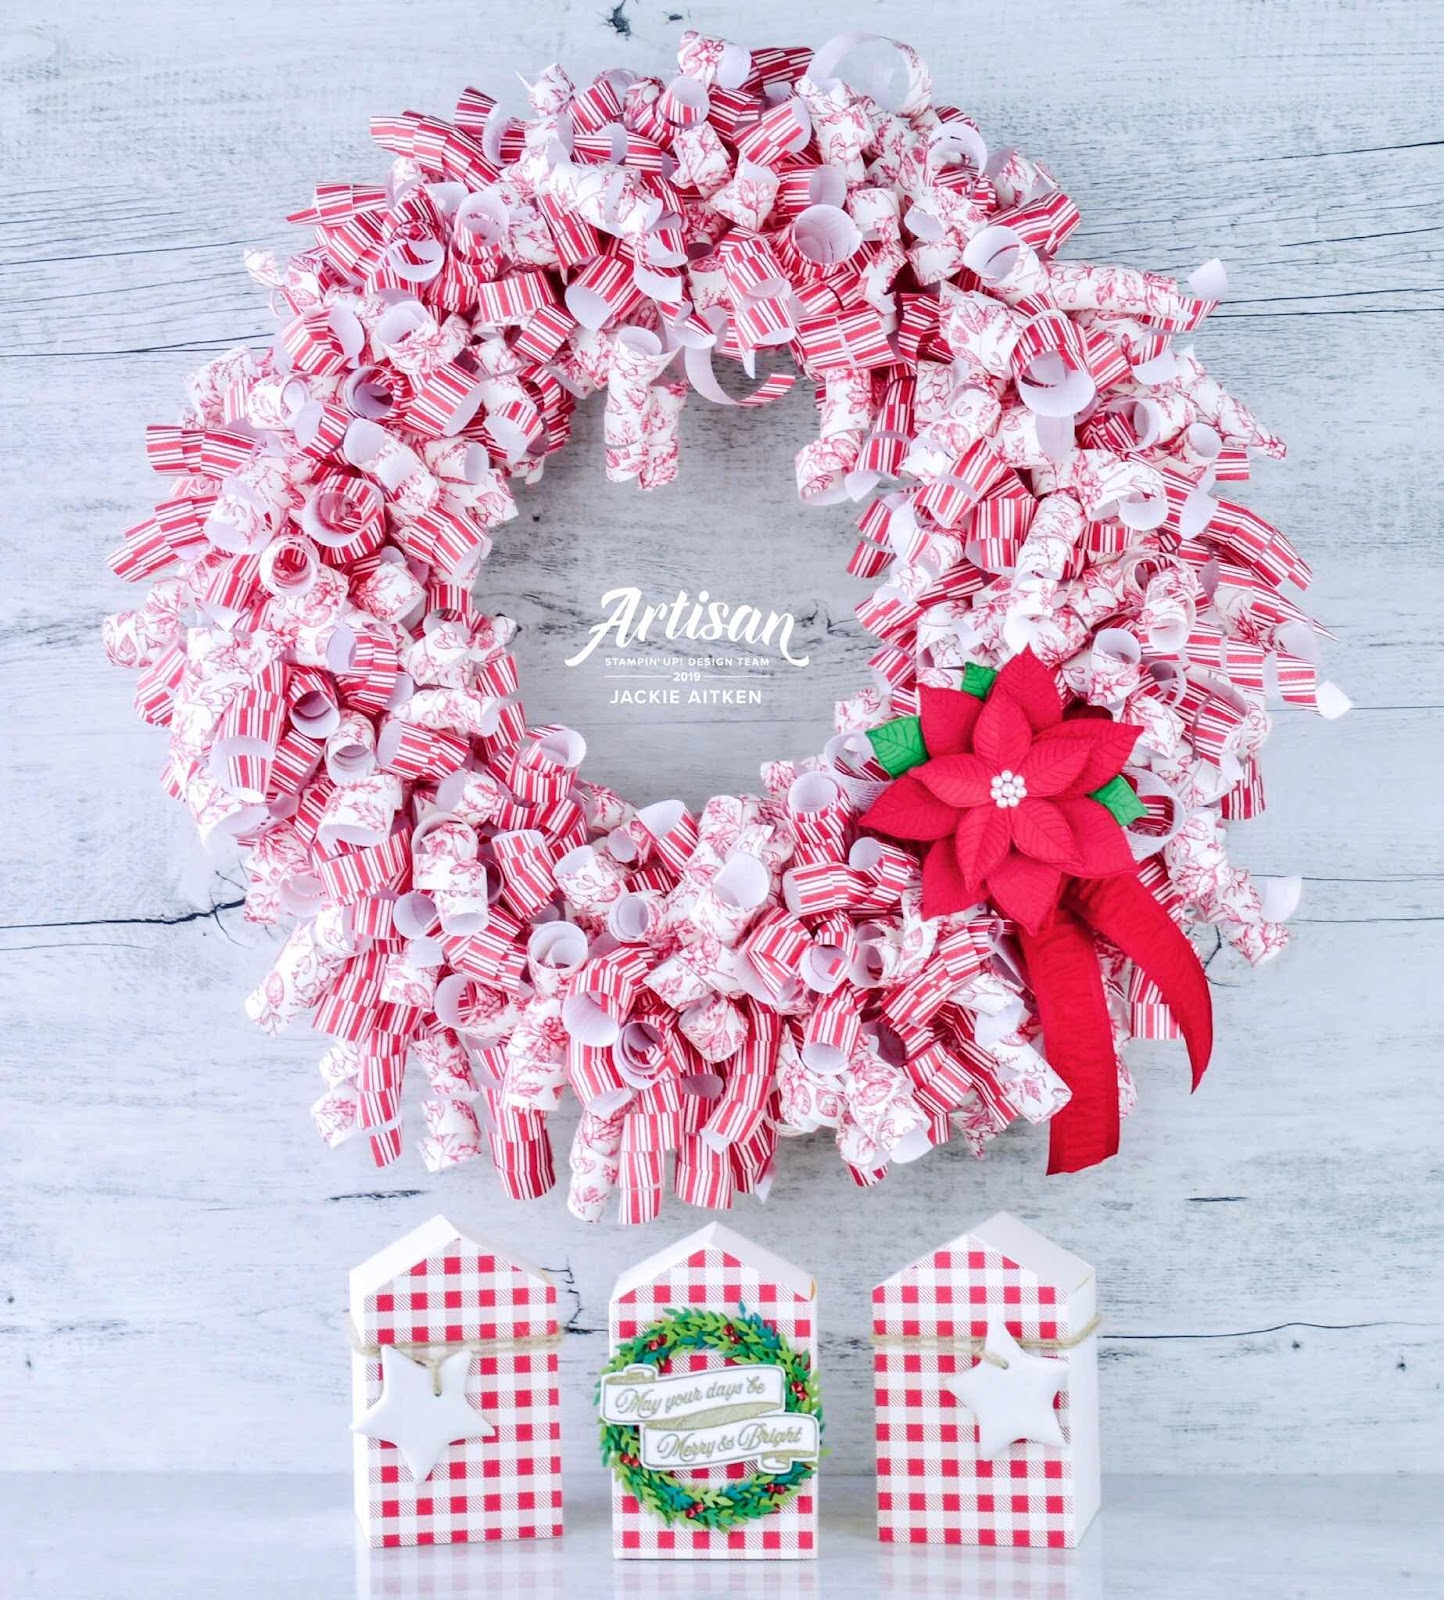
The first project I am excited to share is a curled DSP wreath using the Toile Tidings Gift Wrap for the wall next to our dining table. A few Sheets of the Gift Wrap have been cut down into 12" squared sheets and then I have taken the 12"x 12" and cut it down into 1" strips. To construct the wreath you will need a polystyrene wreath, dressmaker pins and loads of curled strips of DSP.  Once the DSP strips have been curled - I used a bone folder, simply take a pin, place into one end of the curled DSP strip and poke it into the wreath.


I thought the wreath looked like it was missing something so I decided to add the Poinsettia and Ribbon. The Poinsettia Flower has been created using the leaf dies from Nature's Roots Dies. Real Red & Call Me Clover card stock has been lightly spritzed with water before die cutting and embossing the two different sized leaves, using the dies with an embossing mat.  Before attaching the Flower, White Flax Ribbon and Real Read Ribbon were adhered to the wreath using a Hot Glue Gun.


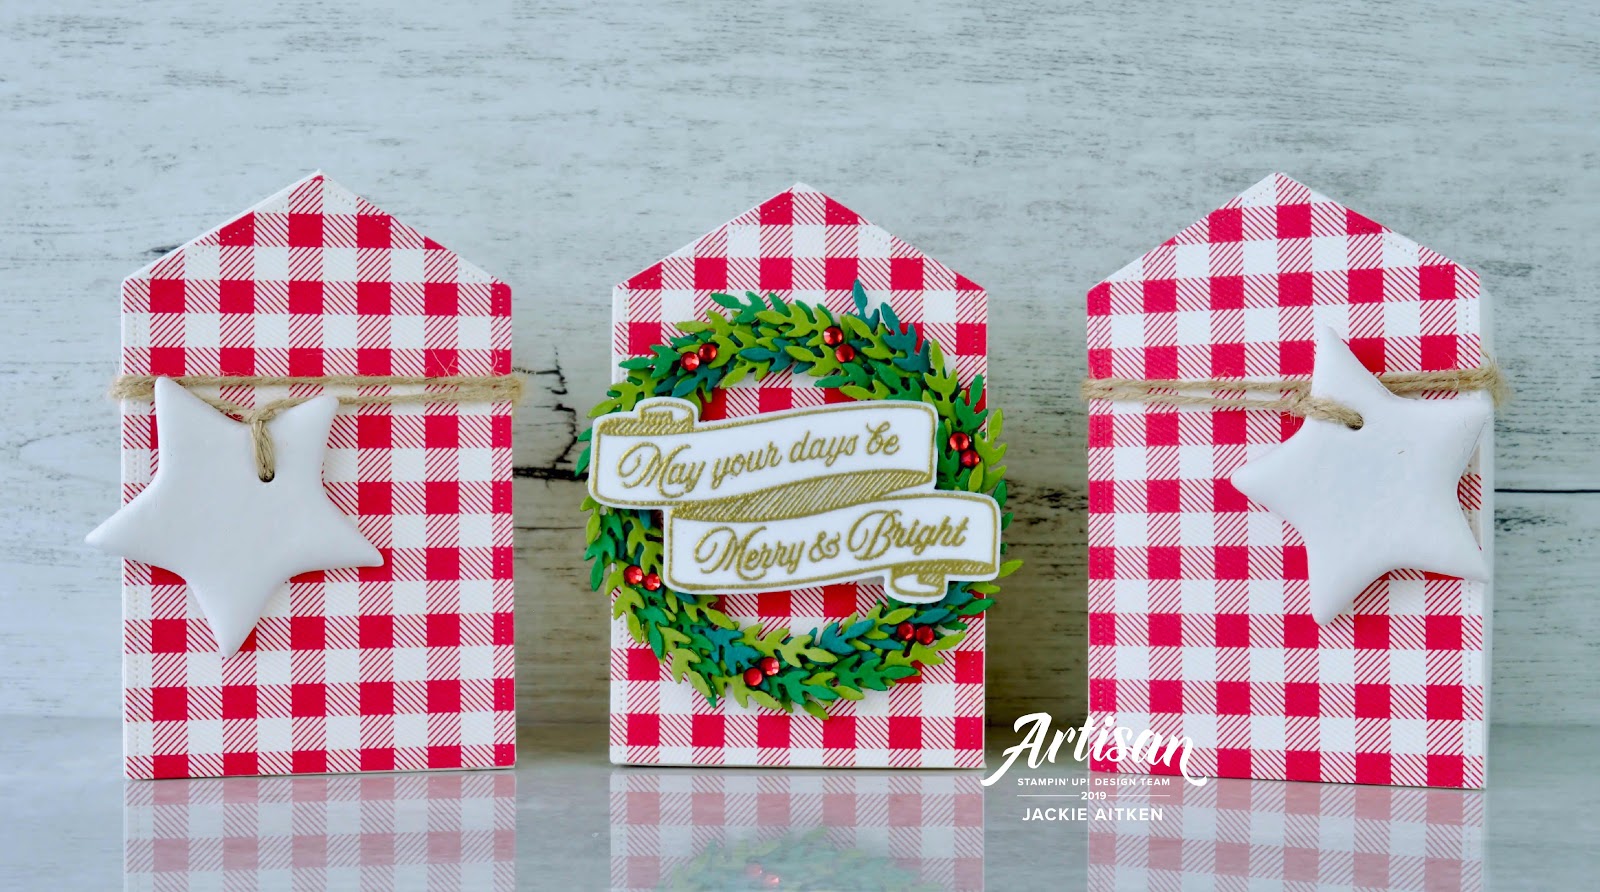
The little house gift boxes will look fantastic on the table on Christmas Day. These house shaped boxes will hold bags of Russian Fudge - just lift the tab that forms the "roof" to reveal the treats inside. To decorate the boxes, Toile Tidings DSP has been die cut using the Stitched Nested Label dies, then a few Air Dry Clay Star Shaped tags were attached to the outer two boxes. 


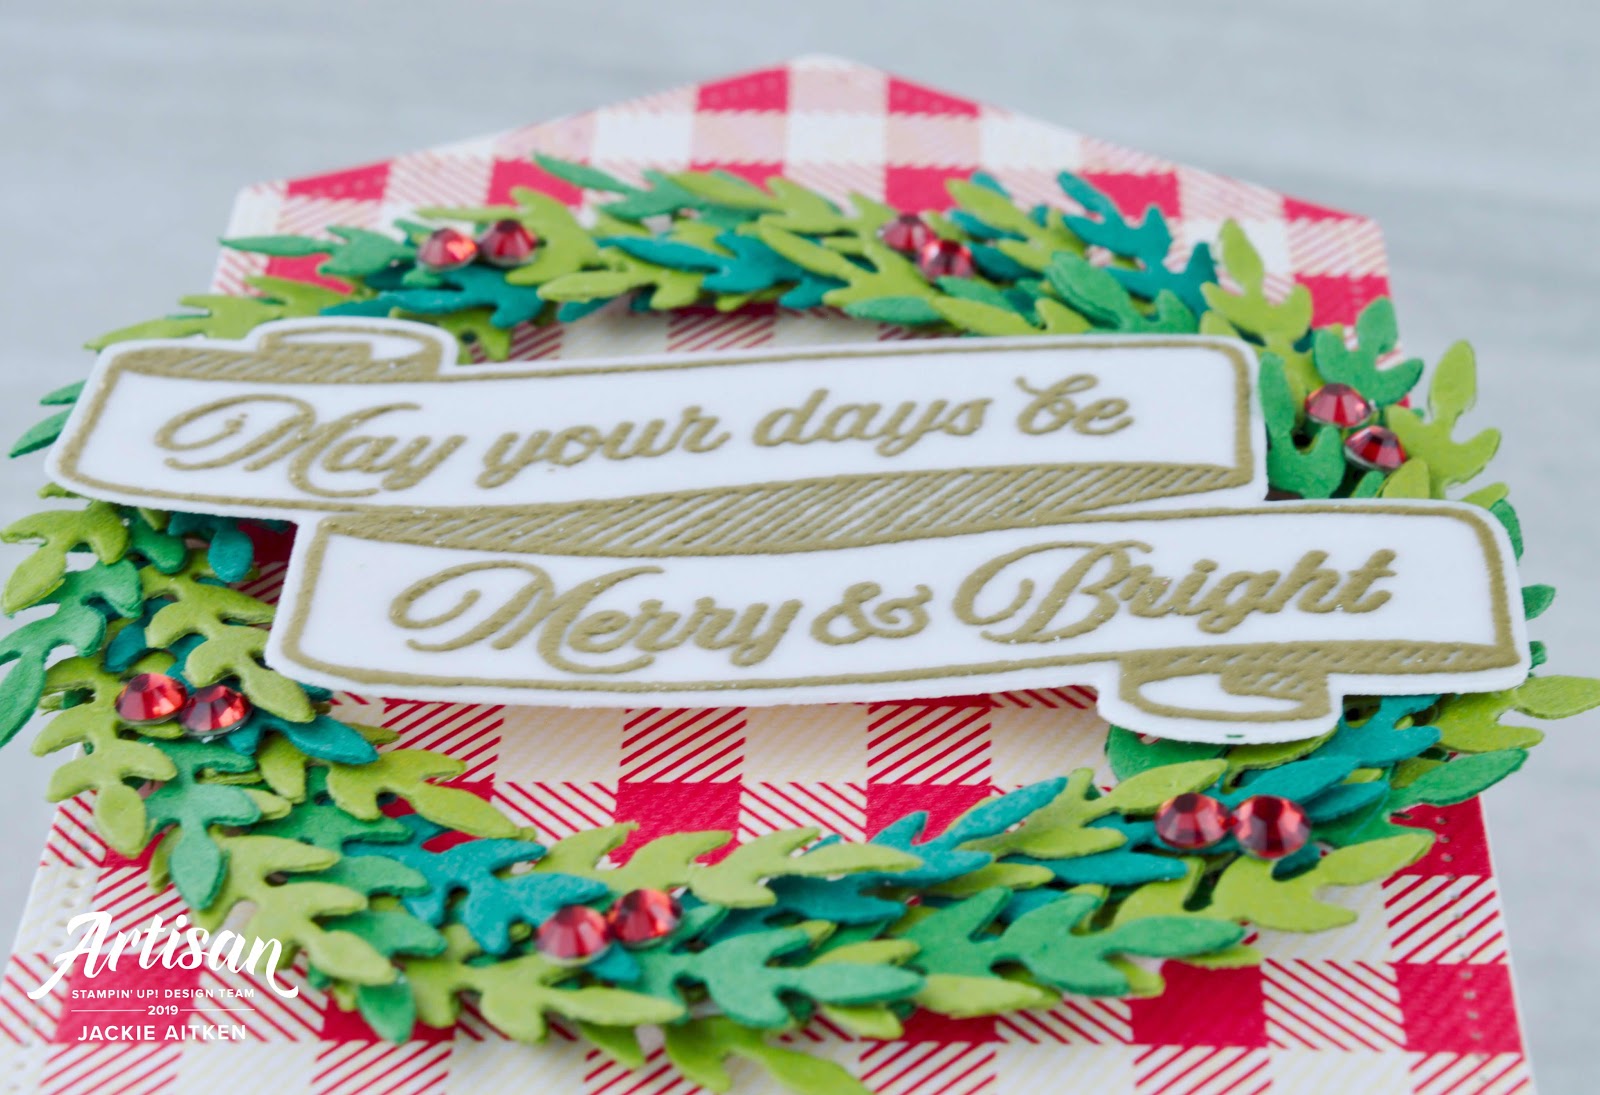
The wreath that adorns the front of the middle gift box has been created with the All Around Wreath Dies. The "banner sentiment" is from the Toile Christmas stamp set and has been gold heat embossed on vellum, die cut and then adhered to a plain whisper white die cut - this ensures the heat embossing is not lost in the busy pattern of the DSP. A few Cherry Cobbler embellishments from the Holiday Rhinestone Basic Jewels were then scattered around the wreath.

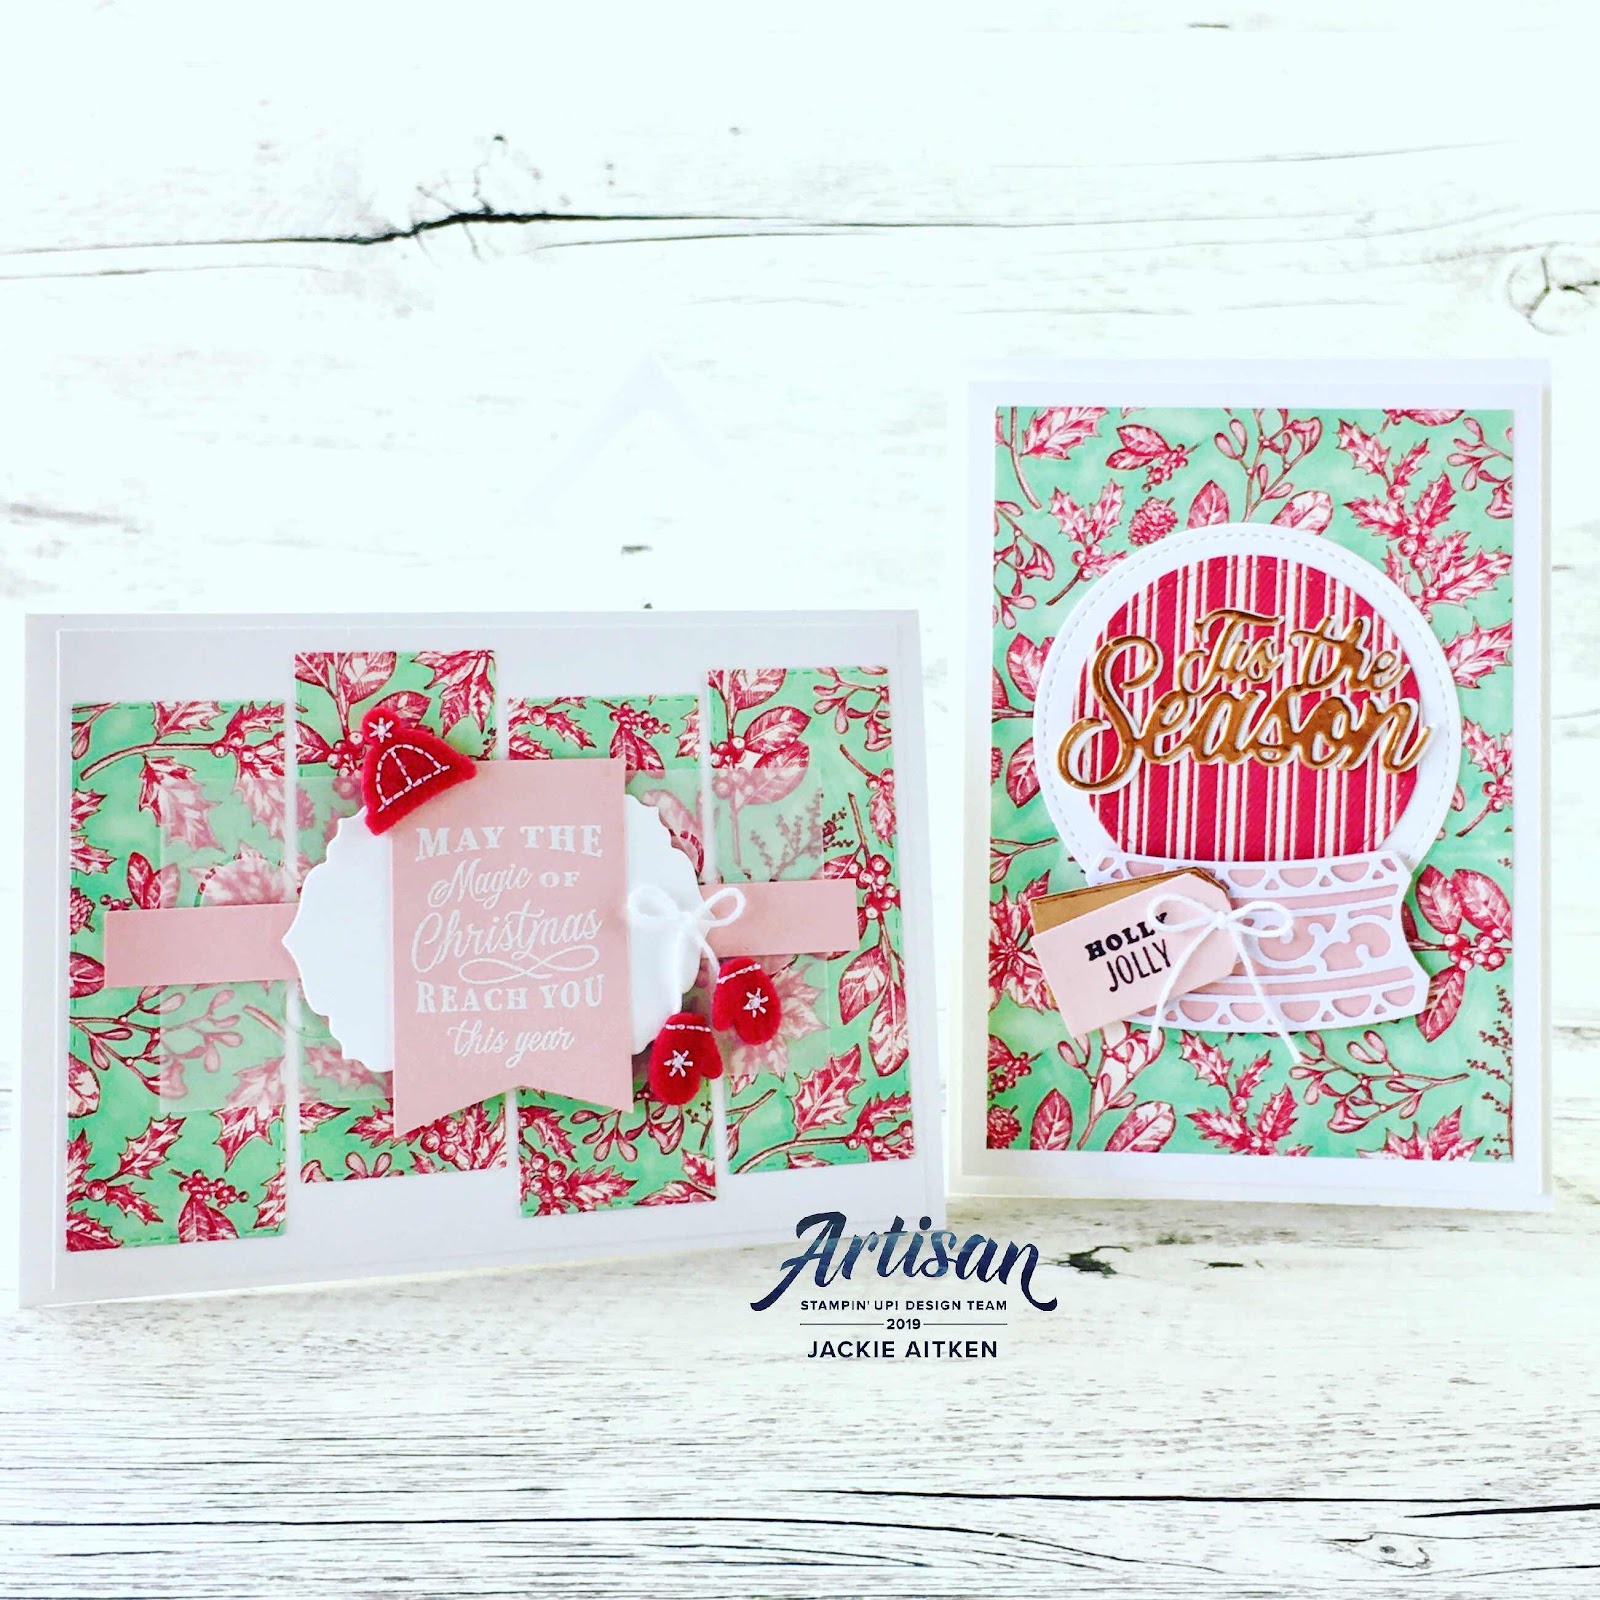
Using the Toile Tidings Gift Wrap, I took the Dark Pool Party Stampin' Blend and coloured in the vanilla background. I then used this sheet to create a couple of cards combing products outside the suite. A few felt embellishments from the Let It Snow Embellishment Kit were used for the card on the left. For the card on the right I have used the Snow Globe Scene dies and the "tis the season" die cut from the Jolly Season Dies.  


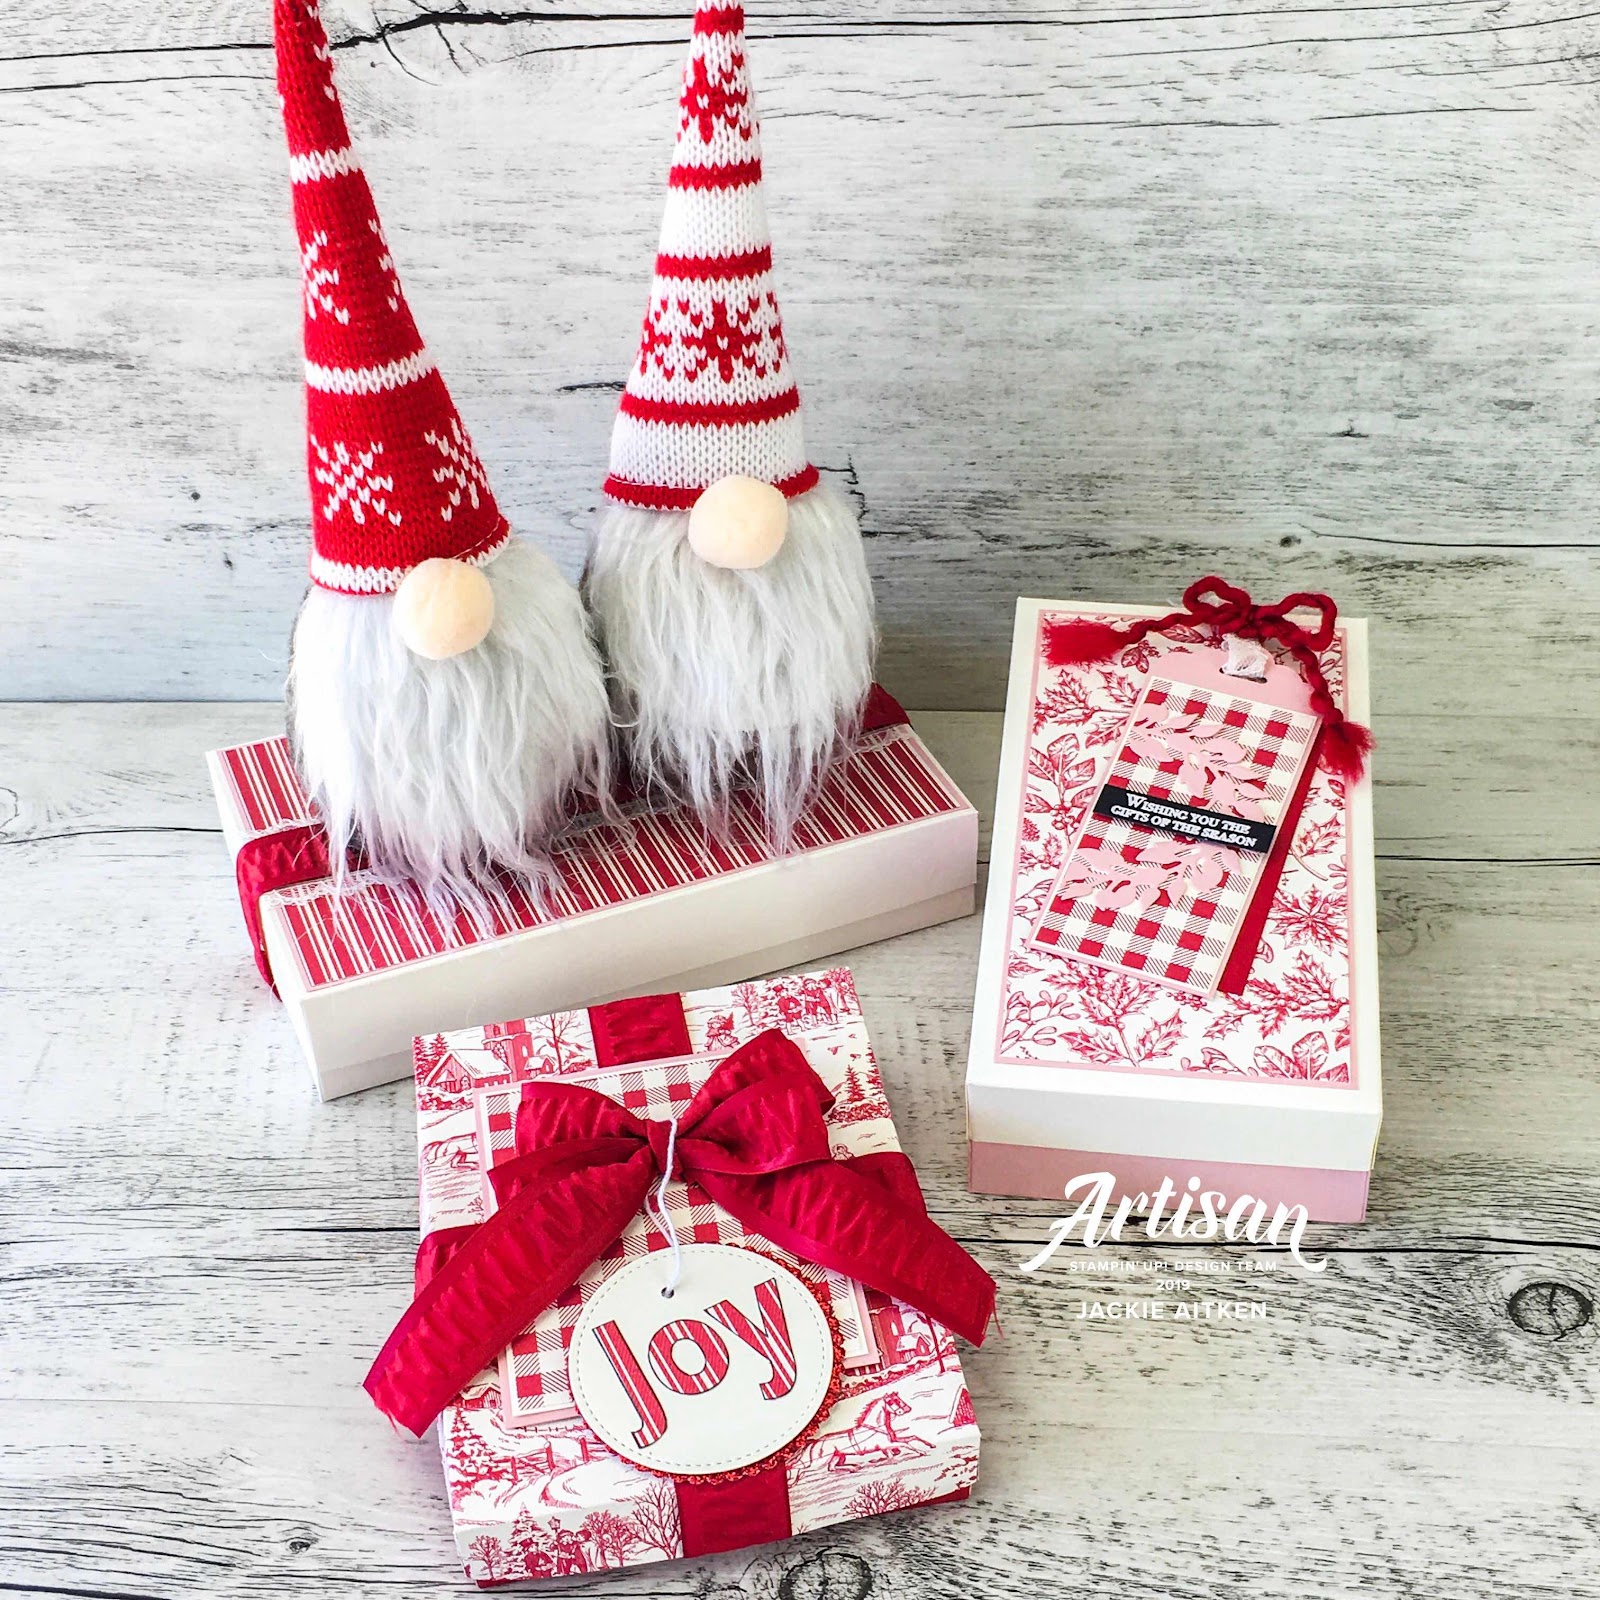
I did manage to use the Gift Wrap for its intended purpose and wrapped a trio of boxes that will sit on our Coffee Station on Christmas Day, along with the rosette banner. I have used wooden letters to match the timber on Coffee Station but these can be substituted with die cut letters or an alphabet stamp.


The last set of projects I wanted to share is a few gift boxes made from A4 sheets of Very Vanilla card stock and then decorated using Blushing Bride, Real Red card and Toile Tidings DSP.  These boxes are perfect for my daughters smaller sized gifts, enabling multiple facial scrubs and lip glosses to fit into each one.

As with the trio of boxes above, I have used the Real Red 1" Ruched Ribbon along with some Real Red 1/8" Curly Ribbon. The "Joy" gift tag attached to the large gift bow was created by stamping the letters j,o and y from the Lined Alphabet stamp set. These were then fussy cut and attached to a Very Vanilla Stitched Circle with Multi Purpose Adhesive.


And that is all from me today. Be sure to keep hopping all the way through the Blog Hop for loads more inspiring projects by the Artisan Design Team using the Toile Tidings Suite.

Up next is my super talented and wonderfully creative friend, Jennifer Picard with her gorgeous projects - enjoy x


Participant List

Jackie Aitken 

You can find some of the products used in today's blog post in the item list below.

Product List
Heat Tool
[129056]
$50.00


Friday, 1 November 2019

Stampin' Up! Artisan Design Team Blog Hop - Christmas Is Here

Good Day Crafty Friends,
Welcome to a special Artisan Design Team Blog Hop where today we are sharing our creativity using the new CHRISTMASTIME IS HERE Suite.  If you’ve hopped on over from Emma, you’ll have seen her stunning colourful creations.  Be sure to Hop all the way through for a heap more inspiring projects using this exclusive, limited time collection of coordinating products.

Image may contain: food

Christmas Is Coming Early This Year with Festive Floral's & A Gorgeous Bracelet!!!!

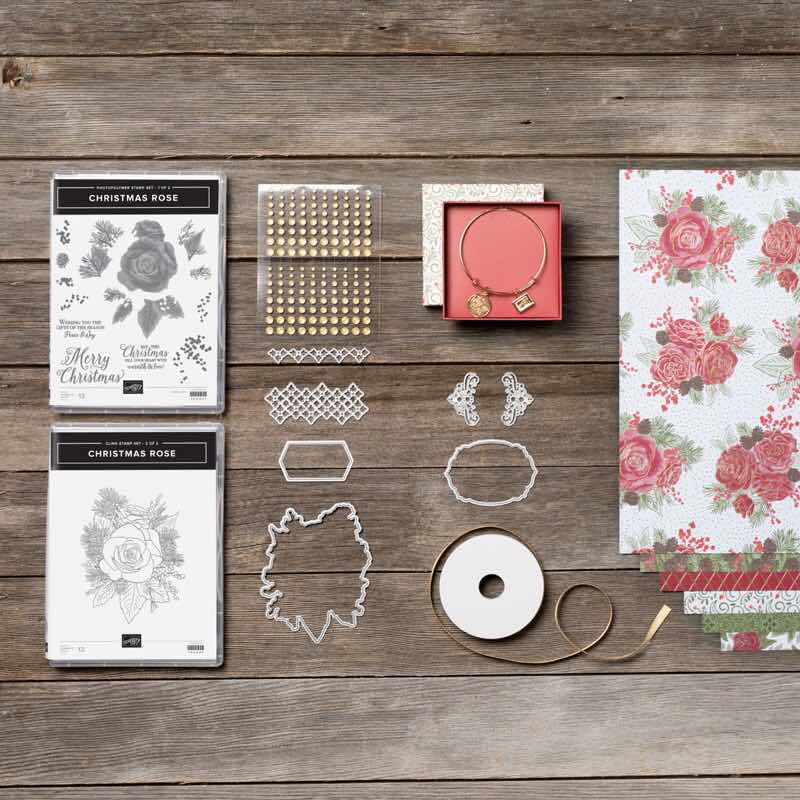
We hope you’re ready to make this holiday season magical, because the Christmastime Is Here Suite is, well . . . here! This exclusive, limited-time collection of festive, floral coordinating products has everything you and you need to share love, joy, and creativity this holiday season. And yes that is an uber cute limited edition Stampin' Up! Bracelet!!!

The Floral inspired theme is perfect for all markets, with no specific emphasis on "seasons" it is ideal for creating Christmas projects for friends and family no matter where in the world they live.

SO WHATS INCLUDED?
*Christmas Rose Stamp Sets - The large Outline stamp is a Cling stamp with the detailed images being photopolymer. There is also the coordinating:
*Roses Dies
*Gold ¼” Shimmer Ribbon
*Gold Glitter Enamel Dots
*Christmastime is Here Designer Series Paper
*Charming Rose Bracelet
Colours are: Cherry Cobbler, Early Espresso, Mossy Meadow, Poppy Parade, Gold Foil.

HOW MUCH  FOR ALL THIS GORGEOUSNESS YOU ASK?
Entire Suite - AUD$195.25
Stamp & Die Bundle - AUD$106
DSP - AUD$25
Ribbon - AUD$12.25
Embellishments - AUD$14
Bracelet. AUD$38
For more information please refer to the Demonstrator Site or contact your local Stampin' Up! Demonstrator - BE QUICK as stock is limited.

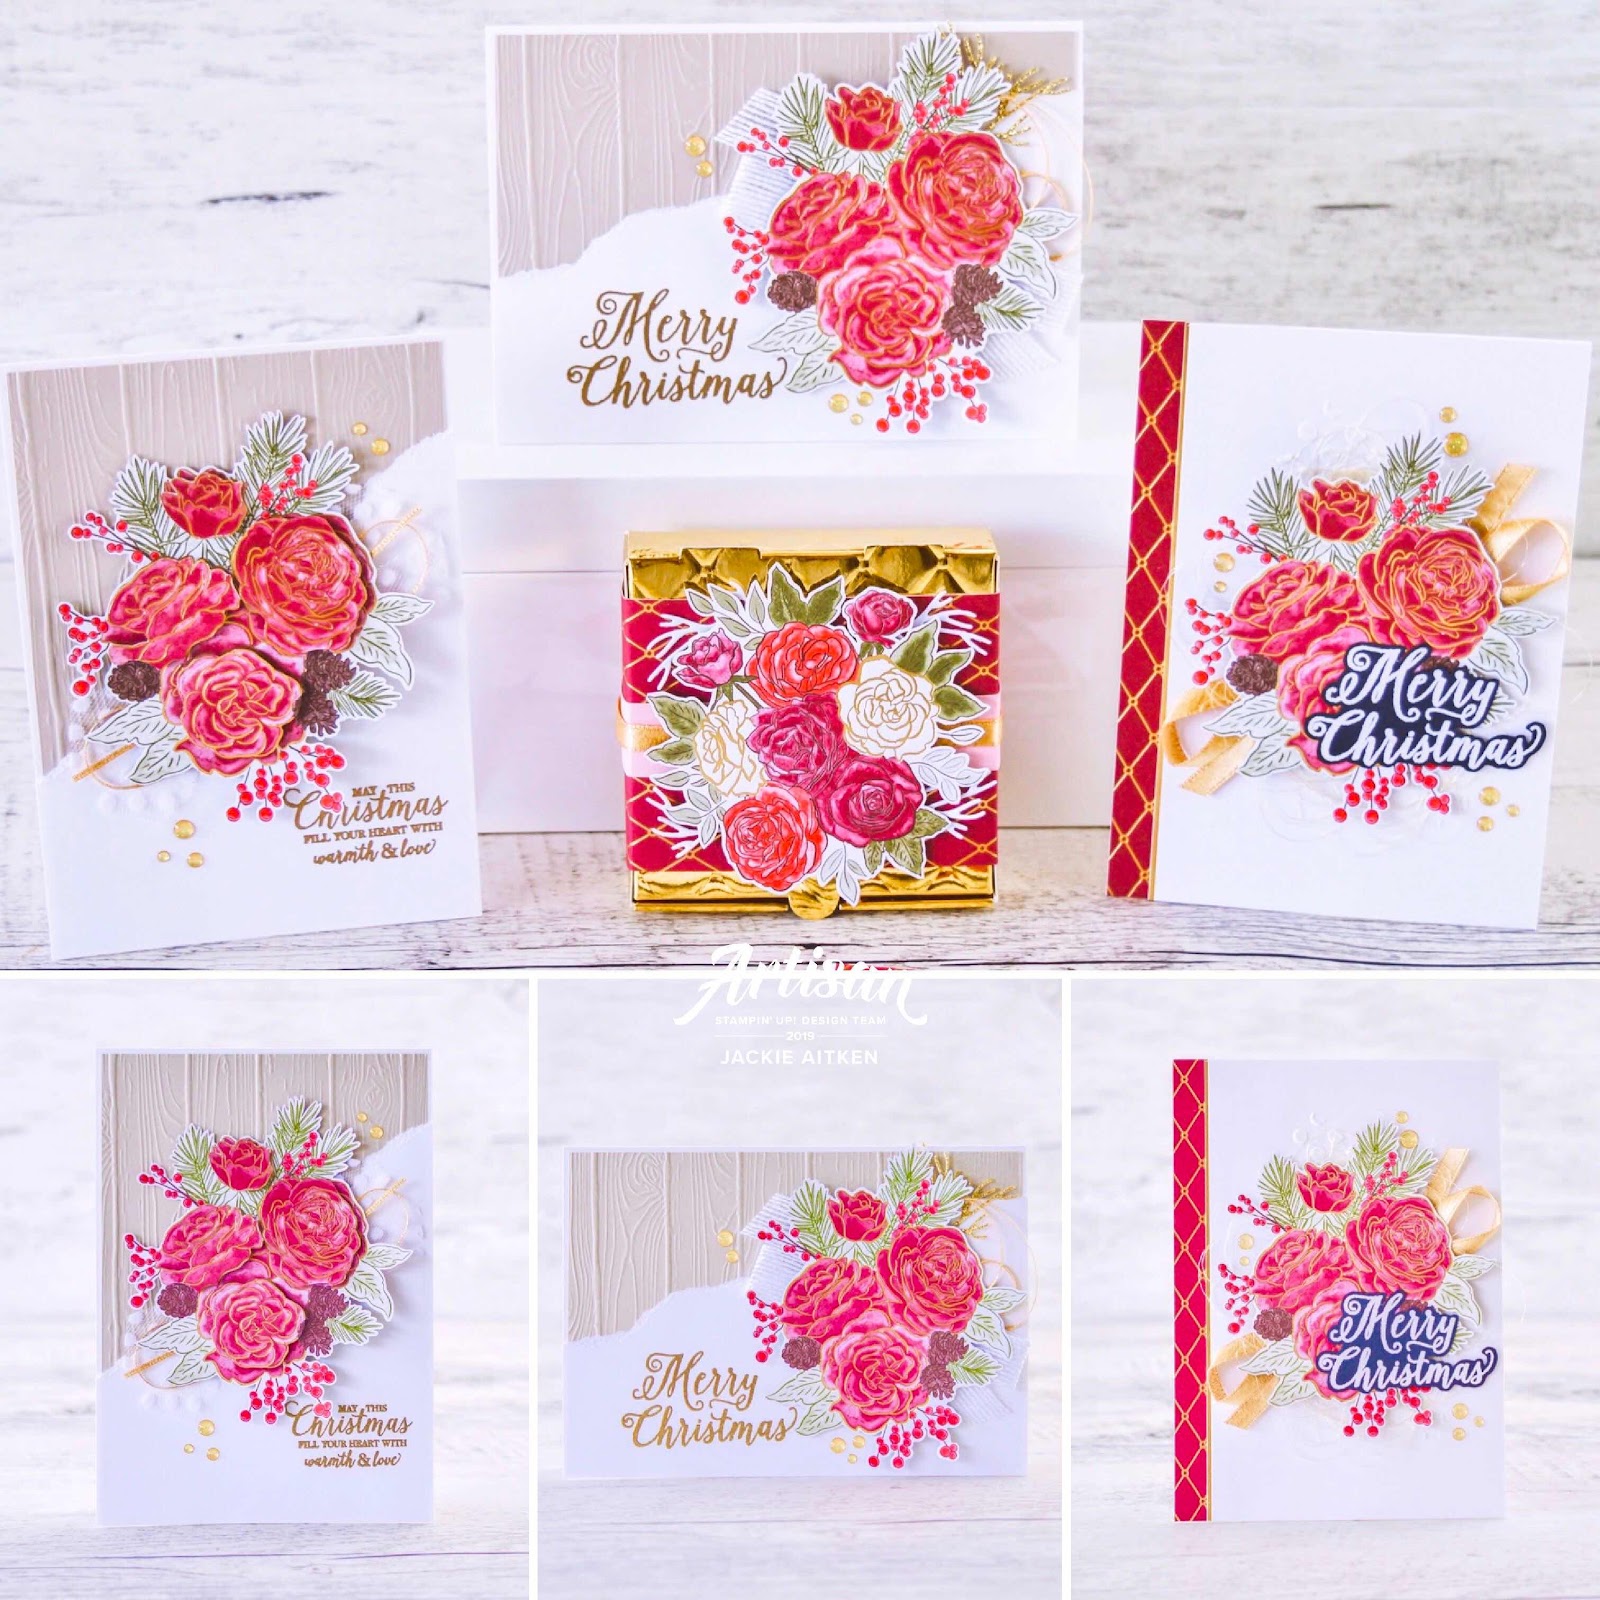
I have had so much fun with this gorgeous suite, I honestly cannot stop creating projects!! Here are a few of my creations from the Artisan Design Team Blog Hop in October.


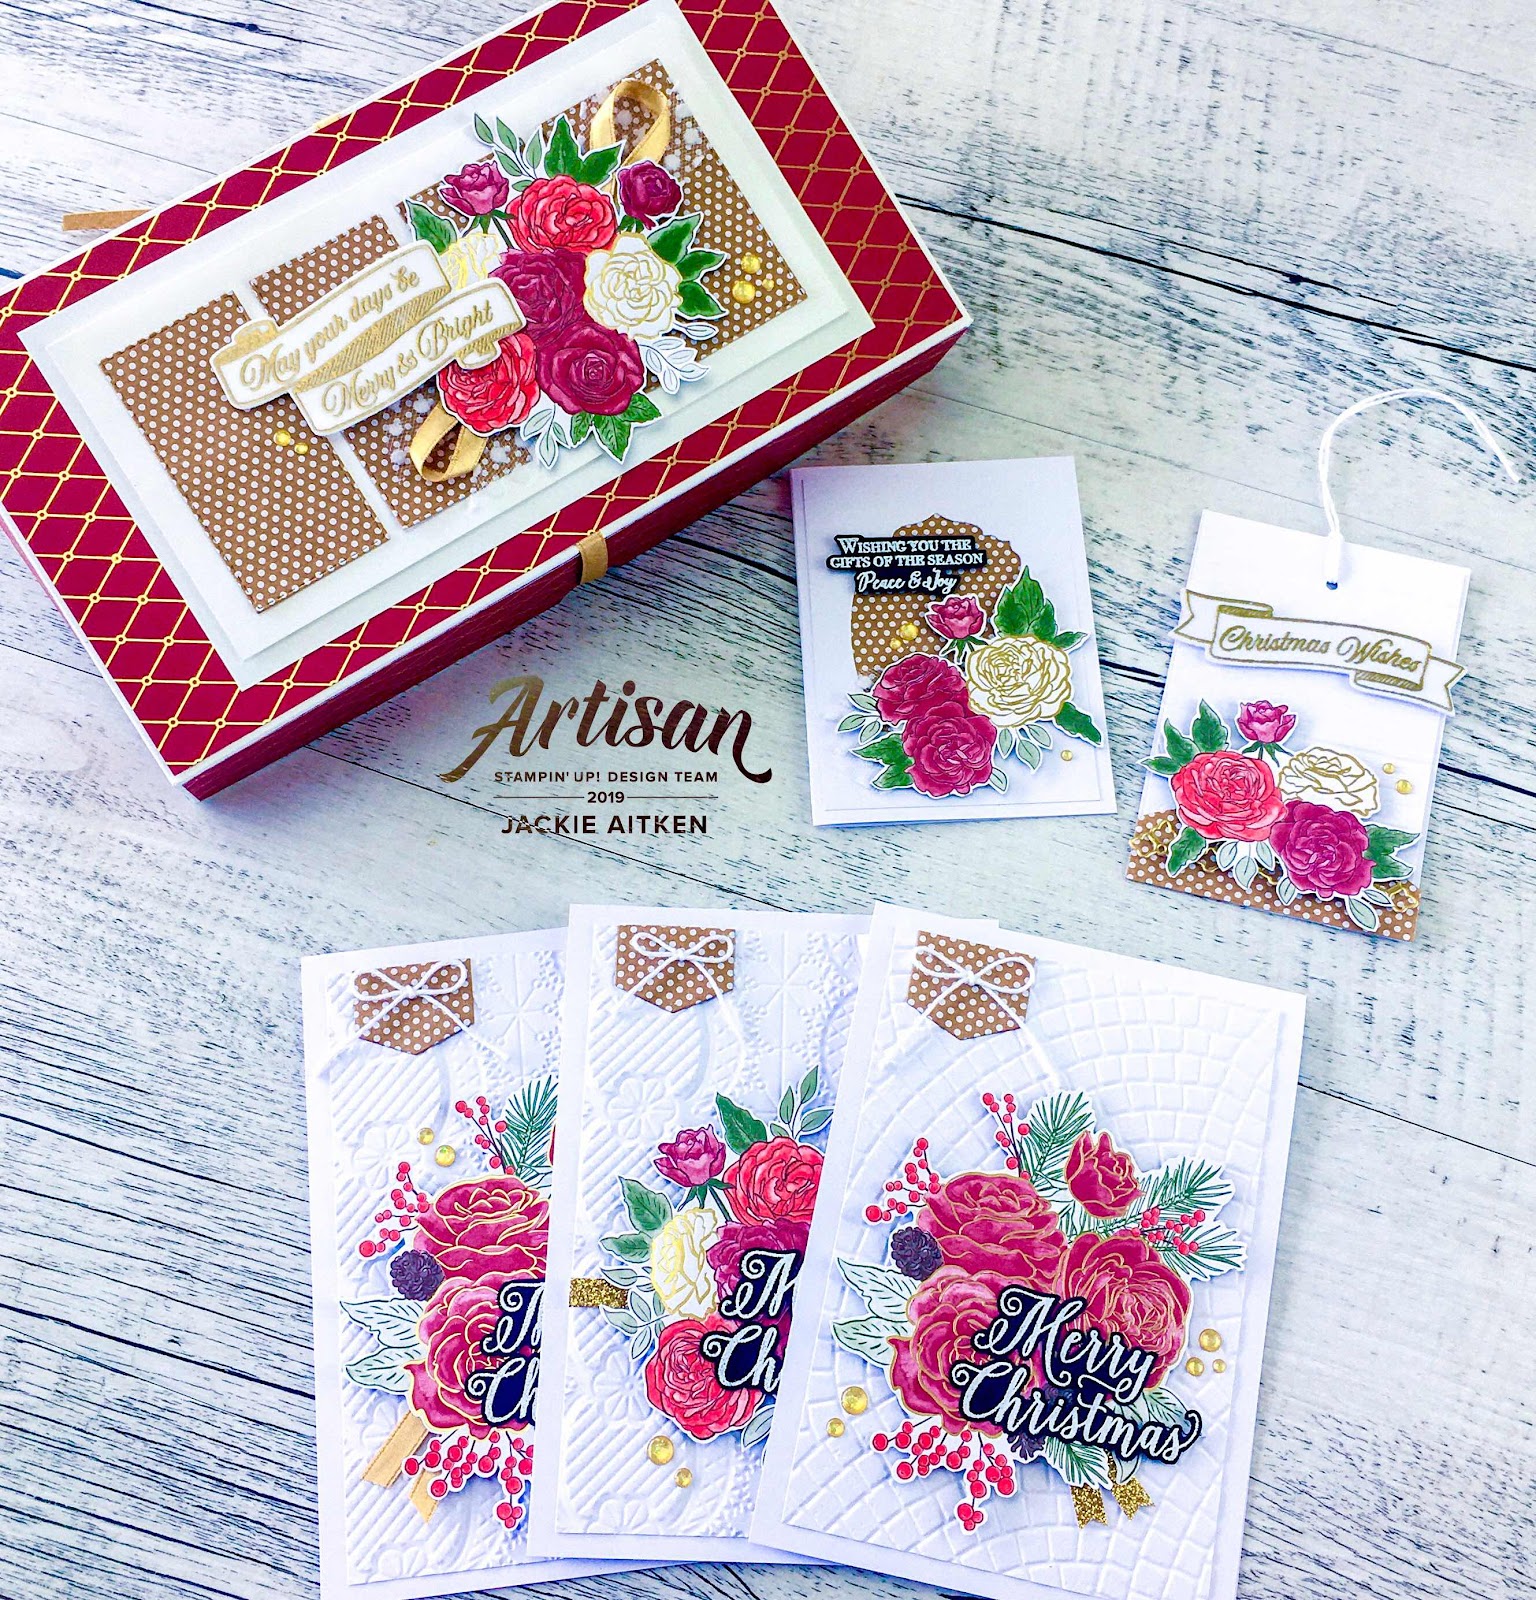
I shared three full sized cards and a decorated Gold Foil Mini Pizza Box with four note cards inside. The Gold Mini Pizza Boxes (from the 2019 Holiday Catalogue) work perfectly with this suite. The lid of the box was embossed with the Tufted Embossing Folder before decorated with the belly band elements.

There are so MANY floral bouquet images in the pack of Designer Series Paper, I spent a couple of hours fussy cutting those that could not be cut with the coordinating dies. This made for quick and easy creations with no inks or colouring required, just a bit of heat embossing for the sentiments.


And now for some new projects made especially for this Hop. First up is a set of four cards.


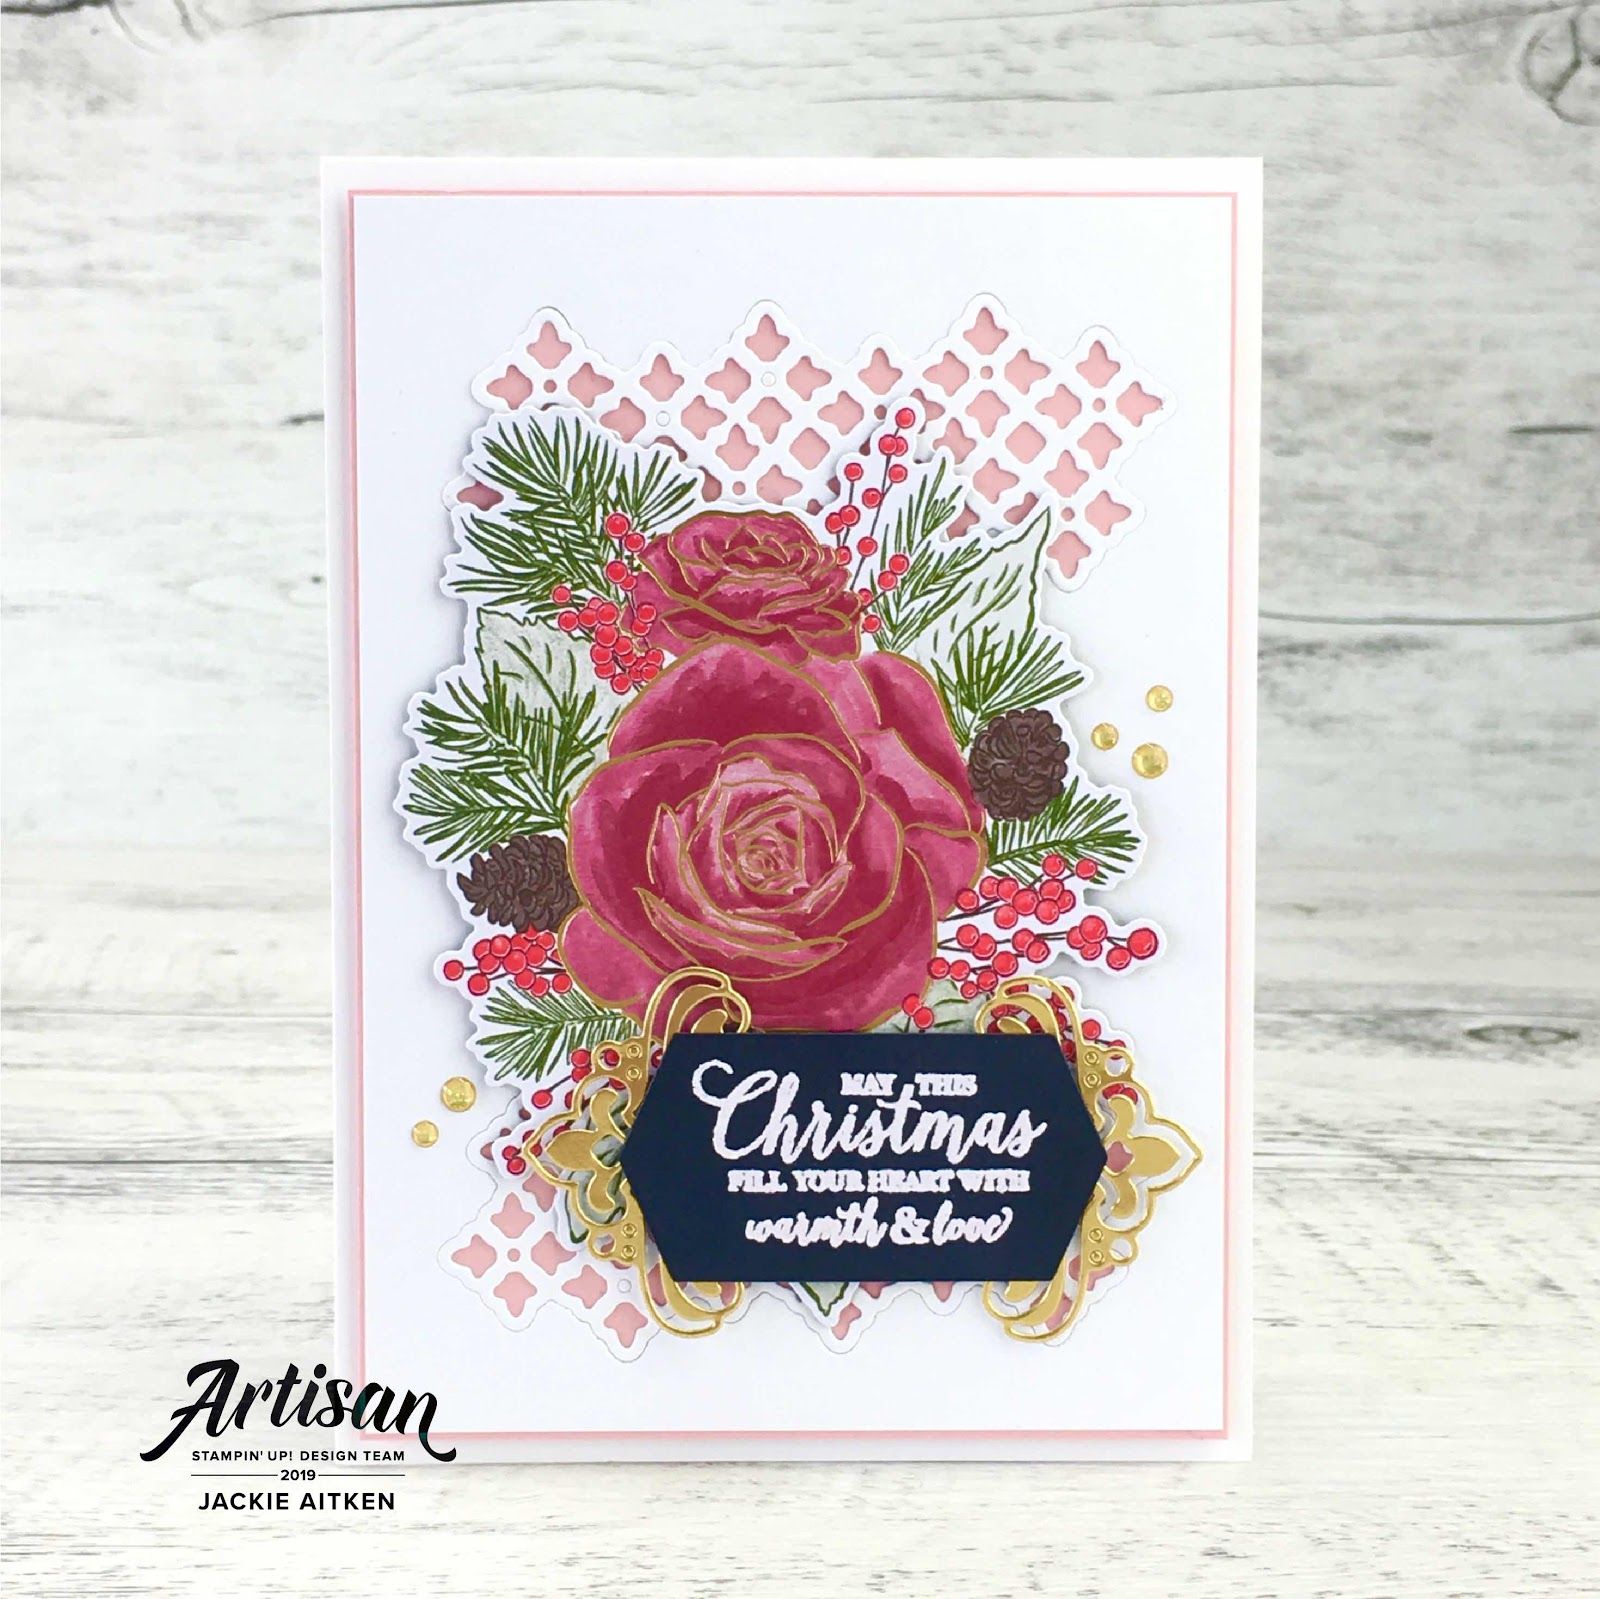
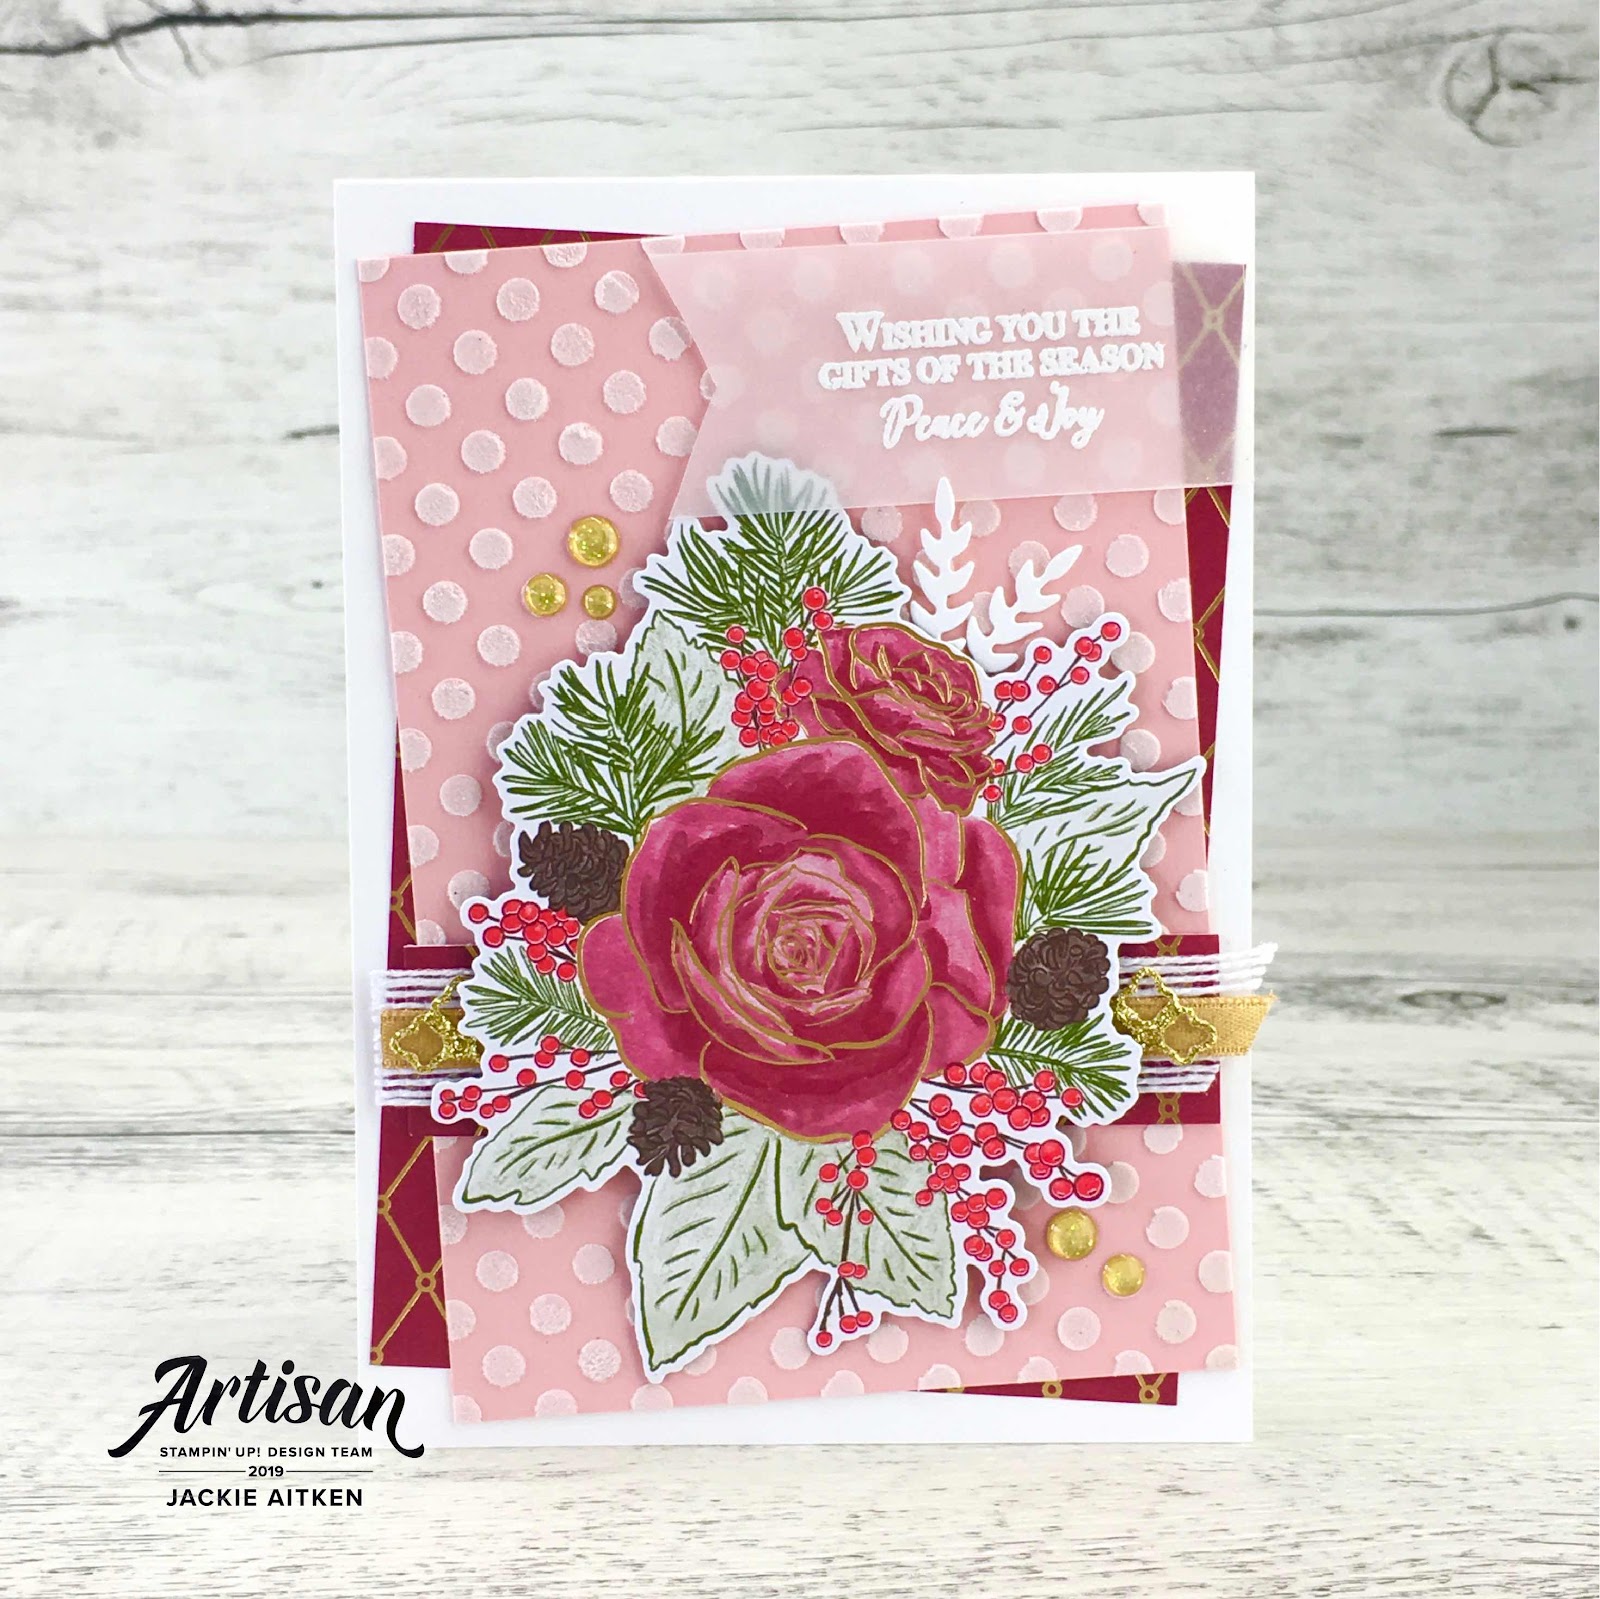
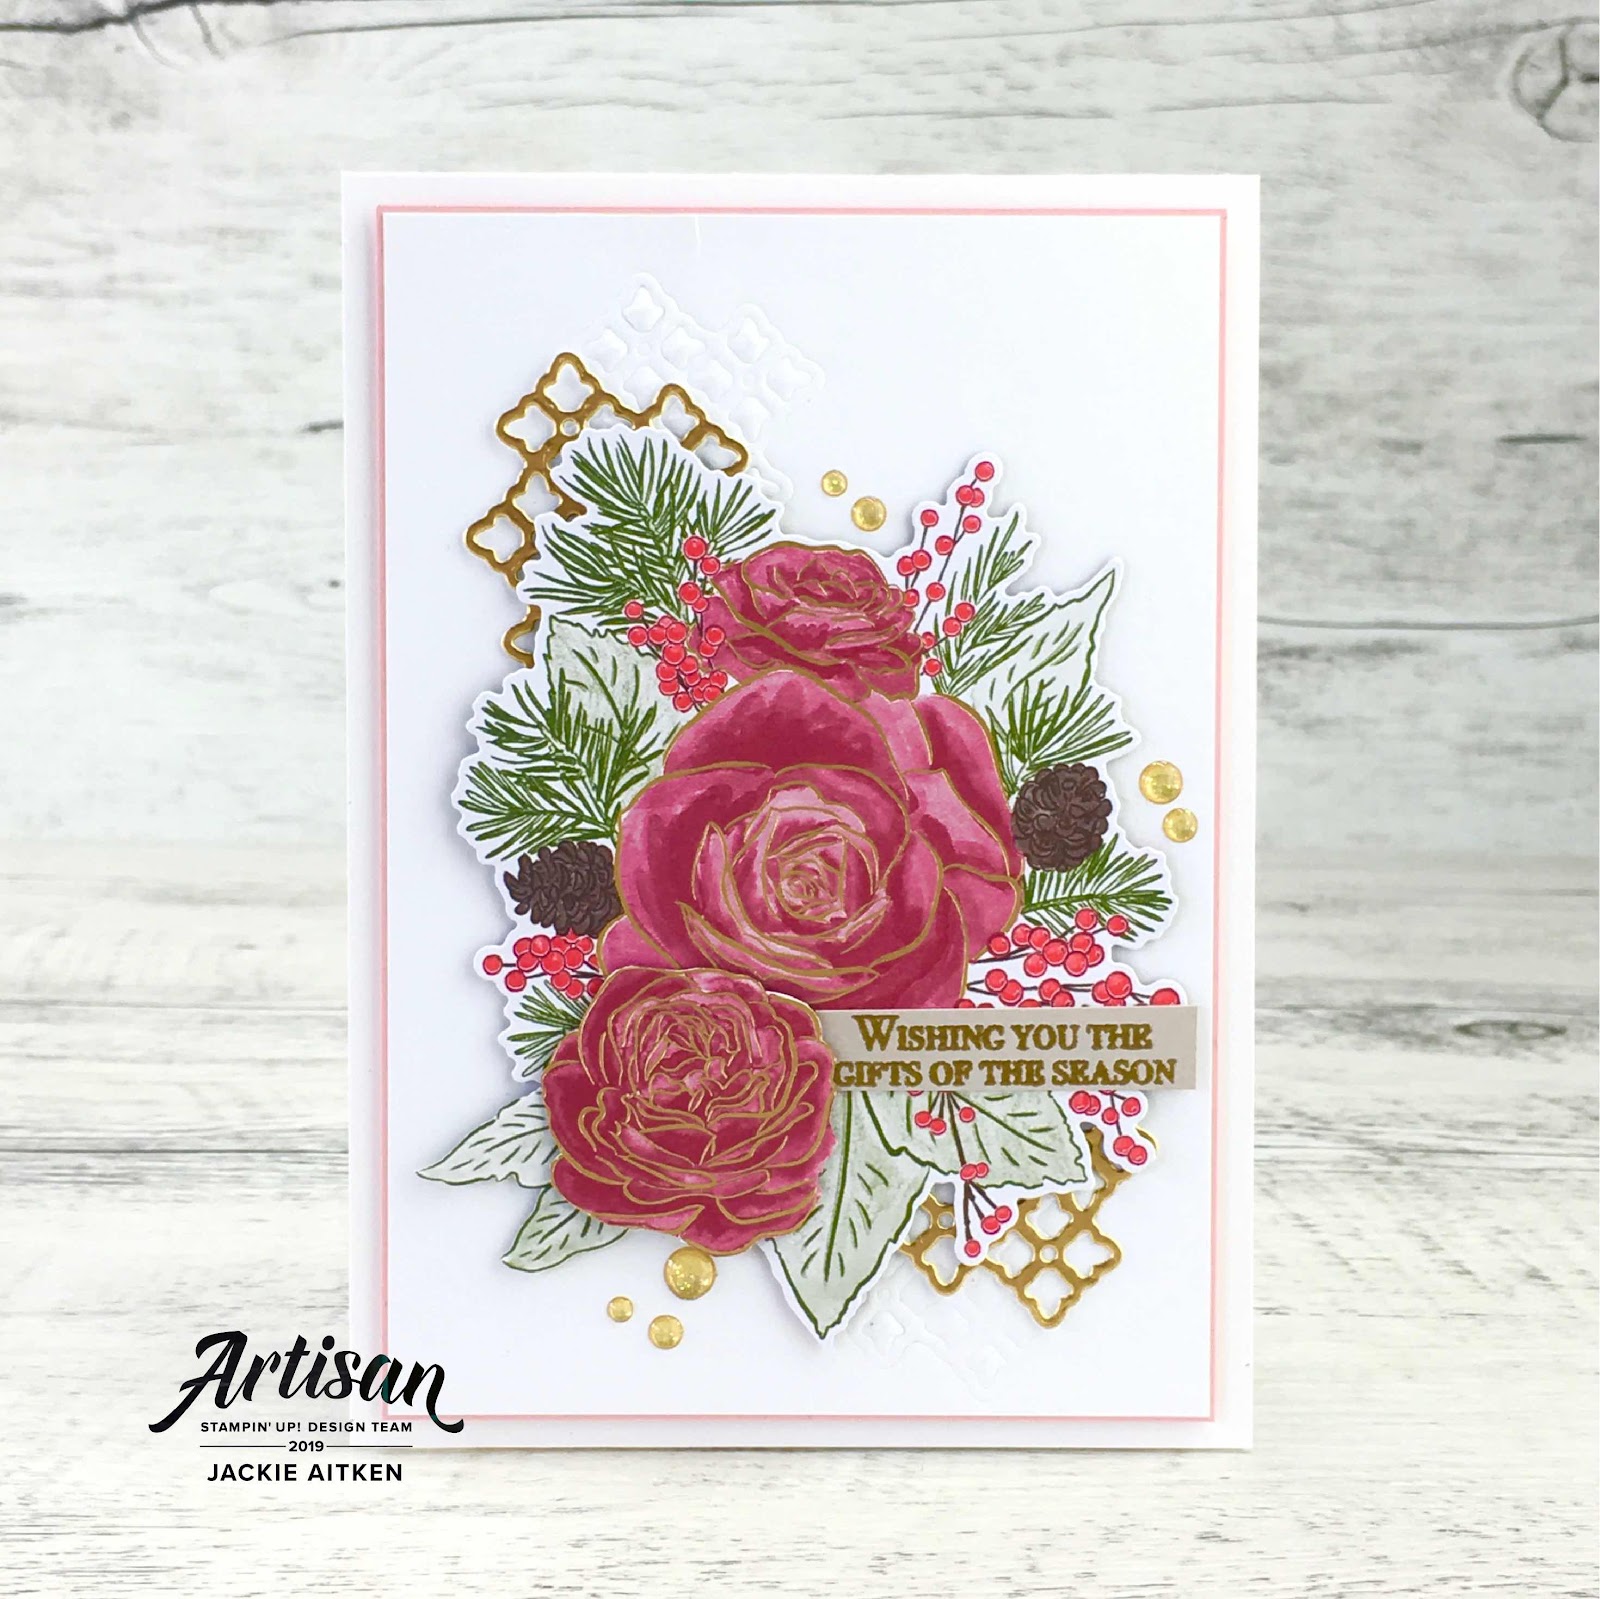
For this set of cards, I wanted to break the bold primary colours with some softness by adding layers of Blushing Bride card. To add texture to the card fronts I have used embossing folders, embossing paste and the detailed trellis die. 


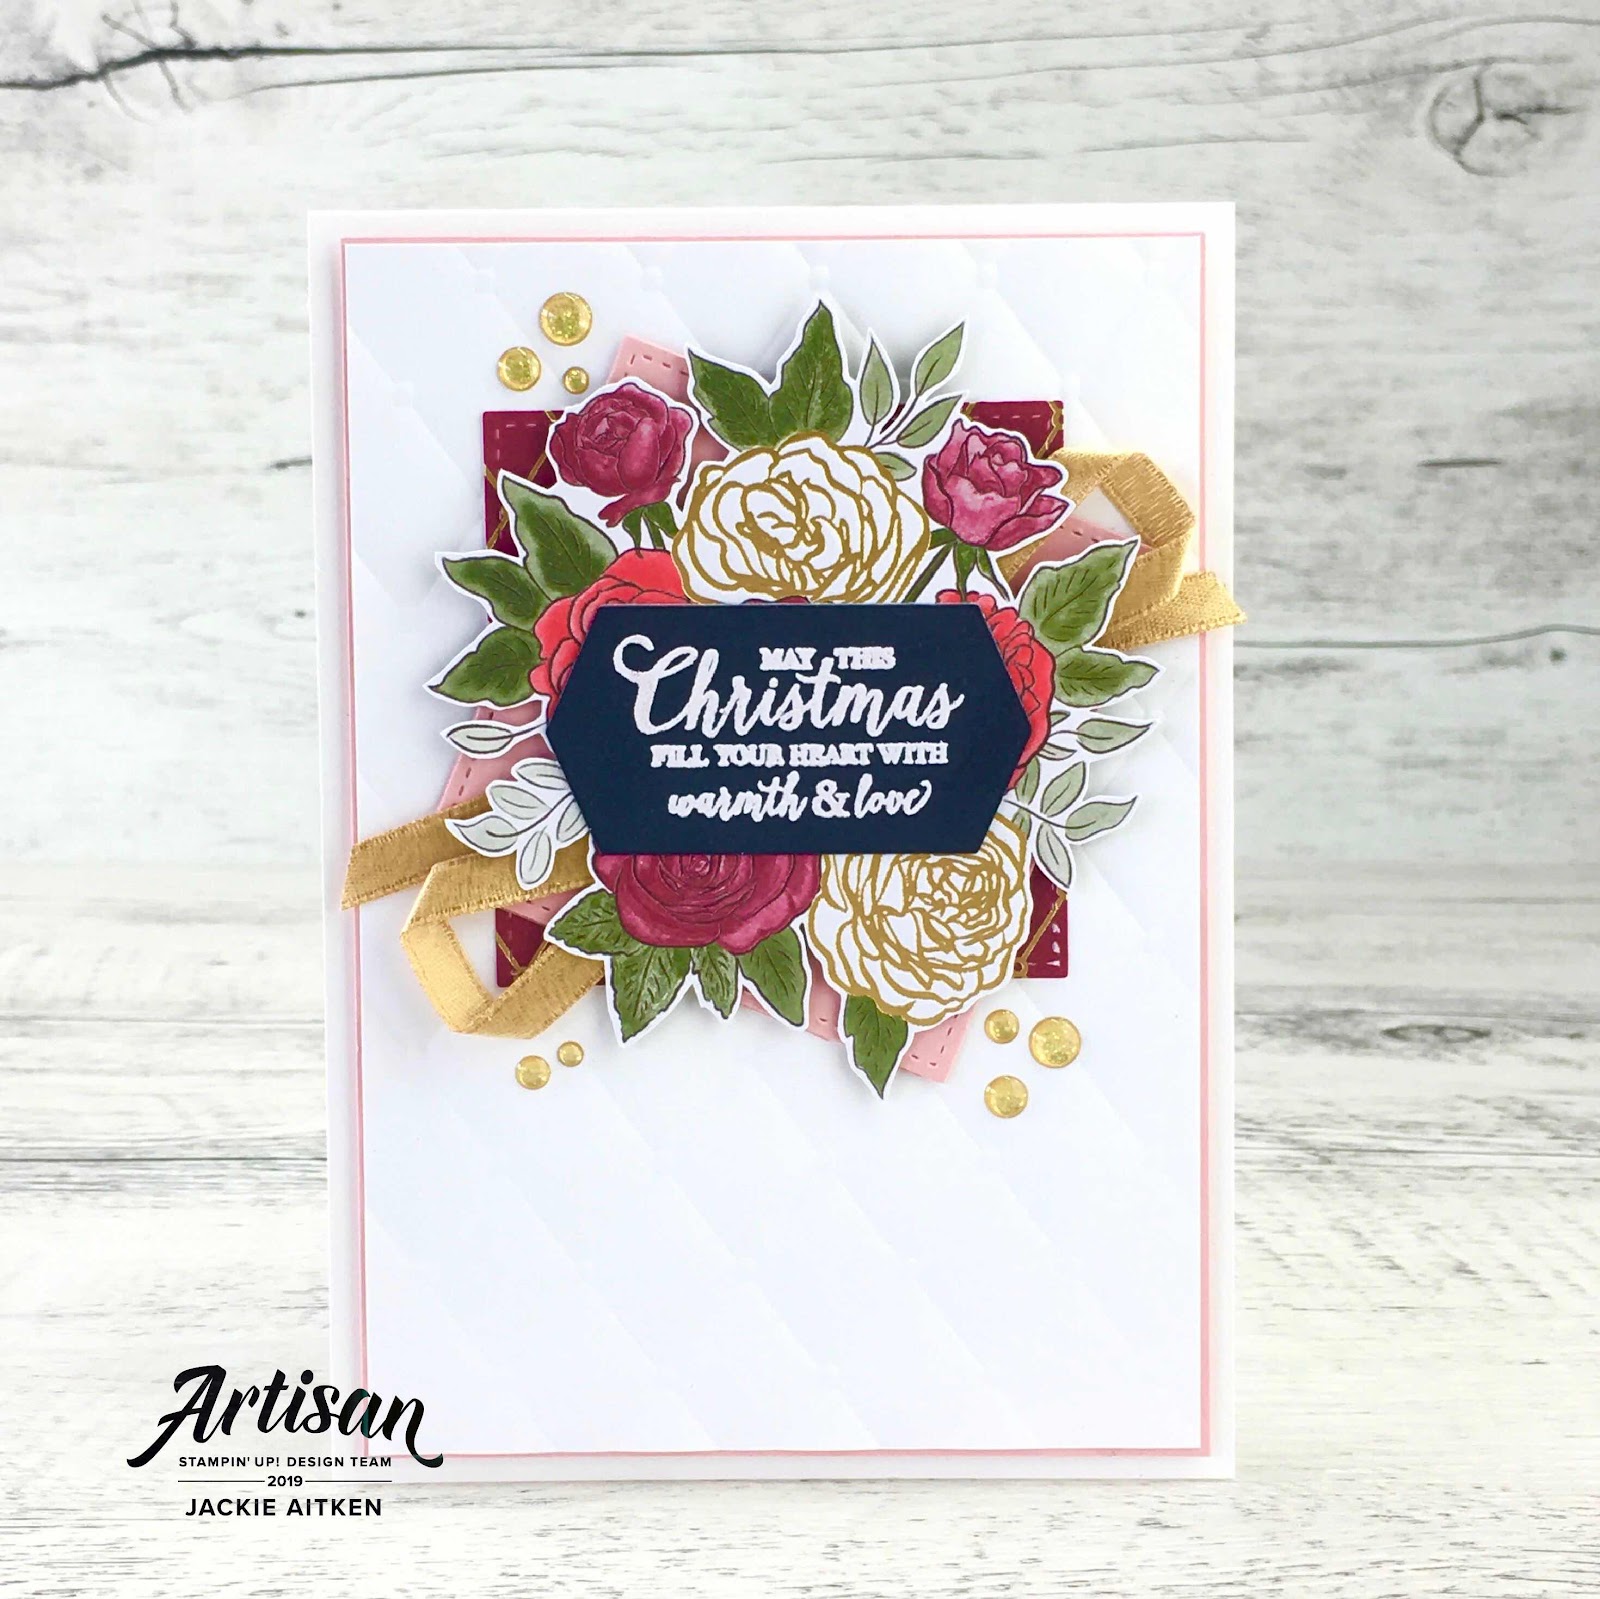
Starting with a Whisper White card base, a layer of DSP was adhered on an angle, with the embossed Blushing Bride panel layered on an opposing angle over the top. Onto Blushing Bride card, I spread White Embossing Paste through the "Dotty" stencil from the Basic Pattern Masks. Once dry it was cut down to fit the angle I wanted. Before adhering the fussy cut floral centerpiece, whisper white foliage die cuts, a strip of DSP, White Flax Ribbon, Gold Ribbon and Gold Glimmer Die Cuts were added. To finish the card, a white heat embossed vellum sentiment has been added along with a few Gold Glitter Enamel Dots.


To create texture for this Whisper White card front, I have "embossed" using the "trellis" detailed die with embossing mats. Using Gold Foil card, I die cut using the same die and layered these over the embossing - under the floral cluster.


To create the front of this card, I took a piece of whisper white, cut it down to slightly smaller than the Blushing Bride piece that would sit behind it and then die cut at the top and bottom. Adhere the white front to the Blushing Bride layer and then adhere the two die cut pieces minus all the "bits". 

Next, I adhered one of the fussy cut images from the DSP and then over that a white heat embossed sentiment. The sentiment has been die cut with one of the "shaped dies" and Gold Foil detailed die cuts added behind.

The last card in this collection uses one of the smaller fussy cut floral images. Behind the floral bouquet is two die cut squares made using the Stitched Shapes Framelits. One is Blushing Bride card, the other is DSP. Gold Ribbon in varying widths has been added behind the flowers, with Gold Glitter Enamel Dots used to finish the card.


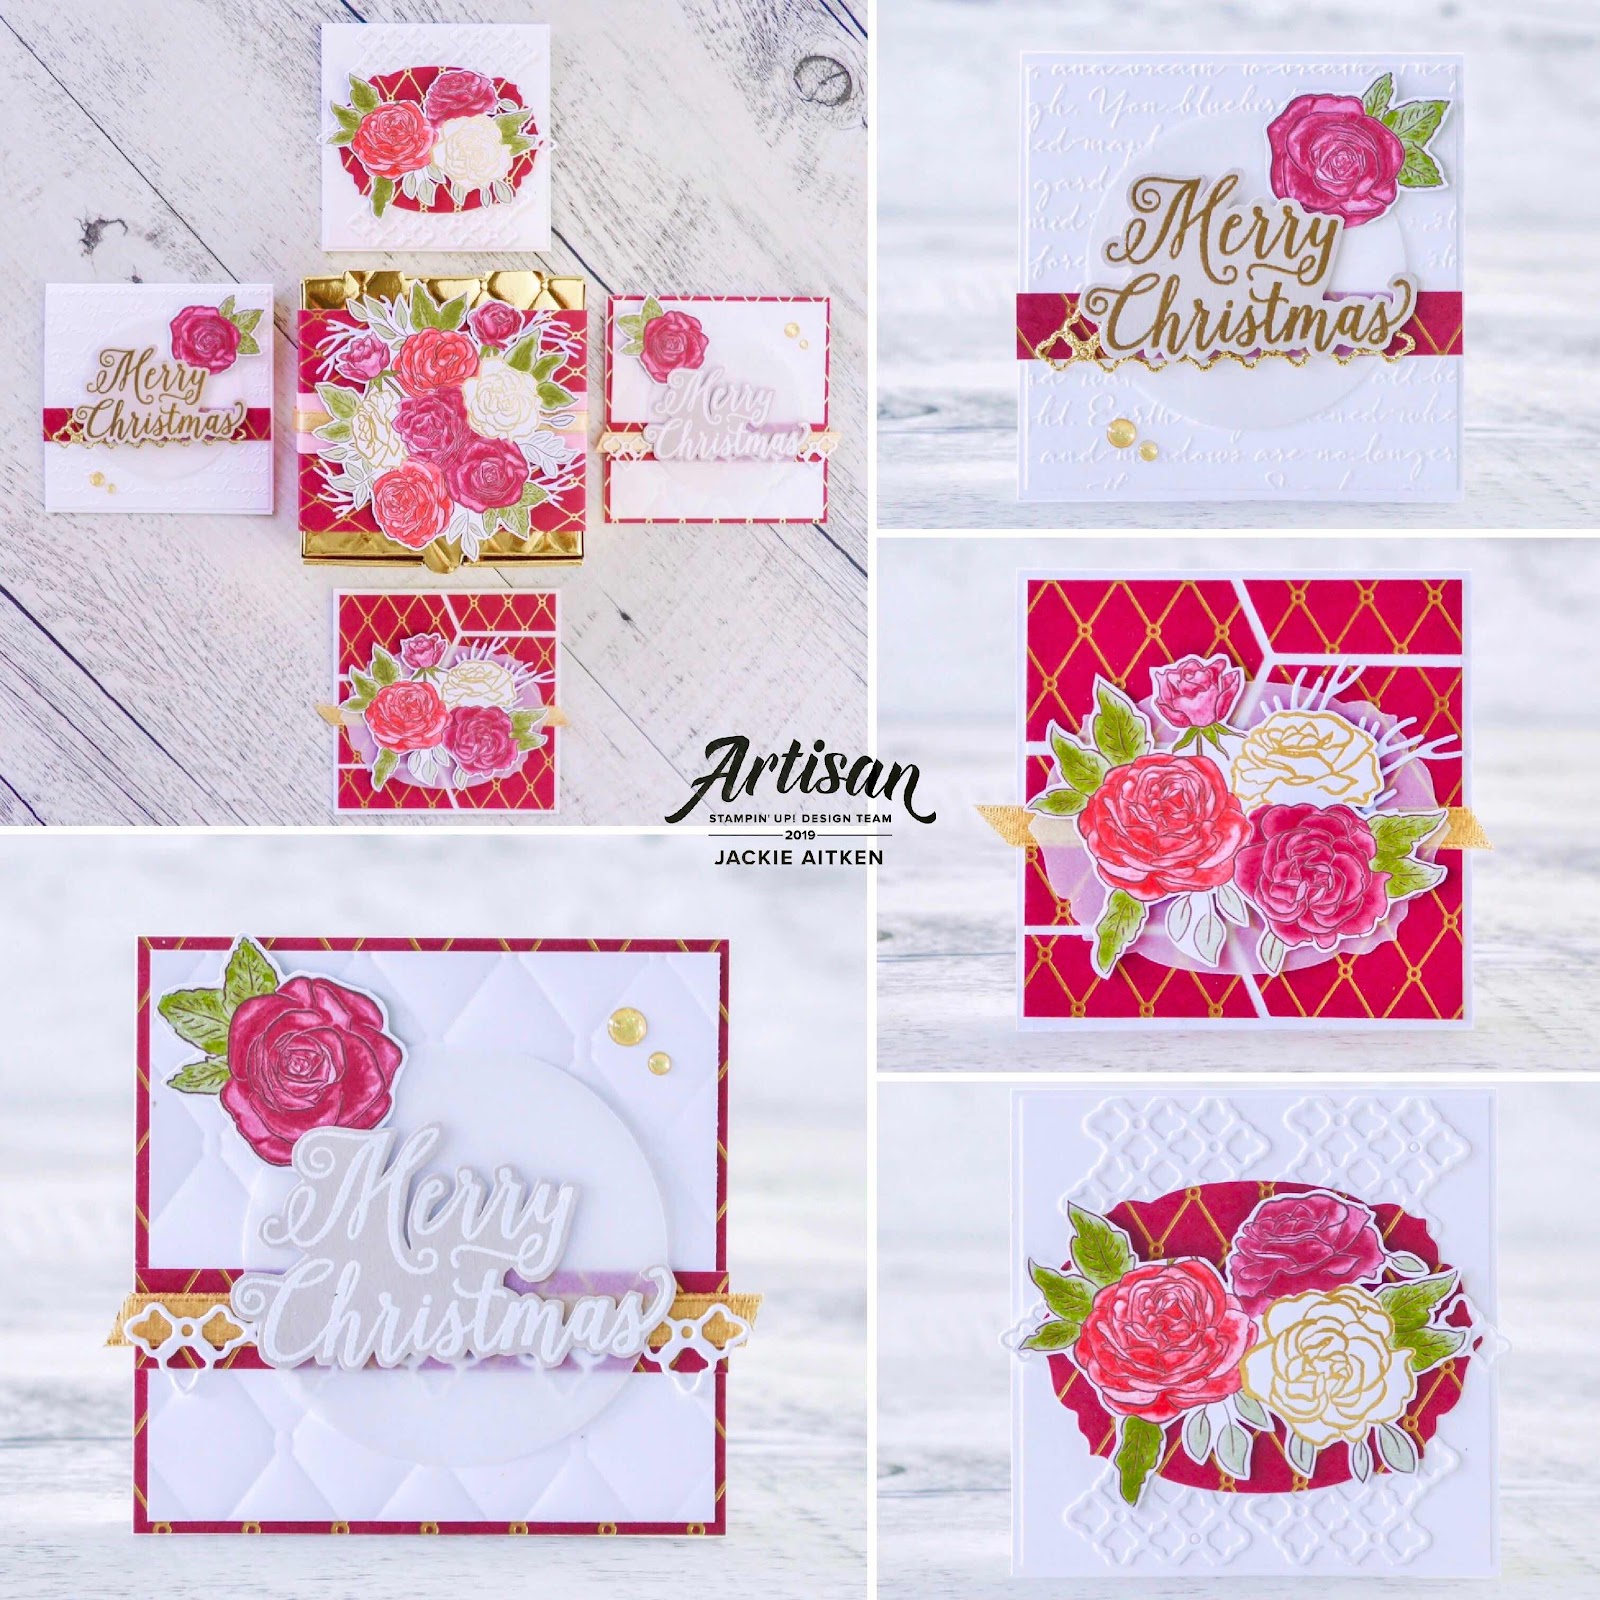
I knew this beautiful suite would be perfect for a gift box fill of cards and gift tags. These make such great gifts for family and friends, after all the cards and tags have been used, they have a lovely keepsake box.

The Box contains six full sized cards - two each of three designs. There is also four mini cards and four gift tags. A few Kraft Pillow boxes were deconstructed, cut up and used to decorate the box and contents along with the fussy cut Christmastime Is Here DSP images.


I have used the Mosaic & Lace Embossing Folders to provide texture and interest to the Whisper White card fronts. The mini cards have a whisper white card front that has been die cut using the "frame" shape from the Roses Dies then backed with some of the cut up Kraft Pillow Boxes. Did you notice that the bottom of the gift tags are the rounded edges of the Pillow Boxes? Just remove the score line and cover the thumb hole with a fussy cut image. The banner sentiments are from a different stamp set called Toile Christmas which can be found in the Holiday Catalogue.

DON'T MISS OUT! ADD THIS STUNNING SUITE TO YOUR NEXT ORDER & ROCK THAT STUNNING BRACELET AS YOU HAND OUT YOUR BEAUTIFUL HANDMADE CREATIONS!!!!

That is all from me today. Be sure to follow the Blog Hop all the way through for loads of inspirational creations using products from the amazingly gorgeous Christmastime Is Here Suite. Up next is my talented friend, Jennifer Picard with her awesome project - Enjoy xx


Artisan Design Team Blog Hop List

Jackie Aitken - You are here

You can find all the products used to make the projects shared in today's Blog Post in the list below. Click on the image and you will be taken to my Online Store - Happy Shopping :)

Product List
Roses Dies
[152144]
$52.00
Heat Tool
[129056]
$50.00

Thanks so much for stopping by and hopping with us. The Artisan Design Team appreciate the time you have invested to visit our blogs. You can see more of the ADT creations on the Stampin' Up! Facebook Page in the "notes" section. Until next time, stay awesome and stay crafty