SOCIAL MEDIA

Wednesday 27 November 2019

Be Inspired Blog Hop - Feeling Festive

Hello Hello Crafty Friends


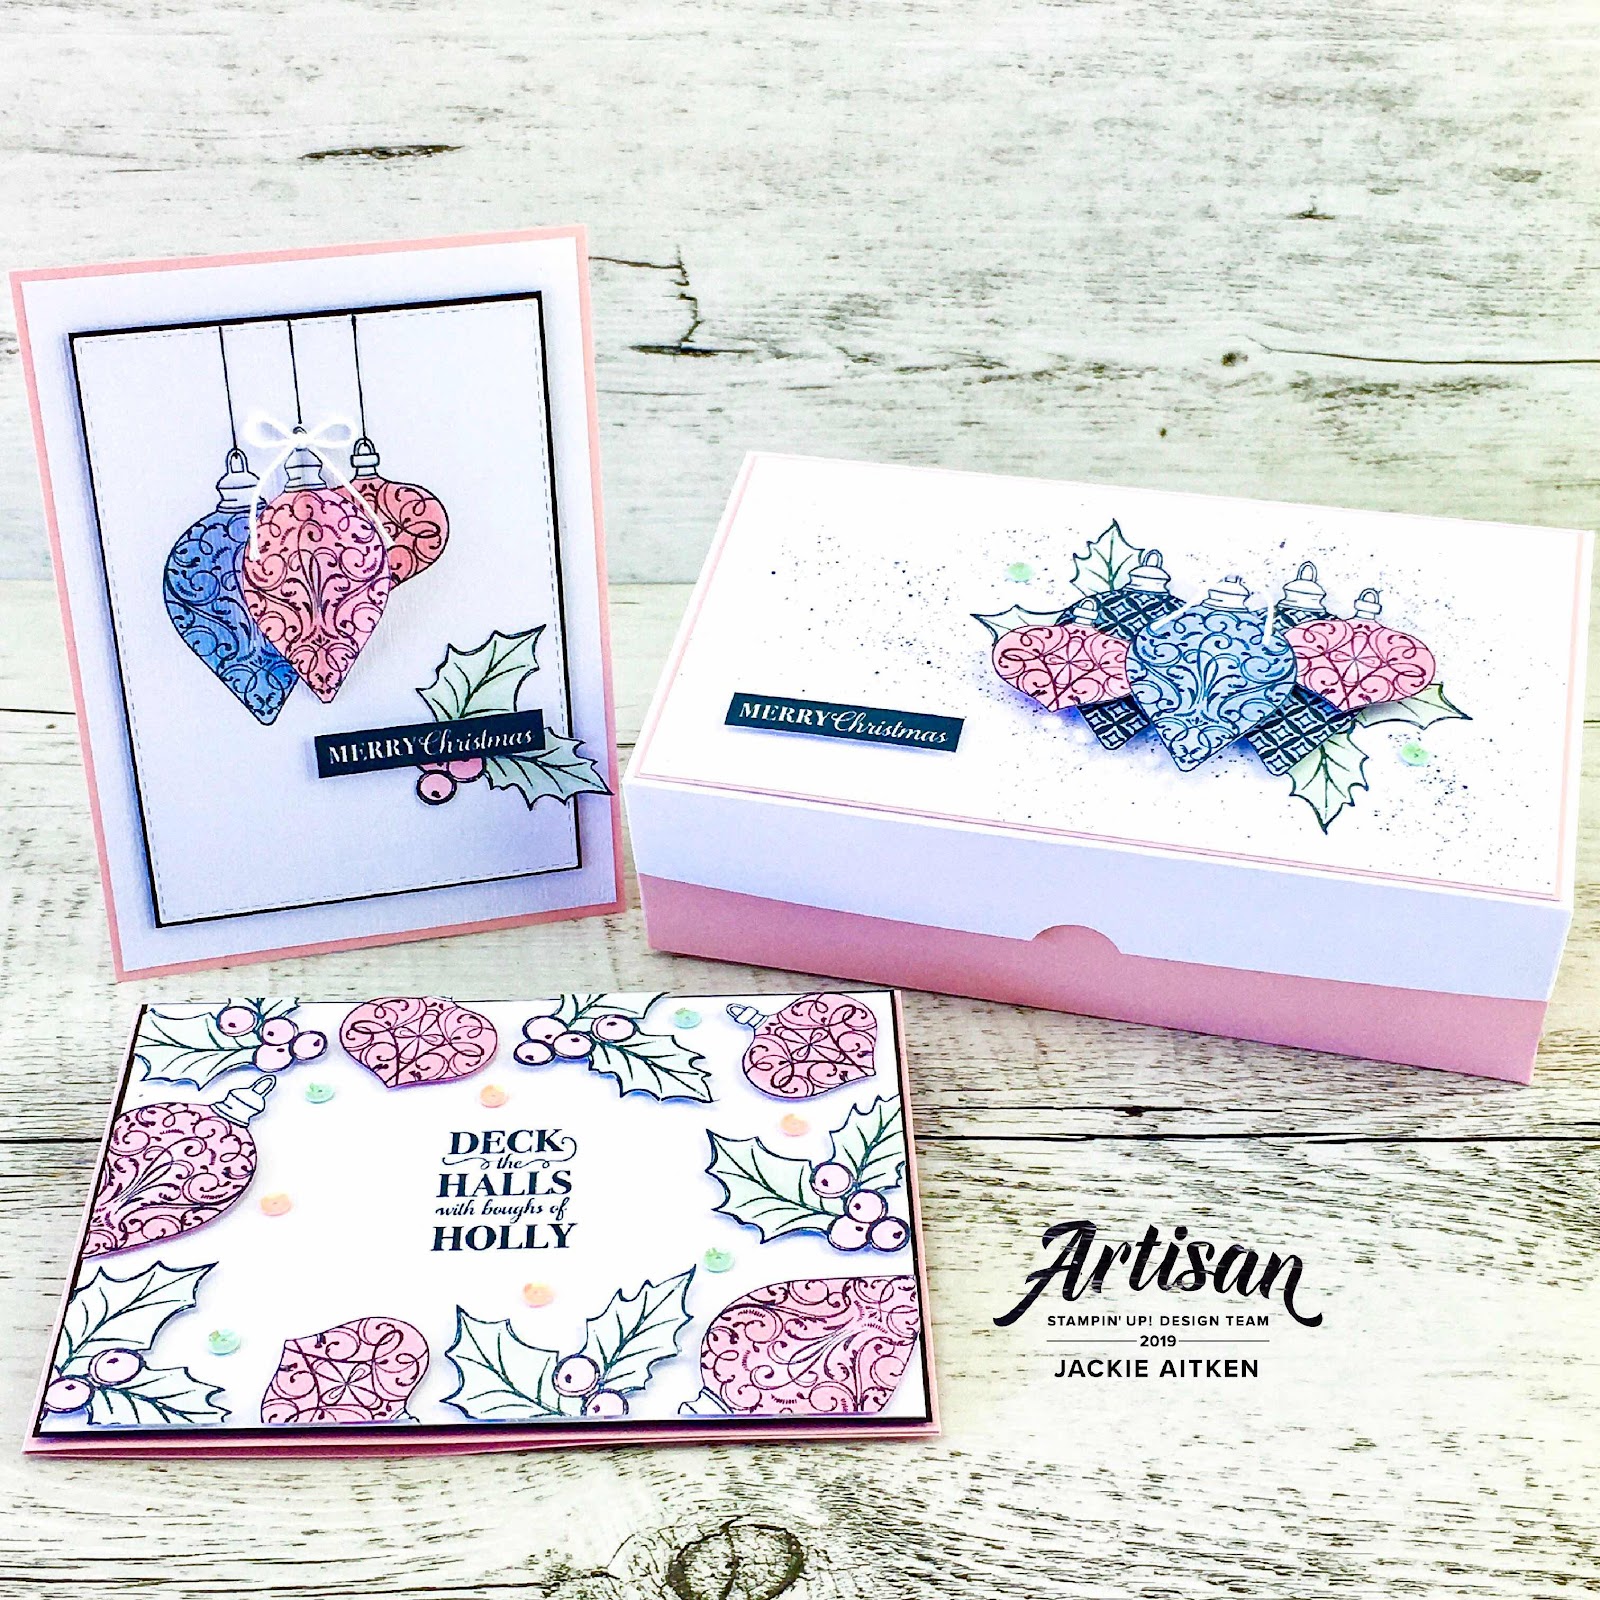
Welcome to the BE INSPIRED BLOG HOP for November. This month the Be Inspired Design Team are sharing creations with a "FEELING FESTIVE" theme. Such a timely challenge if you are anything like me and are still making Christmas Cards like crazy.

Living in Western Australia we get to celebrate the festive season during the Summer months and my family and friends love Christmas Cards with a beachy - summery vibe opposed to wintery scenes. The first two cards I have to share today were requested by Hubby - he asked for "cards with no lard" LoL, which basically means clean and simple without too many layers and embellishments. 


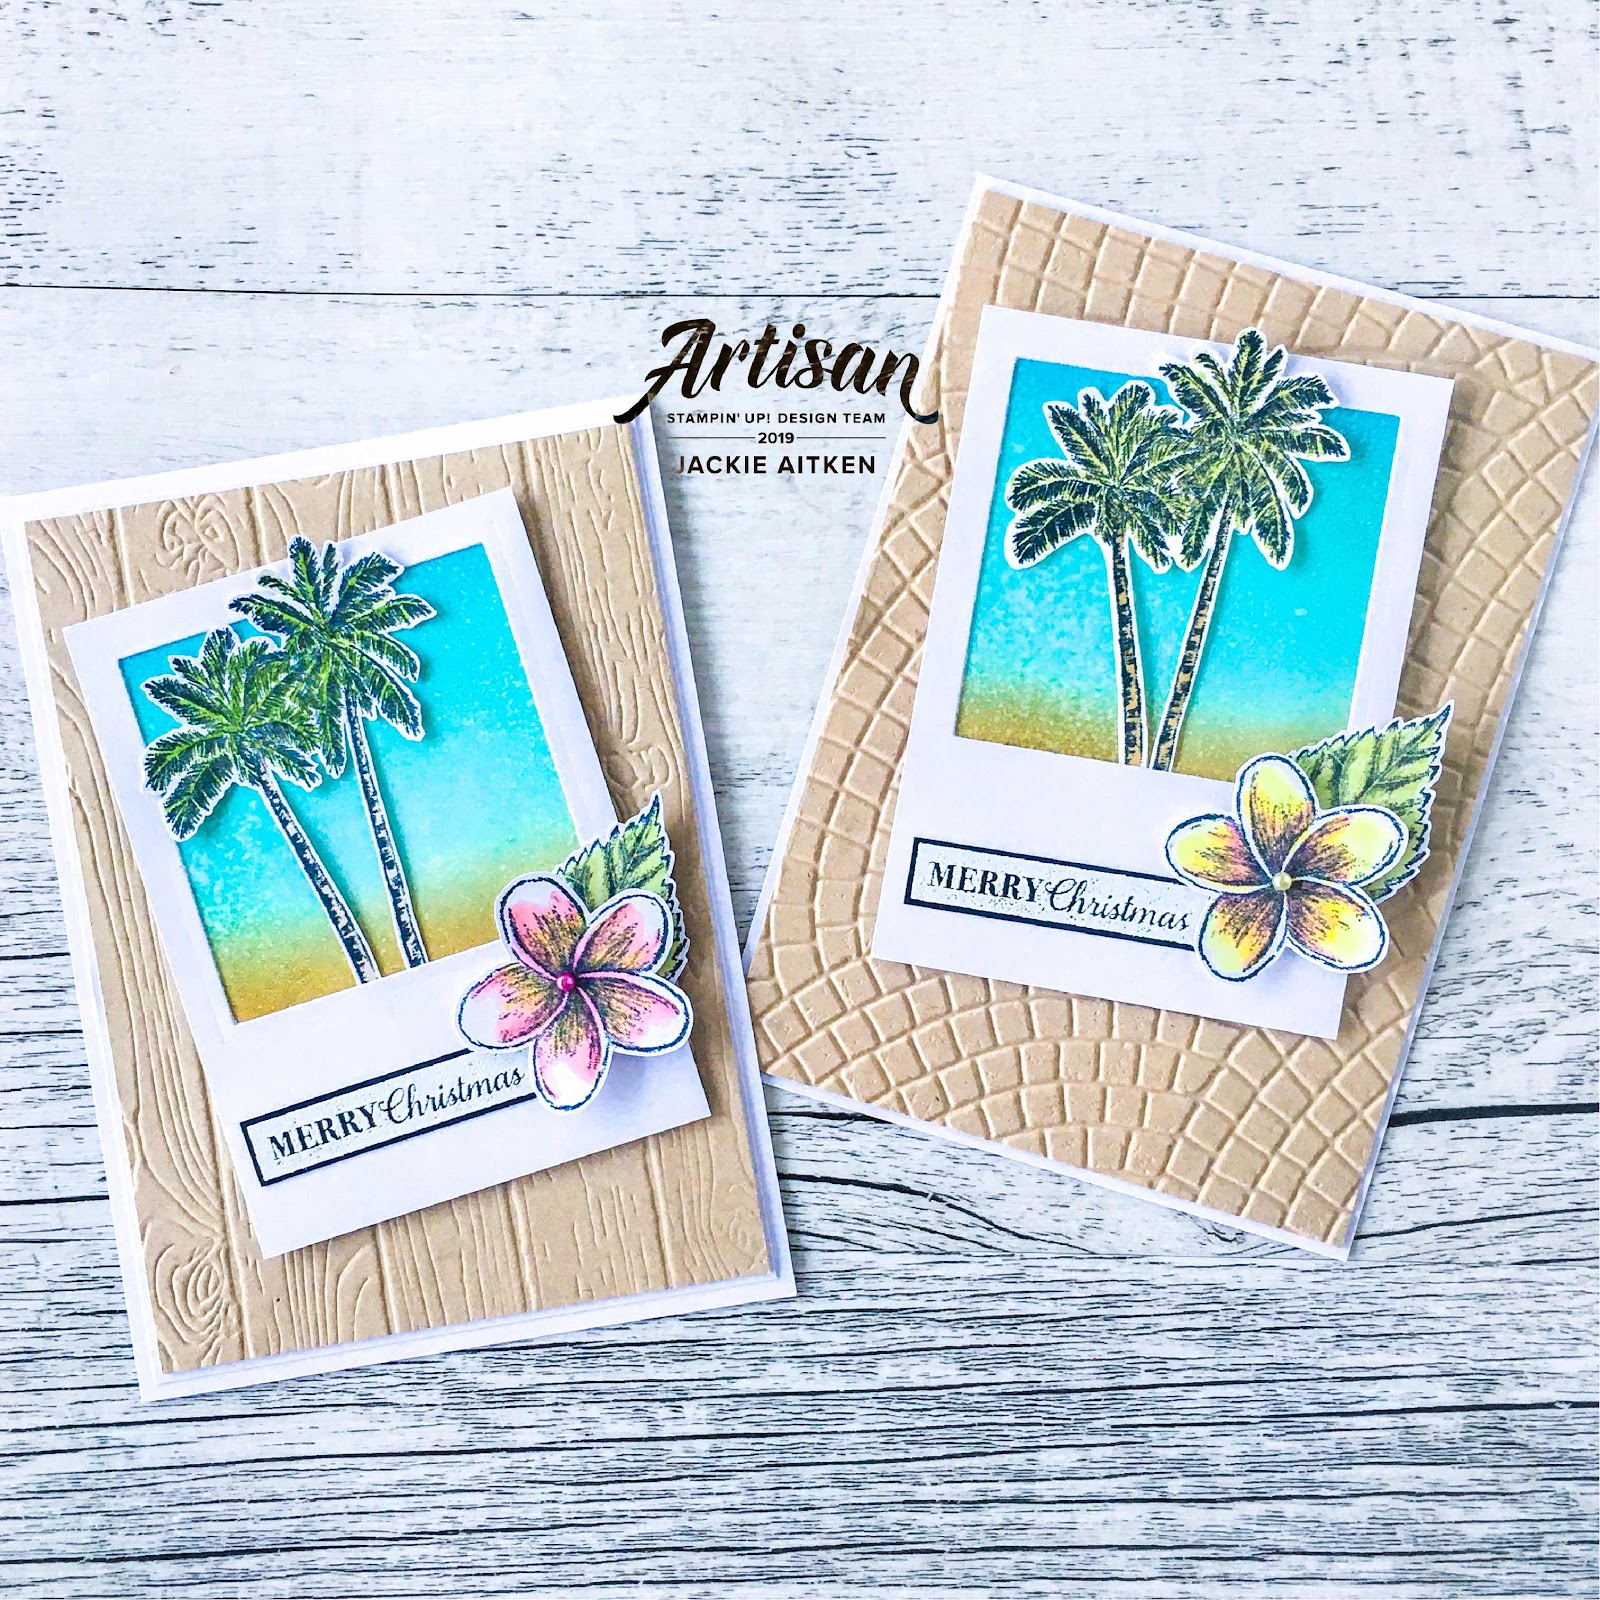
I have inked up images from the Timeless Tropical stamp set for these two cards. I was SOoooOoo stoked when I won this set in Prize Patrol at Onstage. Out of all the sets that were given away on the day I really really wanted this one as I just couldn't wait for preorder!!!!


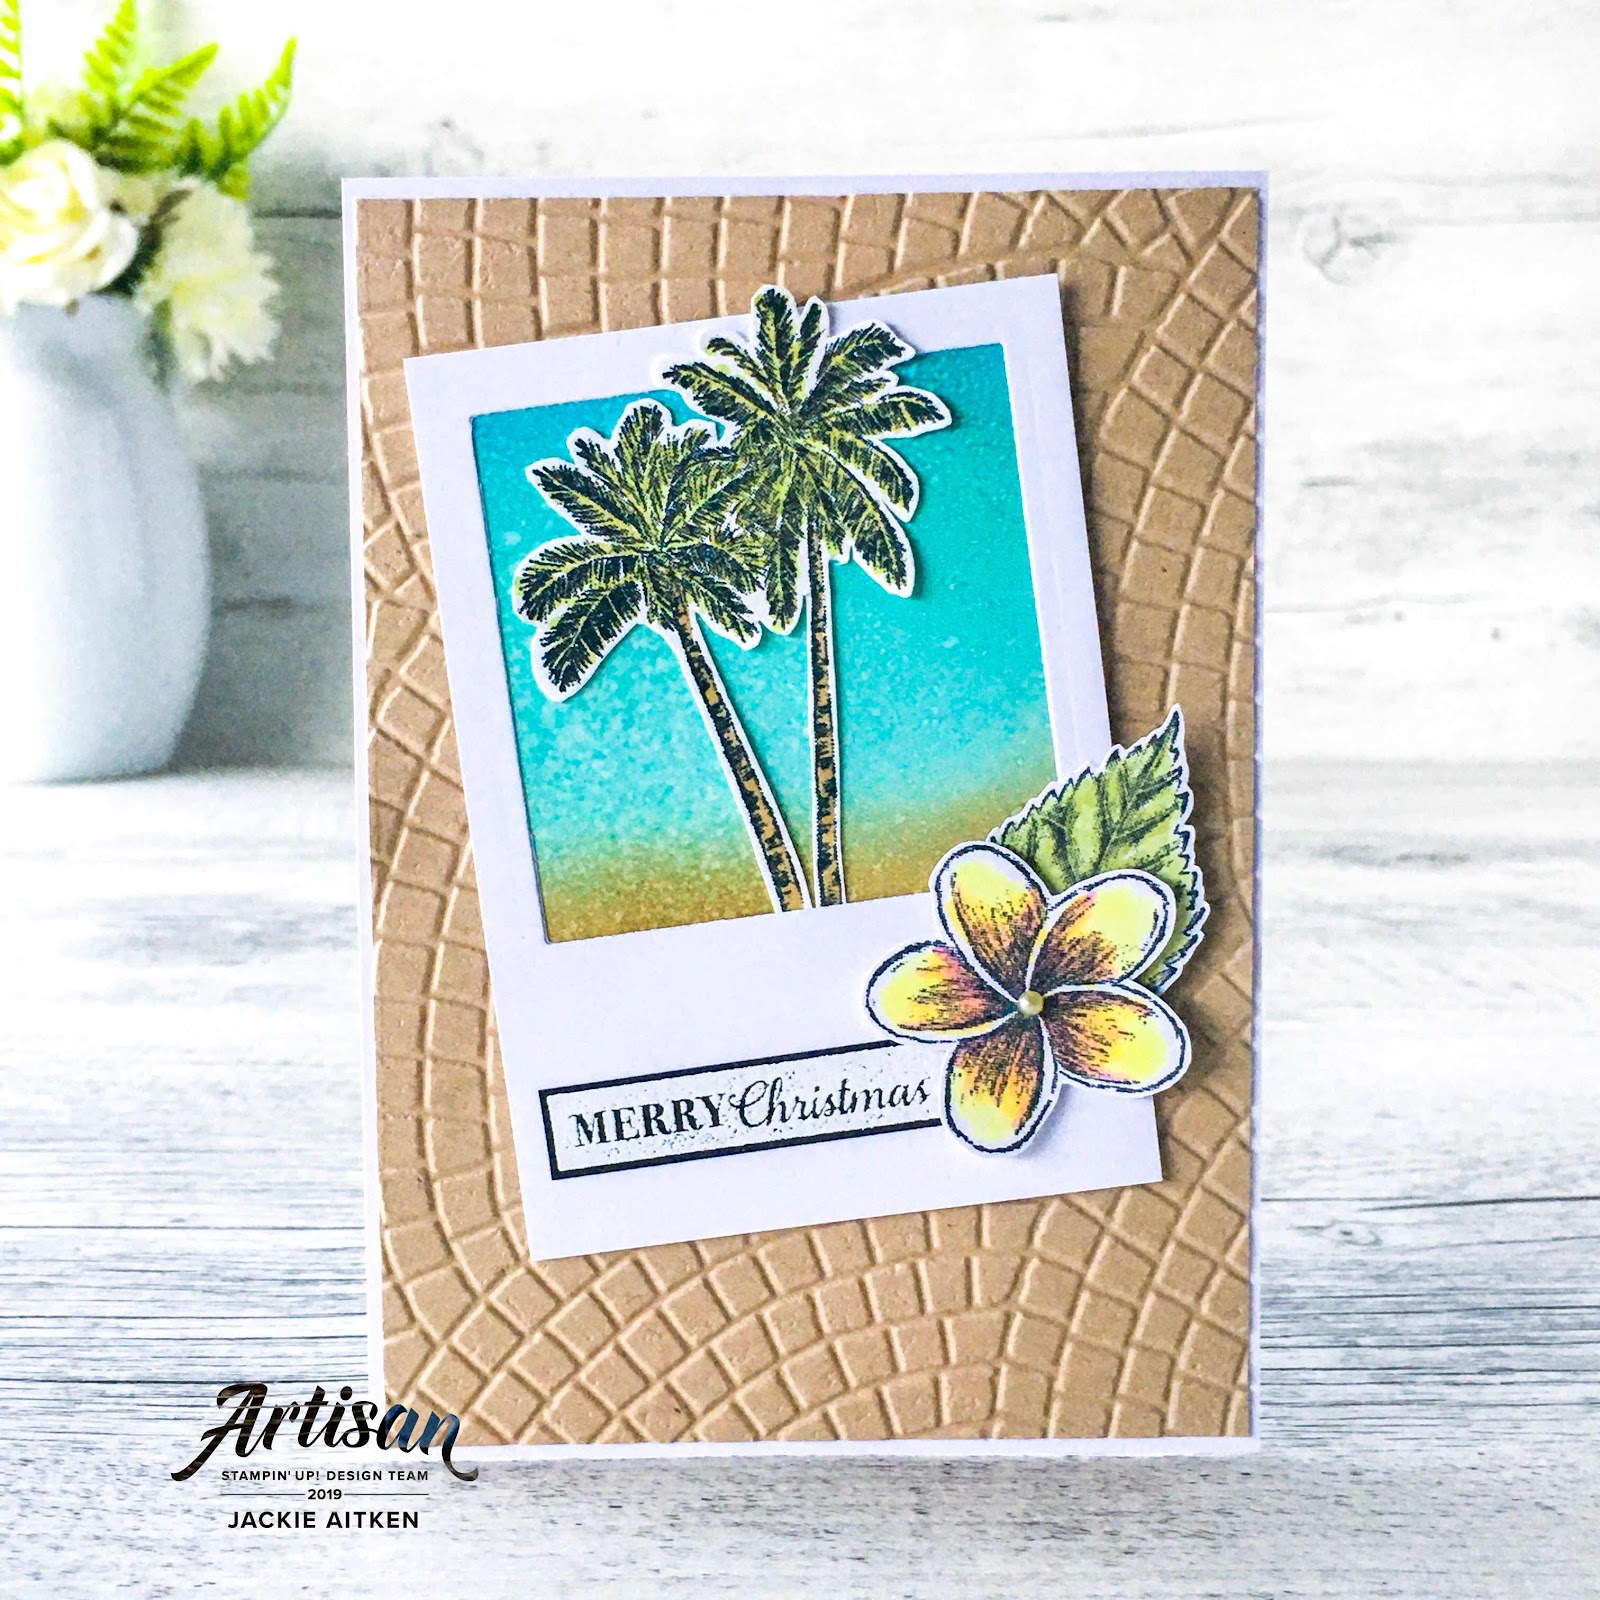
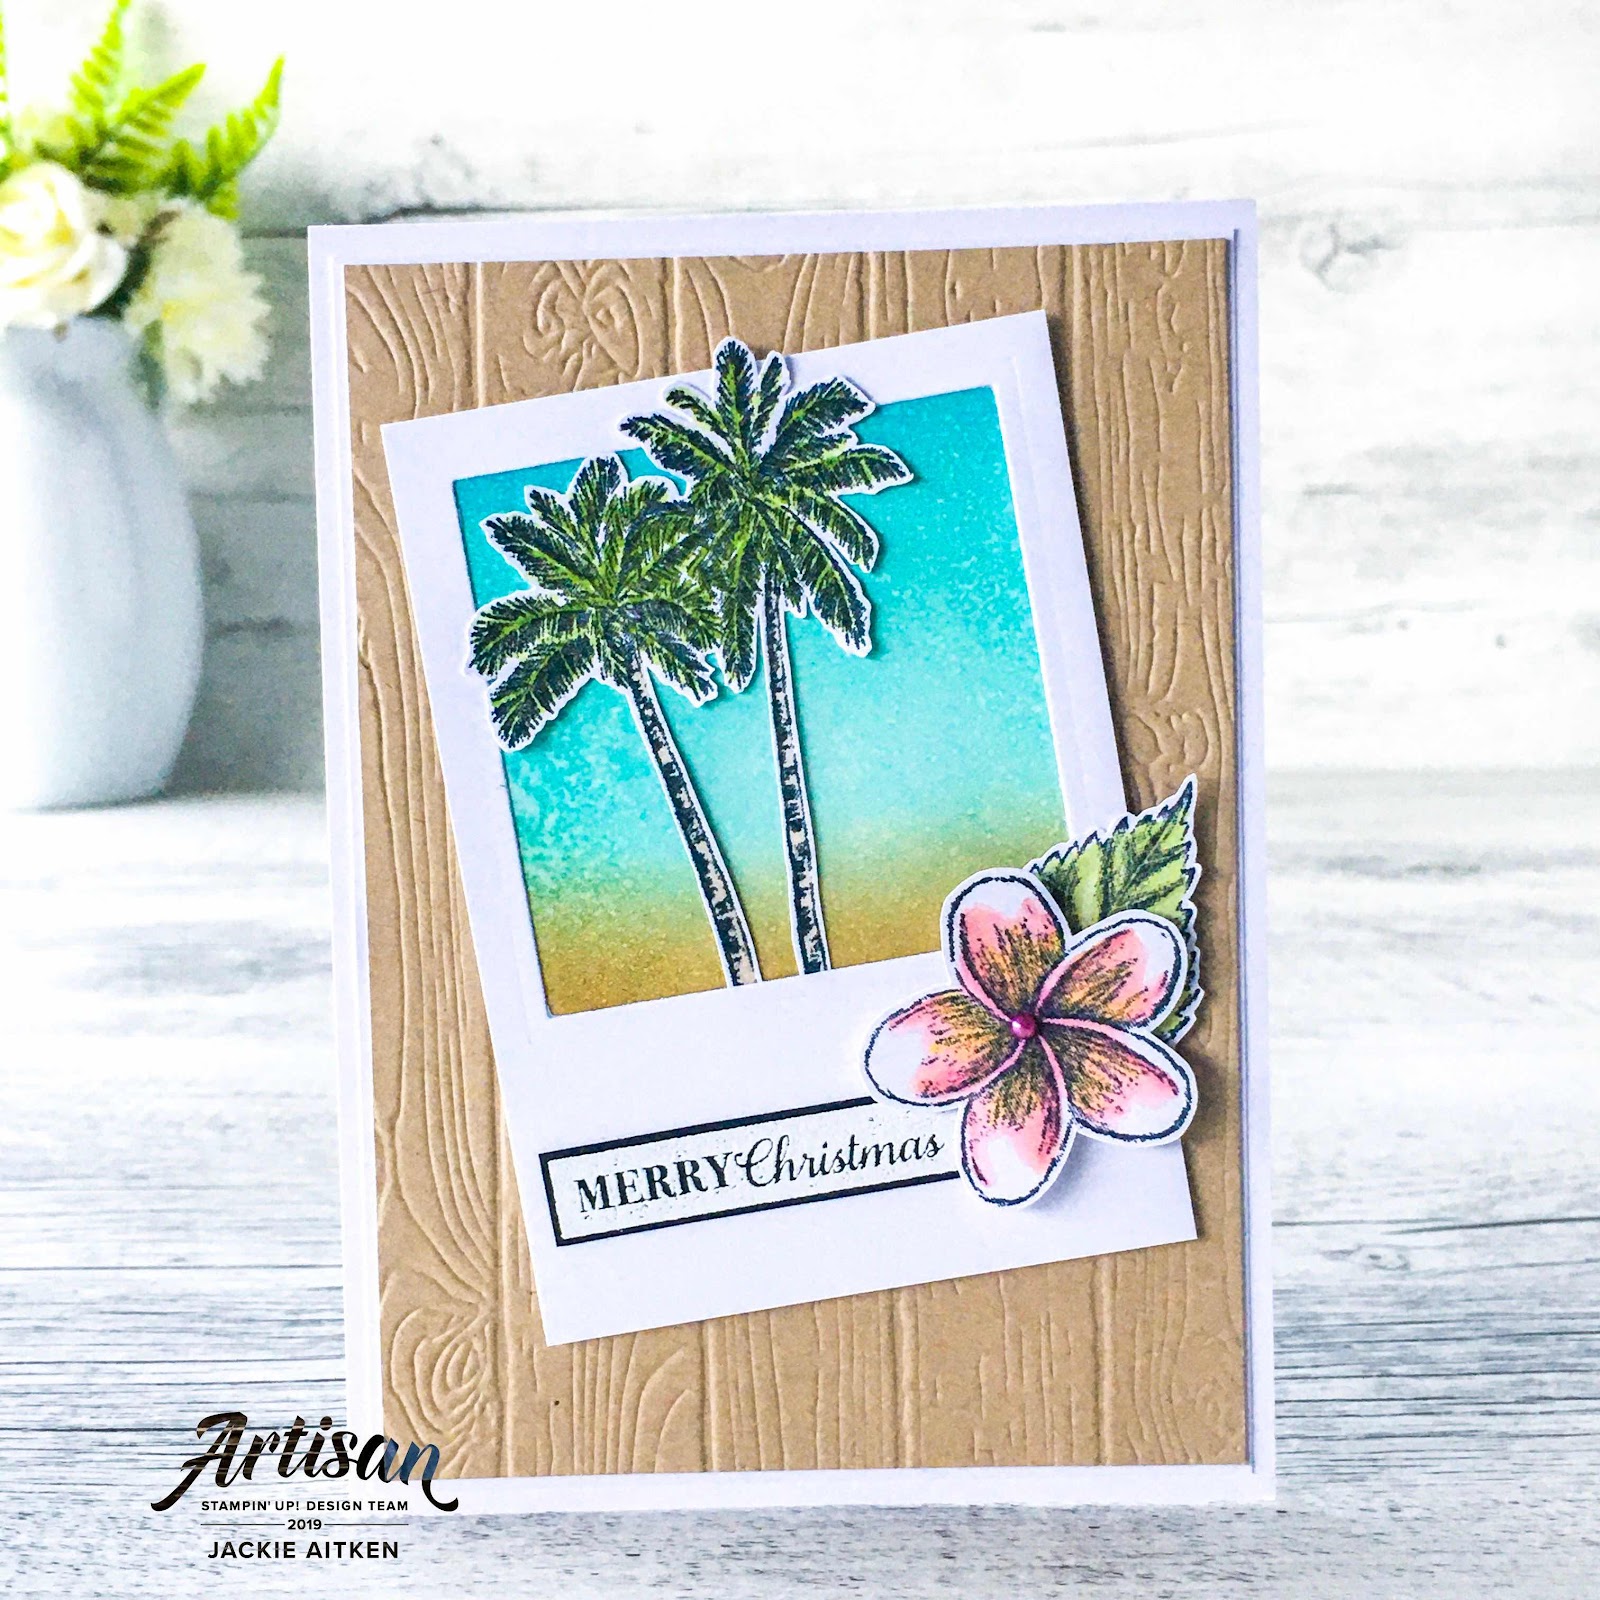
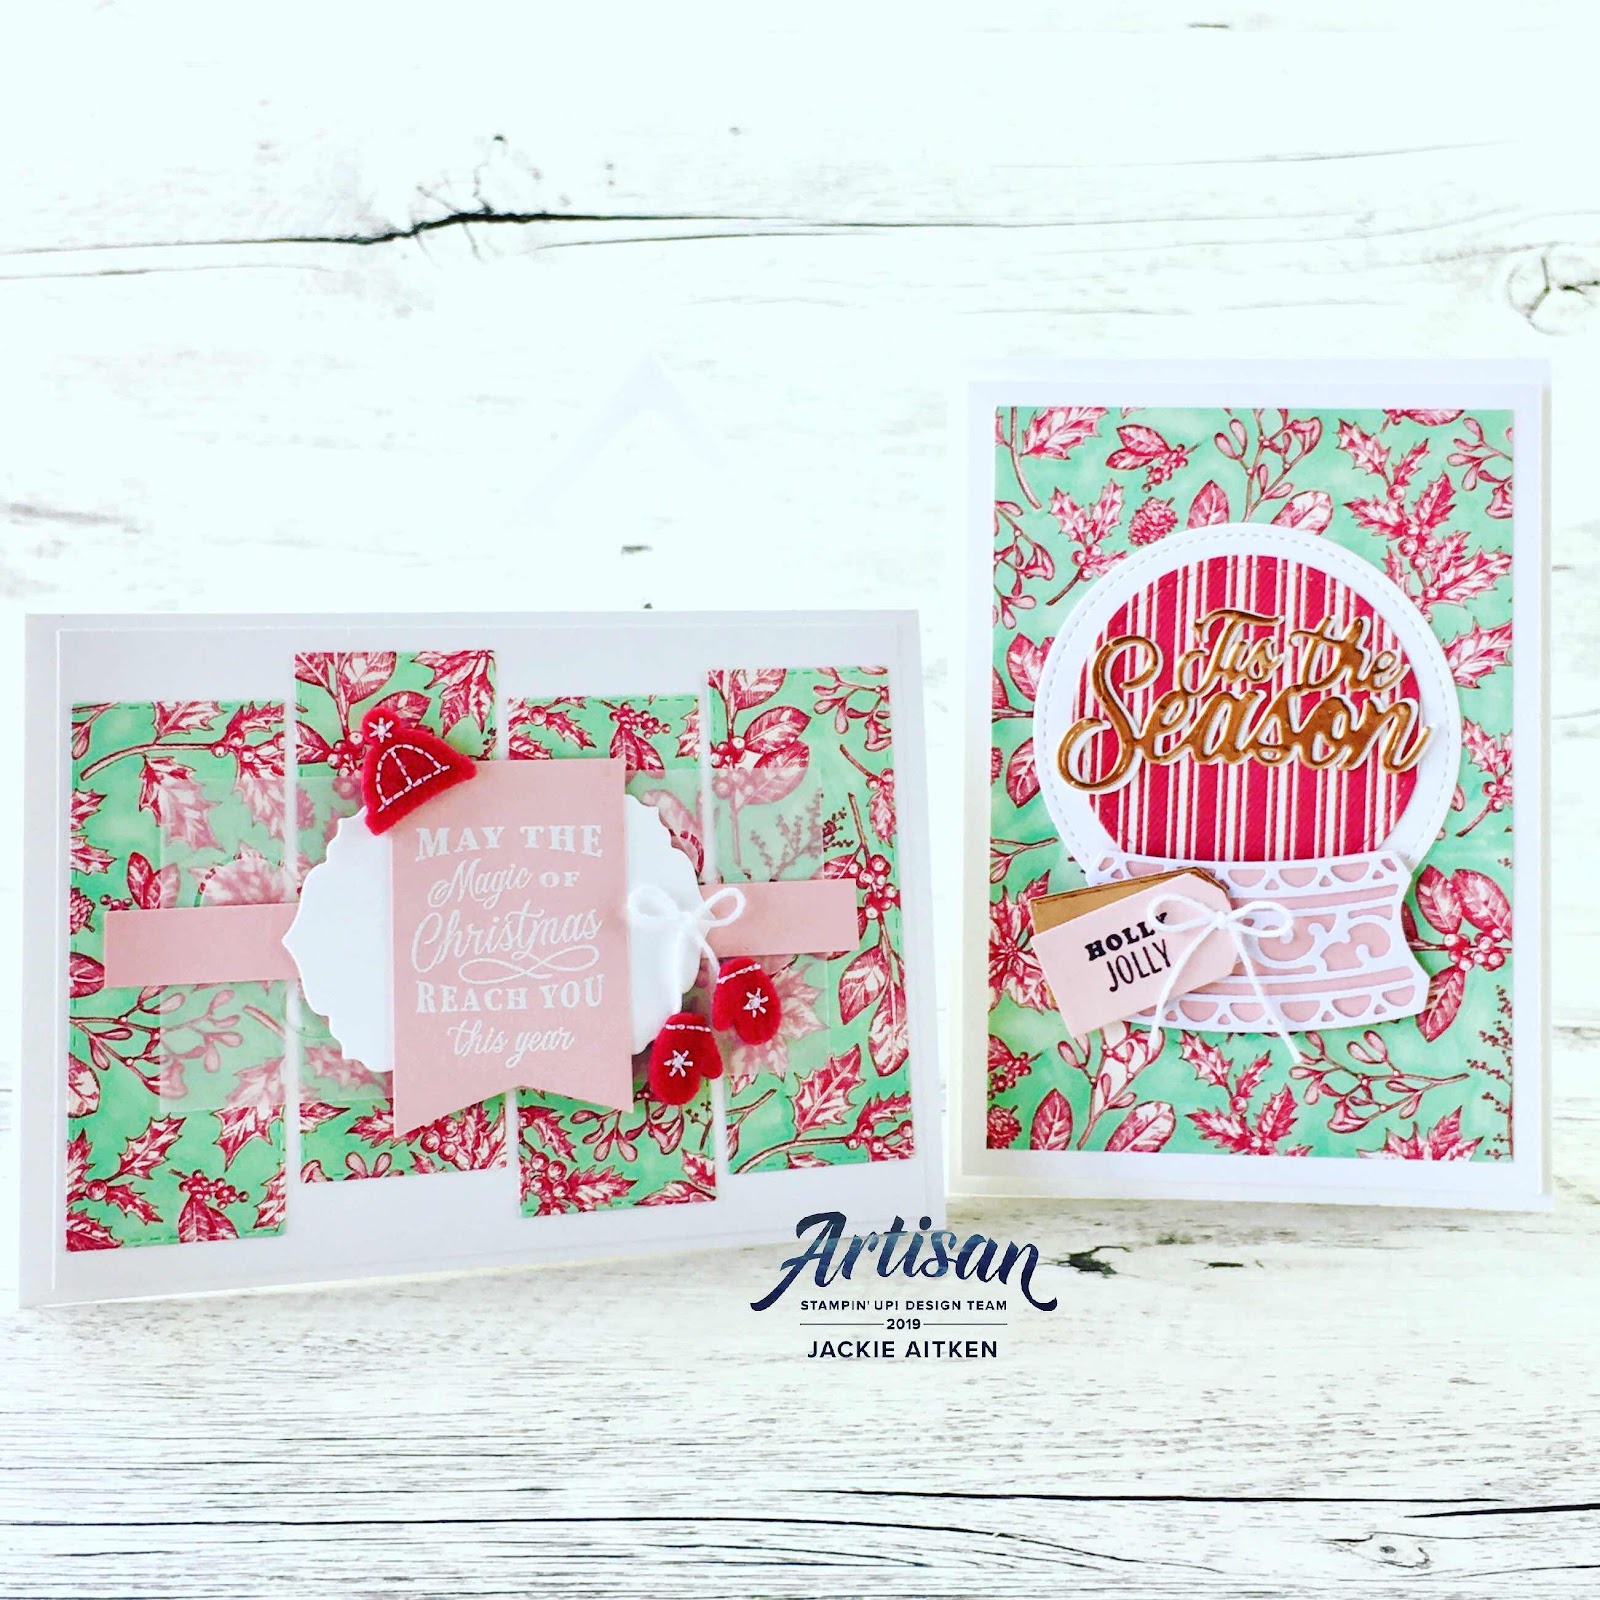
Both cards share the same layout, made to look like a holiday snap of Palm trees. To create the "photo frames" I have simply removed a square from a rectangle piece of Whisper White card. Next, I took a piece of Shimmery White card and sponged Soft Suede, Coastal Cabana and Bermuda Bay inks, then cut it in half and adhered to the "frame" with Tombow.

The Palm tree images and flowers were stamped in Memento and coloured using Stampin' Blends. I have white heat embossed the sentiment from the Christmas Gleaming stamp set and tucked it under the flowers - which have been attached with mini dimensionals.
Jaxx Crafty Creations, Stampin' Up!, Be Inspired Blog Hop, Timeless Tropical, Tropical Cards, Tropical Christmas, Christmas Cards.

The next card disregarded Hubby's request for clean and simple!! This one is for me to send one of my crafty friends who will appreciate all the "lard" LoL.

Jaxx Crafty Creations, Stampin' Up!, Be Inspired Blog Hop, Timeless Tropical, Tropical Cards, Tropical Christmas, Christmas Cards.

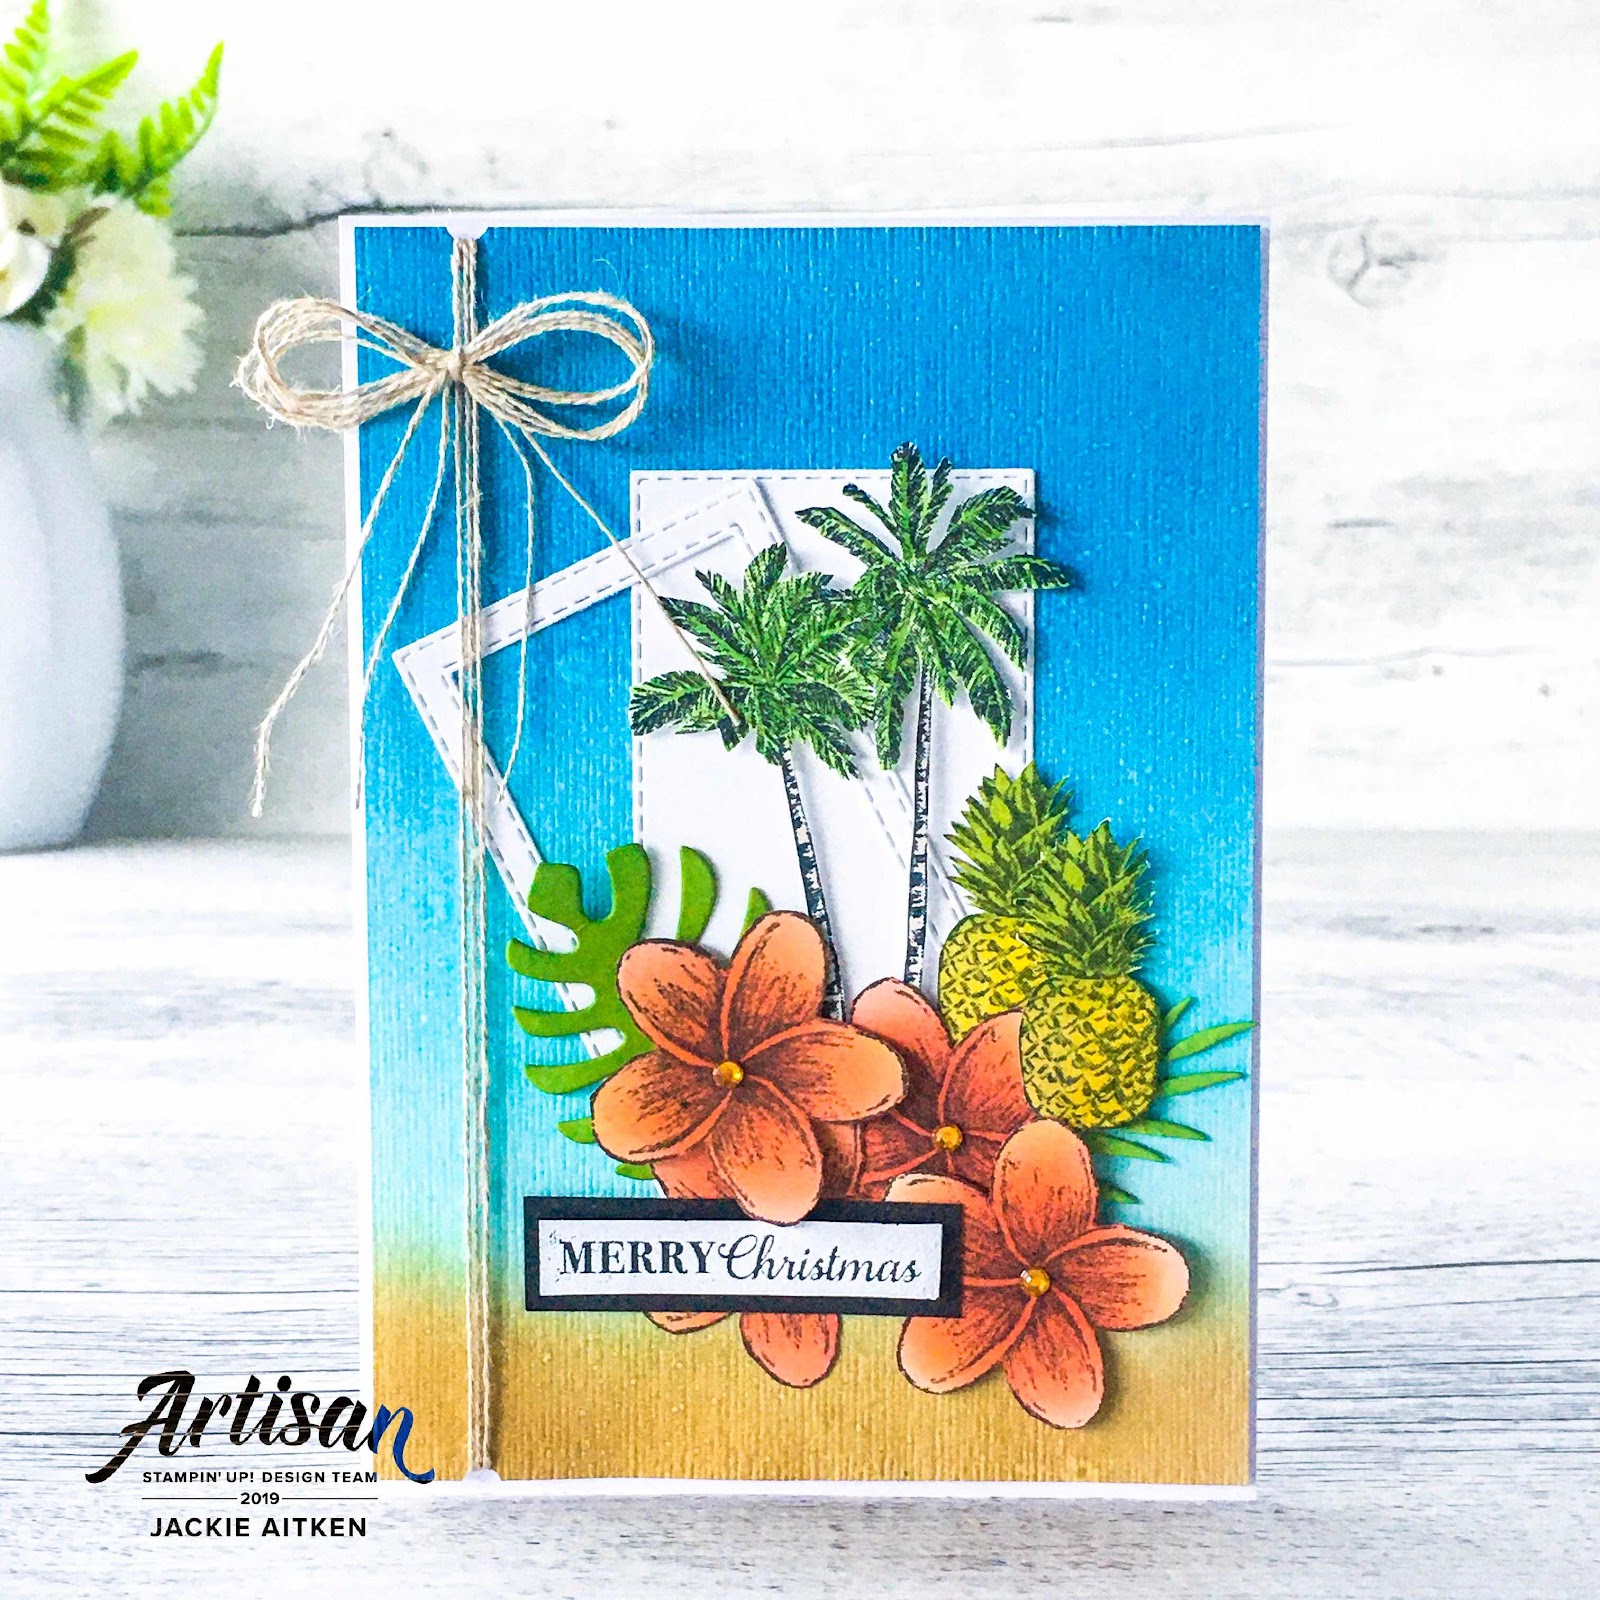
This card starts with a piece of Shimmery White card to which I have sponged, Soft Suede, Coastal Cabana and Pacific Point inks in layers like they were sand, water and sky.

I have then stamped and fussy cut several flowers, pineapples and the Palm trees from Timeless Tropical stamp set and added a few die cut stitched rectangles and Tropical die cuts. Before adhering the card front to the base, I have added some linen twine. To finish the card I added the heat embossed sentiment and a few Holiday Rhinestone jewels in pumpkin pie to the centre of the flowers.


That is all from me today. Be sure to follow the Hop all the way through for loads more inspiring ideas using this months FEELING FESTIVE Theme. Up next in this months Be Inspired Blog Hop is super talented Cathy Caines with her stunning project.


Thanks so much for stopping by. I appreciate the time you have invested to visit my blog. Until next time, stay awesome and stay crafty.


Thursday 21 November 2019

Just Add Ink #483 - Choose Two

Hello Hello Crafty Friends,

Welcome to Just Add Ink Challenge #483. This week the challenge is to chose two elements from Spots, Stars or Sparkle.

Image may contain: text

Can you believe Christmas is only five weeks away!!! I always aim to start my Christmas Card making earlier and earlier each year but it seems no matter how early I start I never have enough. Perhaps I need to be making them all year round?

This challenge was the perfect excuse to add to my Christmas card stash, as all three challenge elements just scream the Festive Season to me.


My card uses the Perfectly Plaid stamp set, some retired Polka Dot DSP (loved this pack of DSP!!) and I incorporated the sparkle element with some Glittery card stock. A few gold stars were added to the tree tops and voila all three challenge items on one card.


The plaid trees were stamped in Coastal Cabana, Granny Apple Green, Melon Mambo and Highland Heather inks. The sentiment has been white heat embossed onto Vellum and wrapped around the card front before adhering to the card base with dimensionals.

We would love for you and your crafty friends to play along, if you have a blog you can add your creation to the Just Add Ink gallery here. Don't have your own blog? No problem! Just send us an email  to  just-add-ink@hotmail.com with a photo attachment. We will upload it to our challenge entry blog for you.

Thanks so much for stopping by today. Until next time stay awesome and stay crafty.


Thursday 14 November 2019

Stampin' Up! Artisan Design Team Blog Hop - Nov - Toile Tidings

Good Day Crafty Friends

Welcome to the Stampin' Up! Artisan Design Team Blog Hop for November. This month we have the pleasure of showcasing the TOILE TIDINGS SUITE. This traditional patterned and coloured suite is full of goodies, including two stamp and die bundles, DSP, Ribbons, Embellishments AND coordinating wrapping paper. You can find all the coordinating products on Page 7 of the 2019 Holiday Catalogue.


I have a couple of projects to share with you today.  I decided to make a few decor items for my house to show the versatility of this suite - My house is going to have a very Red & White feel this year which is perfect as I have a White Christmas Tree.

The first project I am excited to share is a curled DSP wreath using the Toile Tidings Gift Wrap for the wall next to our dining table. A few Sheets of the Gift Wrap have been cut down into 12" squared sheets and then I have taken the 12"x 12" and cut it down into 1" strips. To construct the wreath you will need a polystyrene wreath, dressmaker pins and loads of curled strips of DSP.  Once the DSP strips have been curled - I used a bone folder, simply take a pin, place into one end of the curled DSP strip and poke it into the wreath.


I thought the wreath looked like it was missing something so I decided to add the Poinsettia and Ribbon. The Poinsettia Flower has been created using the leaf dies from Nature's Roots Dies. Real Red & Call Me Clover card stock has been lightly spritzed with water before die cutting and embossing the two different sized leaves, using the dies with an embossing mat.  Before attaching the Flower, White Flax Ribbon and Real Read Ribbon were adhered to the wreath using a Hot Glue Gun.


The little house gift boxes will look fantastic on the table on Christmas Day. These house shaped boxes will hold bags of Russian Fudge - just lift the tab that forms the "roof" to reveal the treats inside. To decorate the boxes, Toile Tidings DSP has been die cut using the Stitched Nested Label dies, then a few Air Dry Clay Star Shaped tags were attached to the outer two boxes. 


The wreath that adorns the front of the middle gift box has been created with the All Around Wreath Dies. The "banner sentiment" is from the Toile Christmas stamp set and has been gold heat embossed on vellum, die cut and then adhered to a plain whisper white die cut - this ensures the heat embossing is not lost in the busy pattern of the DSP. A few Cherry Cobbler embellishments from the Holiday Rhinestone Basic Jewels were then scattered around the wreath.

Using the Toile Tidings Gift Wrap, I took the Dark Pool Party Stampin' Blend and coloured in the vanilla background. I then used this sheet to create a couple of cards combing products outside the suite. A few felt embellishments from the Let It Snow Embellishment Kit were used for the card on the left. For the card on the right I have used the Snow Globe Scene dies and the "tis the season" die cut from the Jolly Season Dies.  


I did manage to use the Gift Wrap for its intended purpose and wrapped a trio of boxes that will sit on our Coffee Station on Christmas Day, along with the rosette banner. I have used wooden letters to match the timber on Coffee Station but these can be substituted with die cut letters or an alphabet stamp.


The last set of projects I wanted to share is a few gift boxes made from A4 sheets of Very Vanilla card stock and then decorated using Blushing Bride, Real Red card and Toile Tidings DSP.  These boxes are perfect for my daughters smaller sized gifts, enabling multiple facial scrubs and lip glosses to fit into each one.

As with the trio of boxes above, I have used the Real Red 1" Ruched Ribbon along with some Real Red 1/8" Curly Ribbon. The "Joy" gift tag attached to the large gift bow was created by stamping the letters j,o and y from the Lined Alphabet stamp set. These were then fussy cut and attached to a Very Vanilla Stitched Circle with Multi Purpose Adhesive.


And that is all from me today. Be sure to keep hopping all the way through the Blog Hop for loads more inspiring projects by the Artisan Design Team using the Toile Tidings Suite.

Up next is my super talented and wonderfully creative friend, Jennifer Picard with her gorgeous projects - enjoy x


Participant List

Jackie Aitken 

You can find some of the products used in today's blog post in the item list below.

Product List
Heat Tool
[129056]
$50.00


Sunday 10 November 2019

Stamping Sunday Blog Hop - Brightly Gleaming

Good Day Crafty Friends
No photo description available.
Welcome to the Stamping Sunday Blog Hop for November. This month the talented Design Team are showcasing items from the Brightly Gleaming Suite which can be found on Pages 30-32 of the Holiday Catalogue. There is a variety of coordinating products including Stamps, Punches, DSP, Embossing Folder and Copper embellishments. 

I have three projects to share with you today, two cards and a gift box. I have used just the Christmas Gleaming stamp set for my creations, combining them with colours not used in the suite. 


To start with is a project perfect for beginners. It is fairly quick and easy to create so not much time is needed for this one.


Two ornaments have been stamped onto a card front with the third stamped onto scrap, coloured and then fussy cut (or you can use the coordinating punch - I did not want the white outline so I chose to fussy cut).  Before adding the third ornament, the card front was embossed with the Subtle Folder. I have scored the middle of the large pink ornament and then adhered Tombow to the crease to fix to the card front.


The next card uses the floating frame technique without the "frame". All the images were coloured using Stampin' Blends, fussy cut and then adhered to the card front with Dimensionals. 


Once the pieces have been adhered to the card, the overhang was removed and a few sequins added.


My final project is my favie lol Its a gift box constructed from A4 sheets of Blushing Bride and Whisper White card stock. Again I have coloured the stamped images with Stampin' Blends, fussy cut and adhered using Tombow and Dimensionals.


The black splatters were achieved by using the lid of a Black Stampin' Write Marker and the brush tip. A little bit of Polka Dot Ribbon was tucked underneath the cluster with a few sequins scattered around the outside.


That is all from me today. Thanks so much for stopping by. Be sure to continue hopping all the way around the Stamping Sunday Blog Hop as the Design Team share their amazing creativity using products from the Brightly Gleaming Suite.

Until next time, stay awesome and stay crafty xx

Participant List