SOCIAL MEDIA

Thursday 30 May 2019

Just Add Ink #459 Colour Combo

Good Day Crafty Friends,

Welcome to this week's Just Add Ink Challenge #459.  We have a delightful colour combination for you to play along with - Blushing Bride, Poppy Parade, Coastal Cabana and Bermuda Bay.

Image may contain: text

I am not a big user of any forms of red tones - think it has something to do with the wool jumper that was part of my high school uniform lol so I found this colour combination particularly difficult. I have discovered if I dislike a colour my opinion of an entire project is affected.

However, after playing around with my ink pads, I discovered the four colours went well together, and having a light and dark of the same colour actually made it perfect for flowers. I decided to use the Daisy Lane Stamp Set that was given to attendees at Onstage in April to create a clean and simple card.


The flowers were stamped in the challenge colours and fussy cut. To an embossed card front, I adhered the fussy cut flowers in circle with dimensionals. A small sentiment and pink and white bakers twine was added as it was just a tad to simple for my liking, and then at the very last minute I remembered I have loads of embellishments that are retiring next week that I need to use, so added a couple of sequins.

Now, I did create another card, which was created first, but the poppy parade ink is only visible on the inside of the card so thought I better be a good girl and make a card that features all the challenge colours on the front of the card.


I used the same images from the Daisy Lane stamp set as used in the card shown above, which will be available to purchase with the release of the new 2019-2020 Annual Catalogue from June 4th. I love stitching detail and had the die cut heart left over from another project that I thought worked wonderfully behind the flowers. A few pearl embellishments were added as I think they look smashing against the Sahara Sand card front and almost matches the polka dots in the ribbon.

That's all from me today, crafty friends. Be sure to stop by all the Just Add Ink Design Team members blogs for more inspiration using this weeks challenge colours.

We would love for you and your crafty friends to play along, if you have a blog you can add your creation to the Just Add Ink gallery here. Don't have your own blog? No problem! Just send us an email  to  just-add-ink@hotmail.com with a photo attachment. We will upload it to our challenge entry blog for you.

Thanks so much for stopping by today. Until next time stay awesome and stay crafty.


Wednesday 29 May 2019

Be Inspired Blog Hop - Perennial Essence

Good Day Crafty Friends
No photo description available.
Welcome to the Be Inspired Design Team Blog Hop for May. I am so excited to be hopping with the crew this month as we have a few new Design Team members who I know are going to blow your socks off with their creations.

You are currently visiting Jackie Aitken in Western Australia. If you are following the hop, you may have arrived here having just visited Monica Gale. If you are just joining us, grab a comfy seat and be sure to hop all the way through for amazing idea's and inspiring projects shared by the Be Inspired Design Team using this month's theme ANYTHING GOES.

I was so excited to have the opportunity to create with some new item while being able to mix them with a some of my favourite retiring products. The Floral Essence stamp set (item #149450)  and Perennial Essence Designer Series Paper (item #149100) will be available from the new 2019-2020 Annual Catalogue from June 4th.


I have added a few vellum die cuts using my favourite foliage dies from Floral Frames and the copper foil die cut labels that the sentiments have been stamped onto are from the Everything is Rosy Product Medley.  Everything else that I have used to create this collection is available in the new Catalogue.


The Perennial Essence DSP is seriously gorgeous and will make stunning gift bags and decor pieces, but I found it extremely hard to cut up and then create something with it. I decided to make some frames for the two cards using the Rectangle Stitched Framelits.


The floral images from Floral Essence have been stamped in Pineapple Punch with Grapefruit Grove applied to the centre with a sponge dauber.

The leaf stamp was borrowed from the Rooted in Nature Stamp set. All images were fussy cut and applied to the card with dimensionals.


The pillow boxes (item #147018) are perfect for those little gifts that can be awkward to wrap, plus I love decorating the pillow boxes, so any excuse lol. The fern leaf tucked behind the flower is from the Daisy Lane Stamp Set (item #149325) has been stamped in Granny Apple Green and fussy cut. The sentiment has been stamped in Sahara Sand ink onto a whisper white die cut created with the Stitched Labels Framelits.


That's it from me, crafty friends. Thanks so much for stopping by today. The Be Inspired Design Team appreciate the time you have invested to visit our blogs today, Thank You. Up next in this months Be Inspired Blog Hop is super talented Cathy Caines.

No photo description available.


Participant Blog List

Jackie Aitken - that's Me


Until next time, stay awesome and stay crafty

You can find all the products used to create the projects in today's post in the product list below. Simply click on the images to be taken to my Online Store. Happy Shopping x


Product List


Saturday 25 May 2019

New Catalogue Showcase - New Wonders

Hello Crafty Friends,

I am squeezing in a quick post today as I wanted to share a few creations made with the new Hostess Stamp Set - New Wonders. I am in love with the little fairy images!! OH M GEE!!! This stamp set will be available in the new 2019-2020 Annual Catalogue.

What is a Hostess Stamp Set you ask, it's one of four sets that can be earned for free when you have a qualifying order over $250AUD. I normally am not overly attracted to the Hostess sets but this year I actually want all four!!! You can find all the information regarding qualifying orders, stamping rewards and hostess sets in the catalogue from Page 204 onwards.


The first card has a watercoloured background that was stamped with the sentiment from Bloom n Grow (another new stamp set available 4th June) as if the little fairy's penned it herself.

The next card shows two of the three fairy images. Again I kept the layout fairly simple as I wanted the sentiment and images to be the focal point.


The next two cards incorporate one of the floral images from the Bloom n Grow stamp set I mention earlier. The first has the third fairy image peeking out from the floral cluster. 


Again another simple creation with a little sponging and light stamping behind the heat embossed sentiment and fussy cut fairy. I have given this fairy a new skirt using the Perennial Flower Punch.


A partially die cut card front makes for the perfect spot for this fairy to write her heat embossed message.


And finally, a vellum window with floral embellishments.


Thanks so much for stopping by today. I will be back tomorrow with a few creations using another new stamp set from the new Annual Catalogue as I participate in a global blog hop.

Until next time, stay awesome and stay crafty


Monday 20 May 2019

Everything Rosy Medley - Kit - No dsp

Good Day Crafty Friends

The Everything Is Rosy Product Medley has been an incredibly awesome kit that I have enjoyed creating with immensley. You can still get your hands on this limited edition product medley until the end of May 2019. For AUD$139 its amazing value and with just cardstock and adhesive of choice you have the option to create 100's of cards.


I have created a few cards that use just the stamp set and coordinating dies. I wanted to show you that when the 48 sheets of stunning DSP are all gone, you can still create projects with the stamps, inks and dies.


This first card is nice and simple with a Black Stampin' Write marker used to outline the stamped images and create the rough border.


This one uses two ink pads, blushing bride and sahara sand - thats it!! 


Very similar to the card above with colour scheme, I have added some gold heat embossing to this card and changed the orientation.

These next card show the stamps inked in some cheerful colours - Blushing Bride, Petal Pink, Coastal Cabana, Granny Apple Green.


The floral images in the next card are fussy cut from the DSP and adhered over stamped foliage.


My final card today has had all the images stamped in white craft ink and then restamped with colour applied using a sponge dauber.


I hope I have been able to provide some inspiration using the stamps from this awesome Product Medley. Just remember with any product suite the colour scheme is a guideline and if you try other combinations especially those not in the product suite DSP's then you may just surprise yourself with some unique creations.

Until next time, stay awesome and stay crafty


Thursday 16 May 2019

Stampin' Up! Artisan Blog Hop - Carry Over Event

Good Day Crafty Friends

No photo description available.

Welcome to the May Artisan Design Team Blog Hop. Our format this month is a little different from previous ADT Blog Hops, as we will be focusing on products that are carrying over into the new 2019-2020 Annual Catalogue. For this months assignment we were asked to chose products that are carrying over and prepare a blog post showing how our Artisans would use the products in a class or workshop situation.

I love fancy fold cards and knew I would want to include one in my Workshop. My Various Vases Workshop showcases two amazing stamp sets - Varied Vases and Vibrant Vases. This 2-3 hour class is perfect for the casual to avid crafter with a few fun folds teamed with some simple stamping. Each attendee makes two basic cards, a 3D project and two fancy fold cards. None of the projects are overly difficult (except the template needed for the Poppin' Box card) and could be simplified for a beginner by omitting layers or some of the stamping.

The main items used for this workshop are:

#146644 Varied Vases Stamp Set
#148656 Vibrant Vases Stamp Set
# 145372 Stitched Shapes Dies
#145486 Acetate Card Boxes
#106577 Night of Navy Card Stock
#106549 Whisper White Card Stock
#147110 Night of Navy Ink Pad
#147277 White Craft Ink Pad
#132708 Memento Tuxedo Black Ink Pad
#144040 Stampin' Blends - Night of Navy Combo,
#144601 Stampin' Blends - Crumb Cake Combo

At first glance you may notice I have not used any DSP for the projects in this Workshop, that is because we will making it ourselves - back to basics with simple stamping!! This also reduces the costs involved or reliance on having the right amount of DSP.

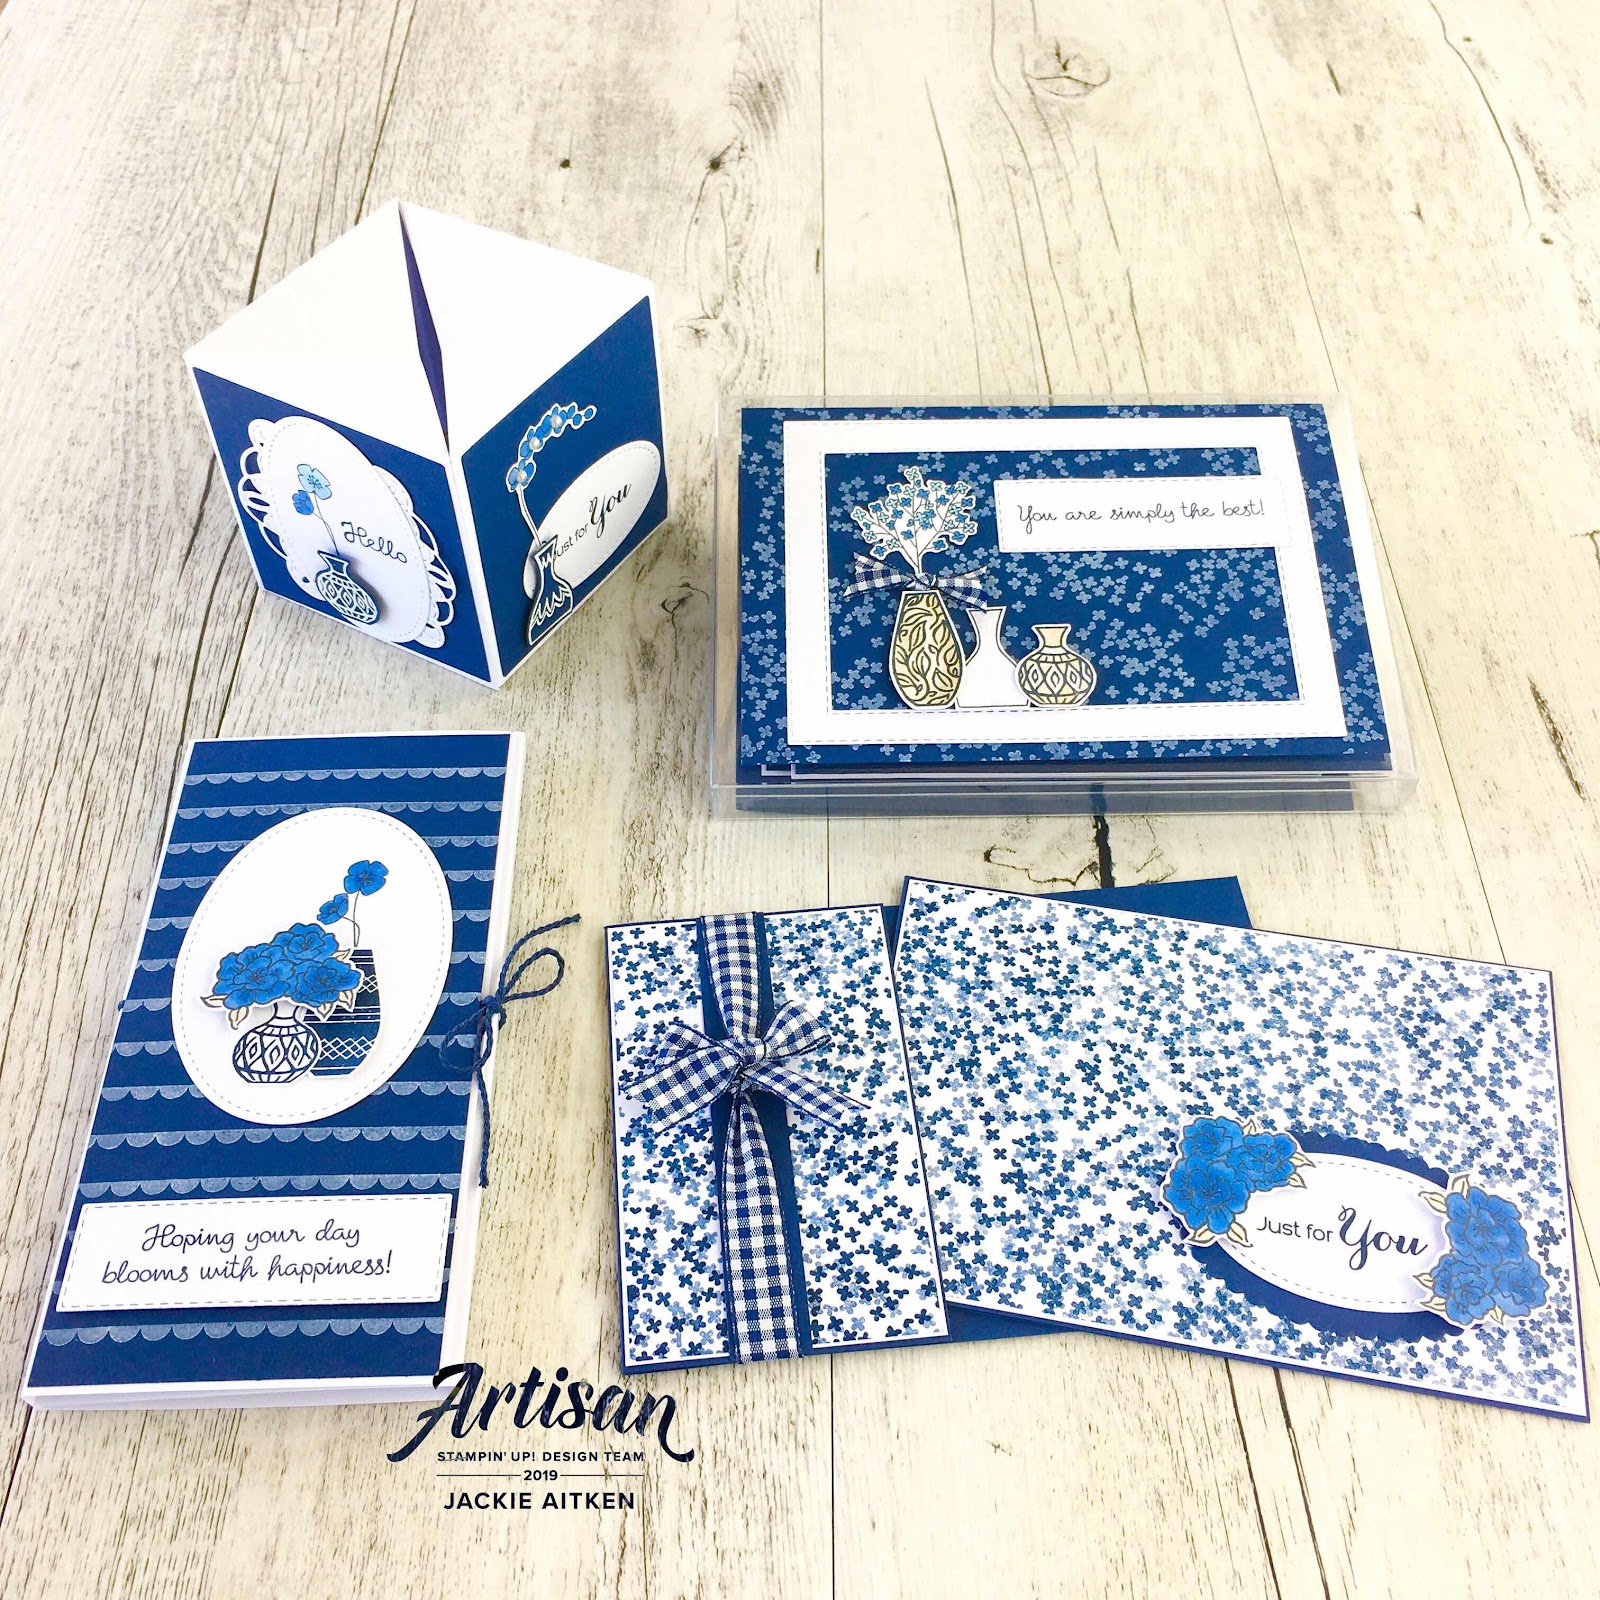
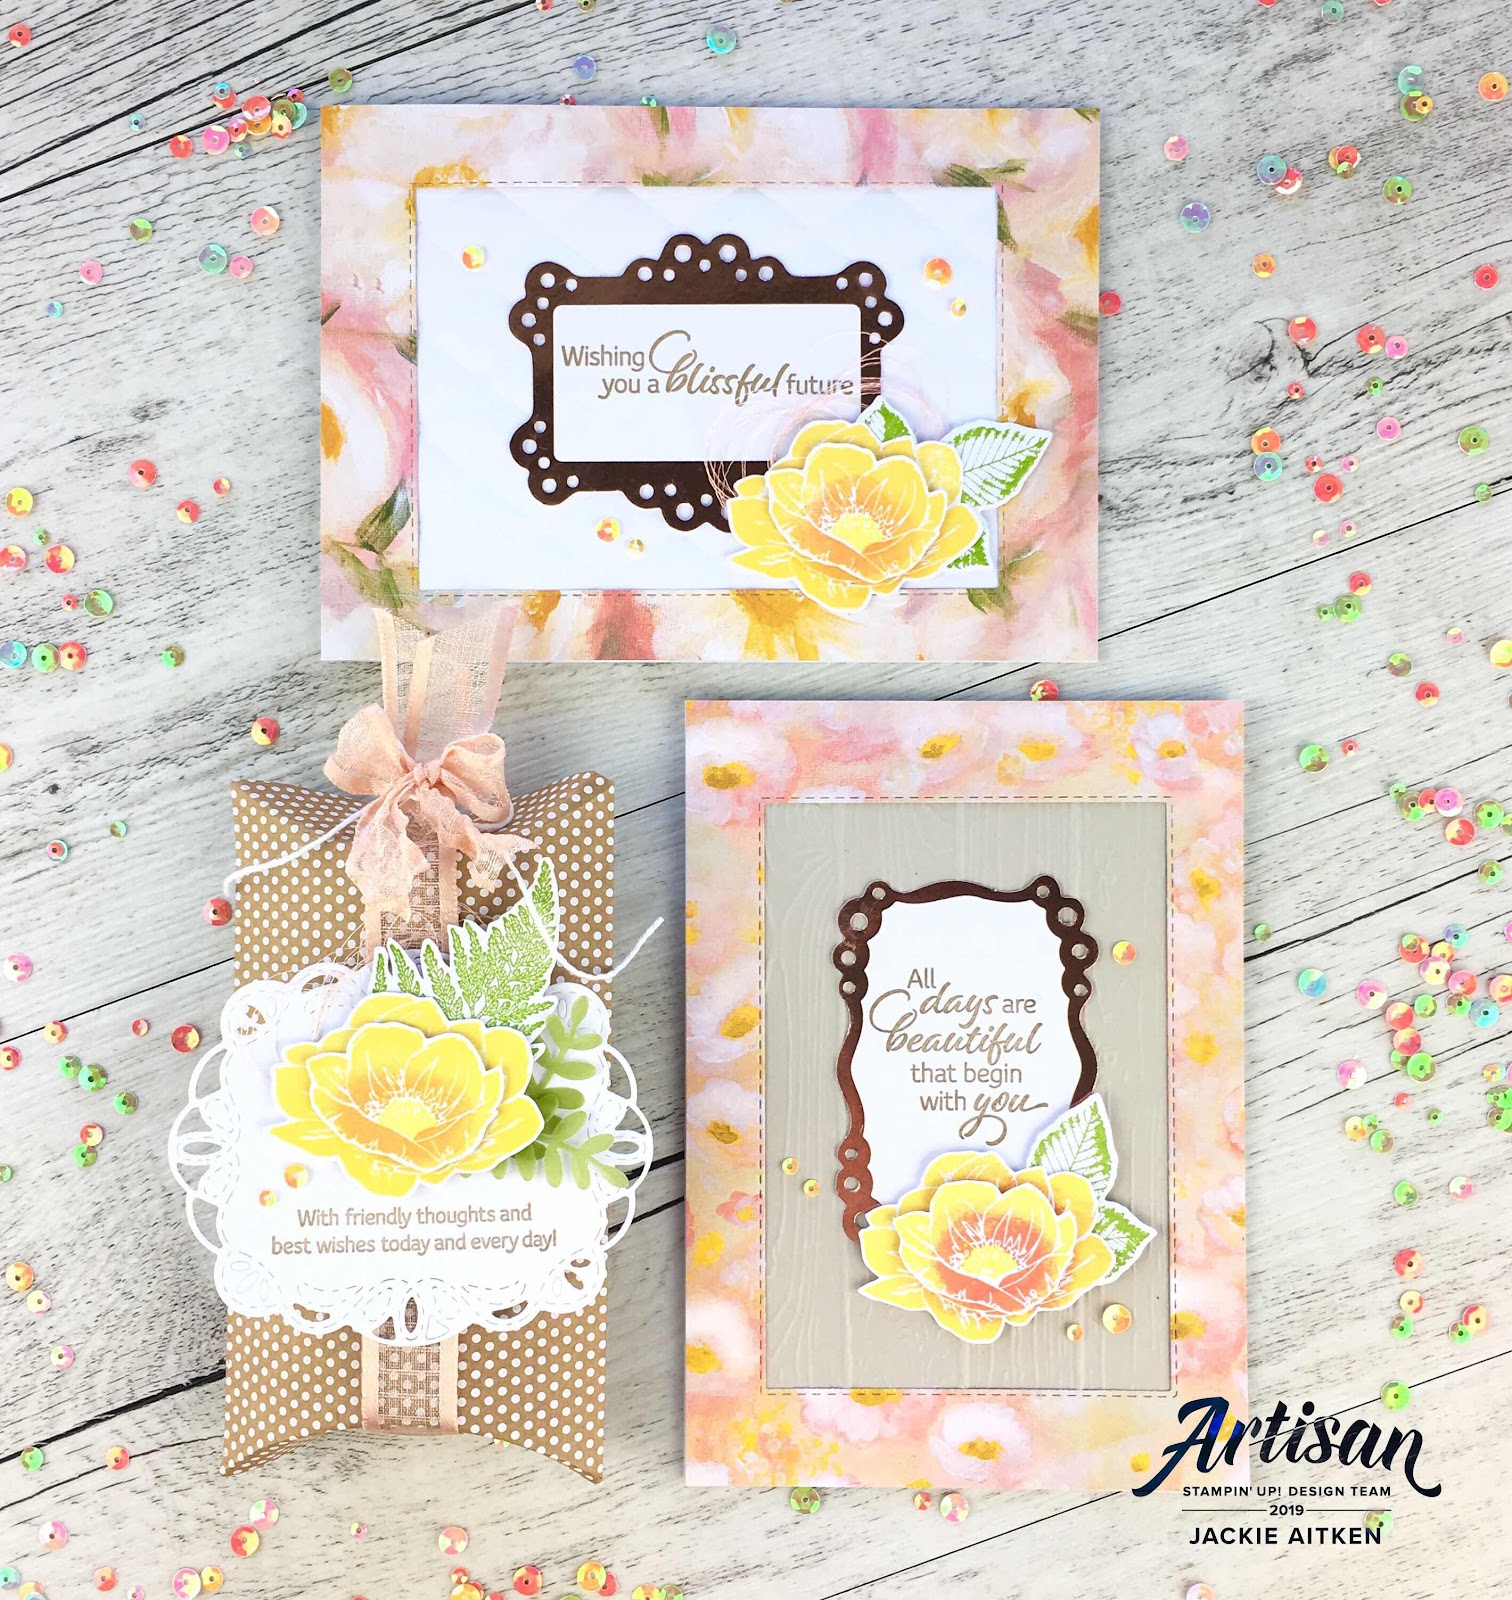
Each attendee creates a Poppin' Box Card, A Folder Card and a decorated Acetate Box that contains two simple cards and envelopes as shown in the photo below:


First up, is what appears to be a basic tri-fold card. The Poppin' Box card is one of my favourite "wow" cards. The rubber band mechanism allows the cube to fold flat and pop open when its released from the card. The cube is not difficult to construct, however, it does require a set of instructions and templates which I prepare in advance for class attendee's, otherwise this avid fancy fold is a class on its own. You can find the tutorial and templates for this card by talented U.K. Demonstrator Gemma Clarke from the Inspired Stamper here.

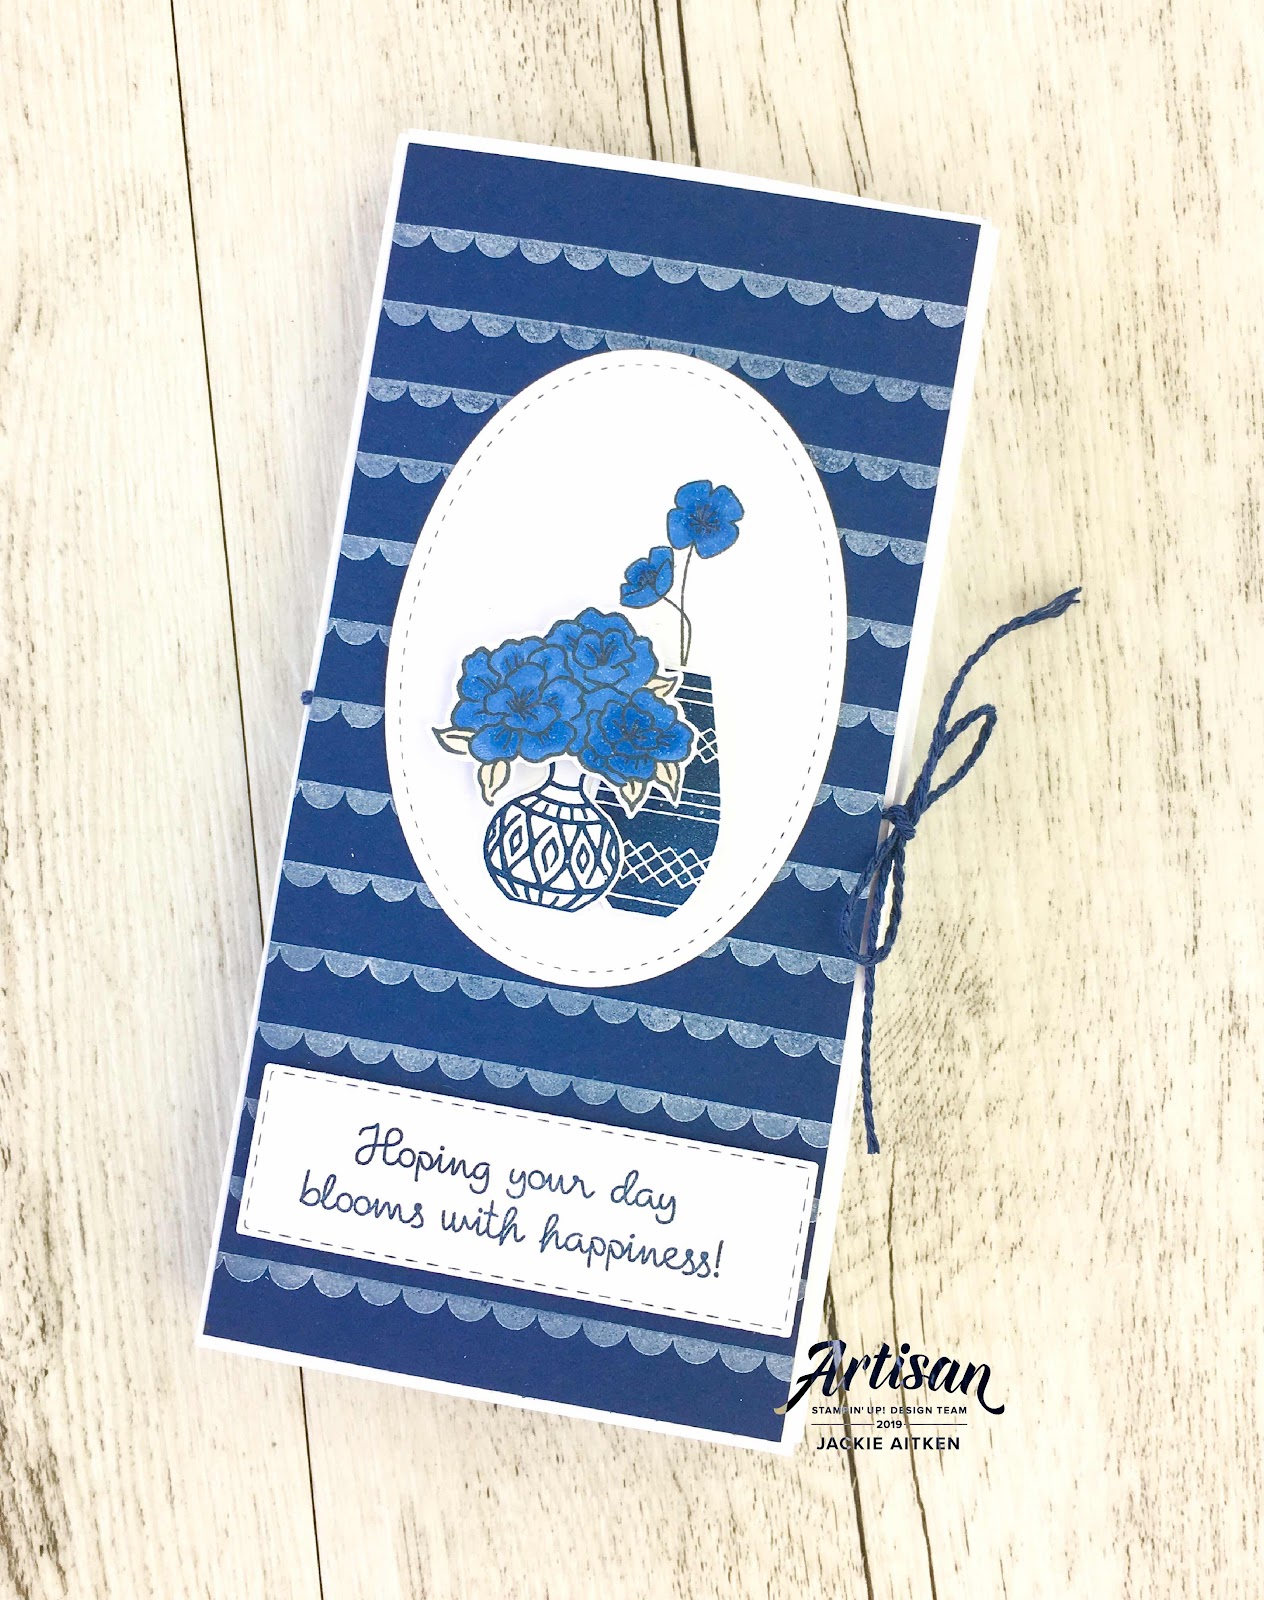
With all the measuring, cutting and scoring done this project focuses on decorating the cube and card that holds the cube, with stamps and ink. The card front has been created using the scalloped border image, stamped repetitively with White Craft Ink onto Night of Navy Card stock. Before adhering the stamped panel to the card base, wrap some ribbon or bakers twine around the card - this will help keep the card closed when the cube is inside.


The vases and sentiment have been stamped in Night of Navy ink with the floral images coloured using Stampin' Blends. All images have been fussy cut before adhering to the Stitched Oval die cut.

The cube has been kept fairly simple with all four sides lined with Night of Navy card stock and then decorated with heat embossed vases, stamped and fussy cut floral images and stamped sentiments. As tempting as it was to add layers and embellishments, remember to allow enough room for the cube to fit inside the card.


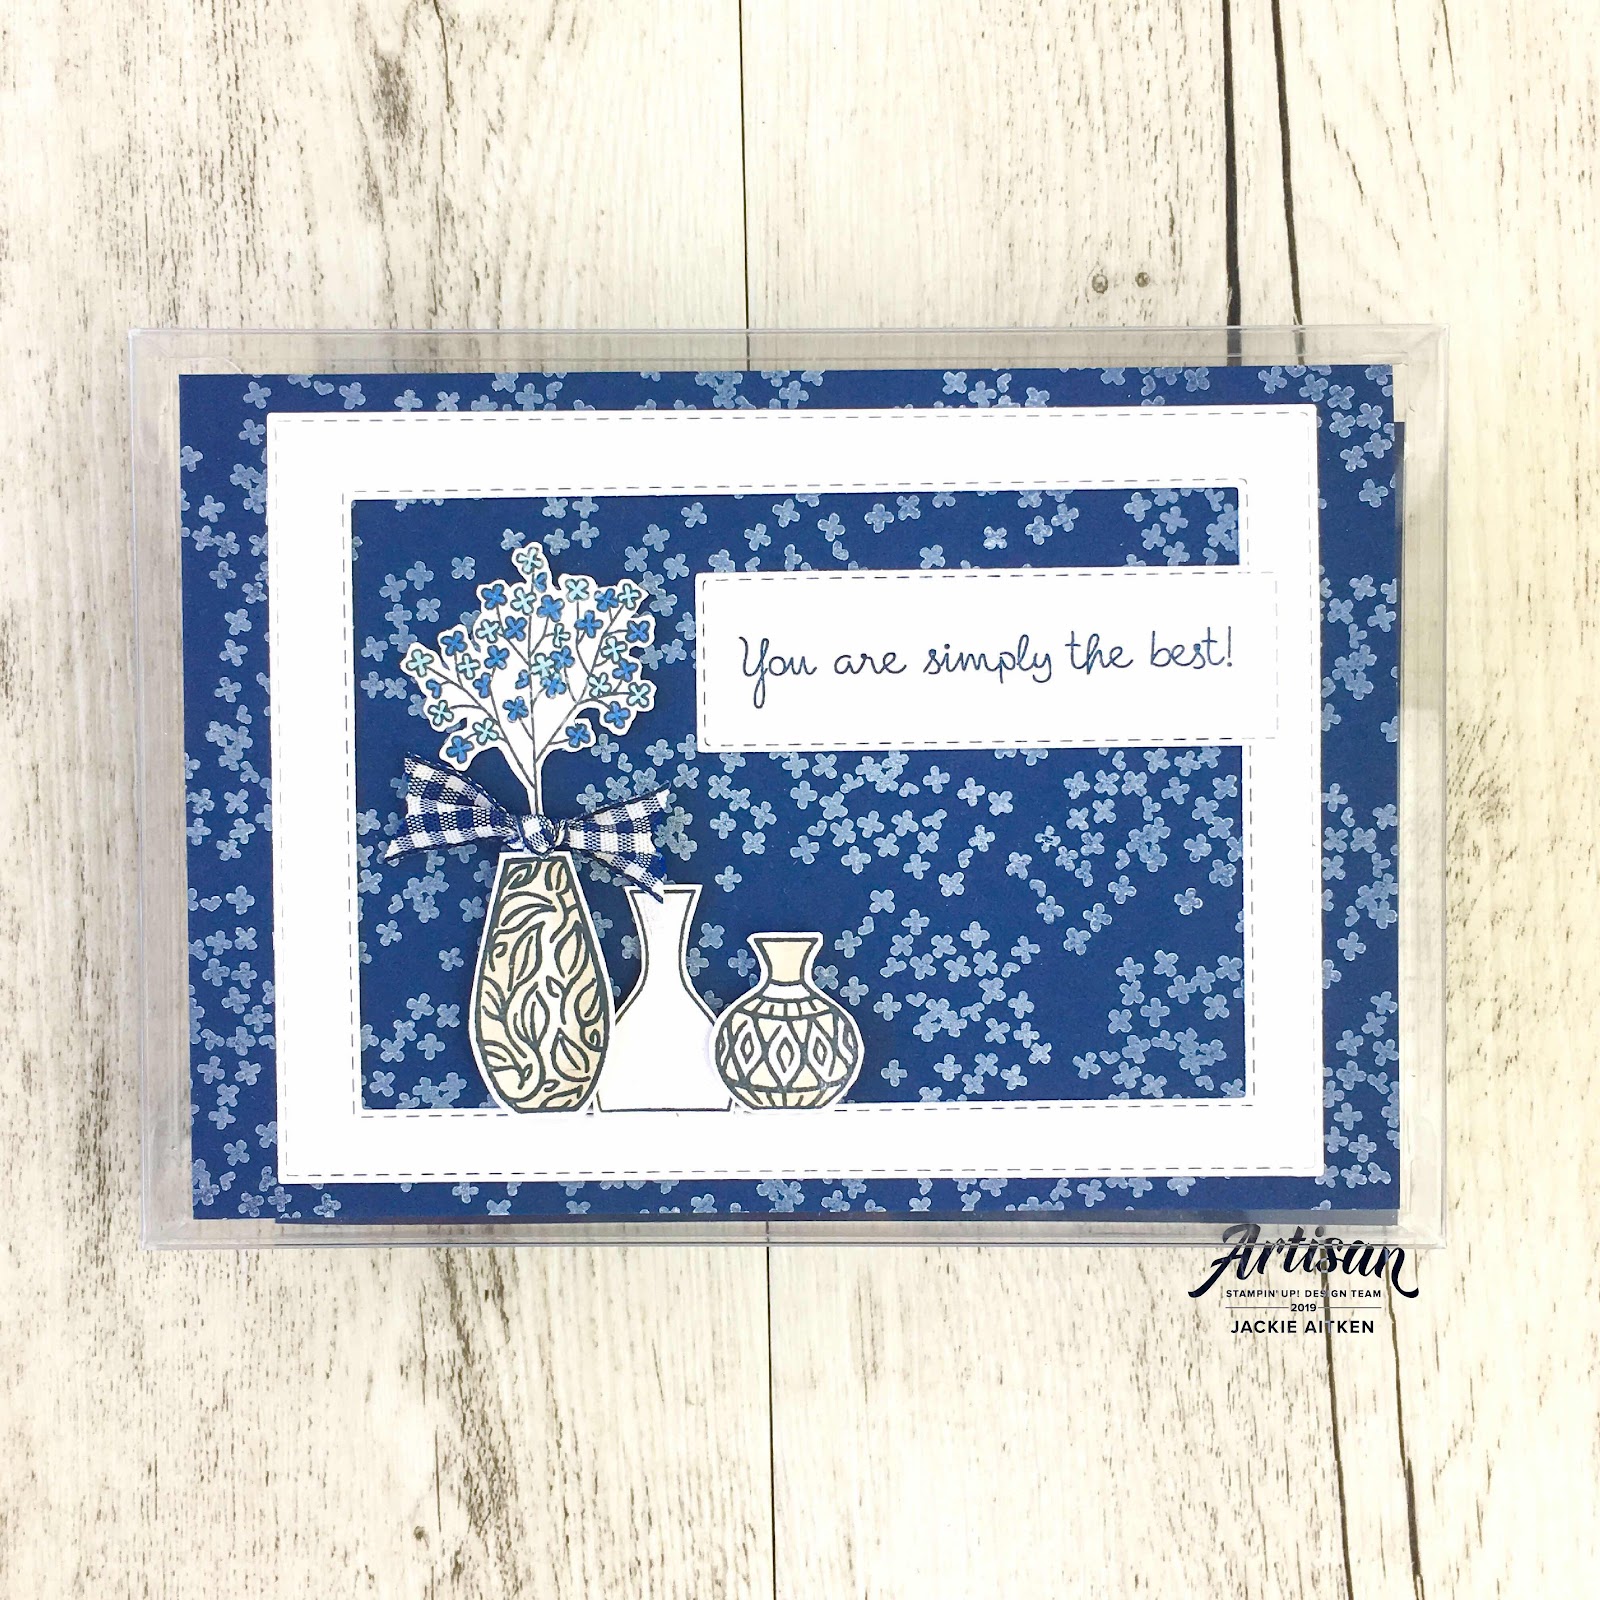
Up next is the decorated Acetate Box. These Card Boxes are perfect to fill with handmade cards for gifting to friends and family.  You could omit the box and use the design as another card creation.


The Night of Navy card stock has been stamped repetitively with white craft ink. A frame has been created using the Rectangle Stitched Dies with a few fussy cut stamped images applied to the bottom edge of the frame with dimensionals.


The acetate box contains three cards and coordinating envelopes.


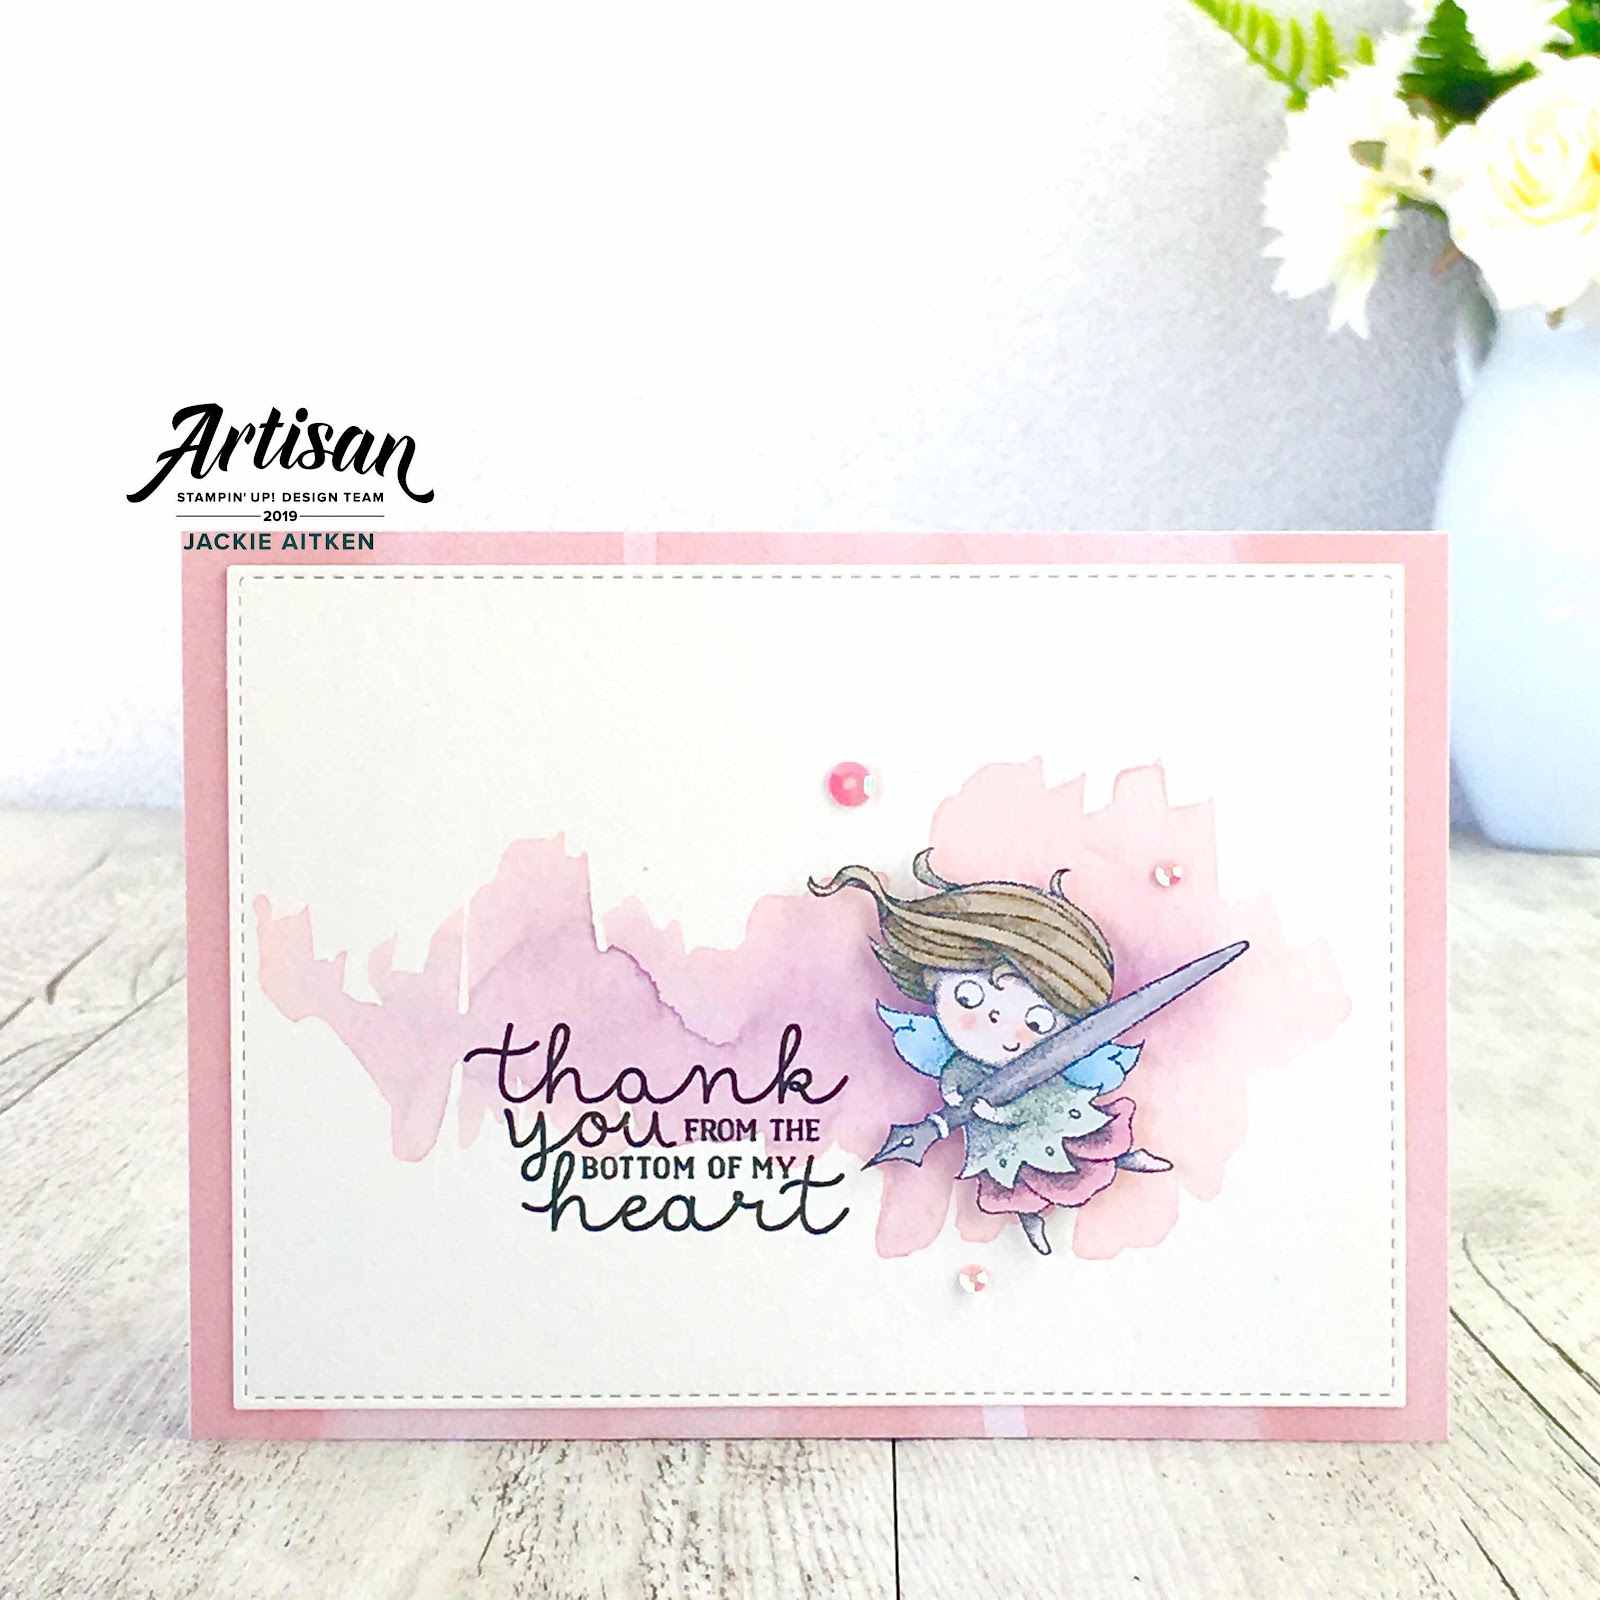
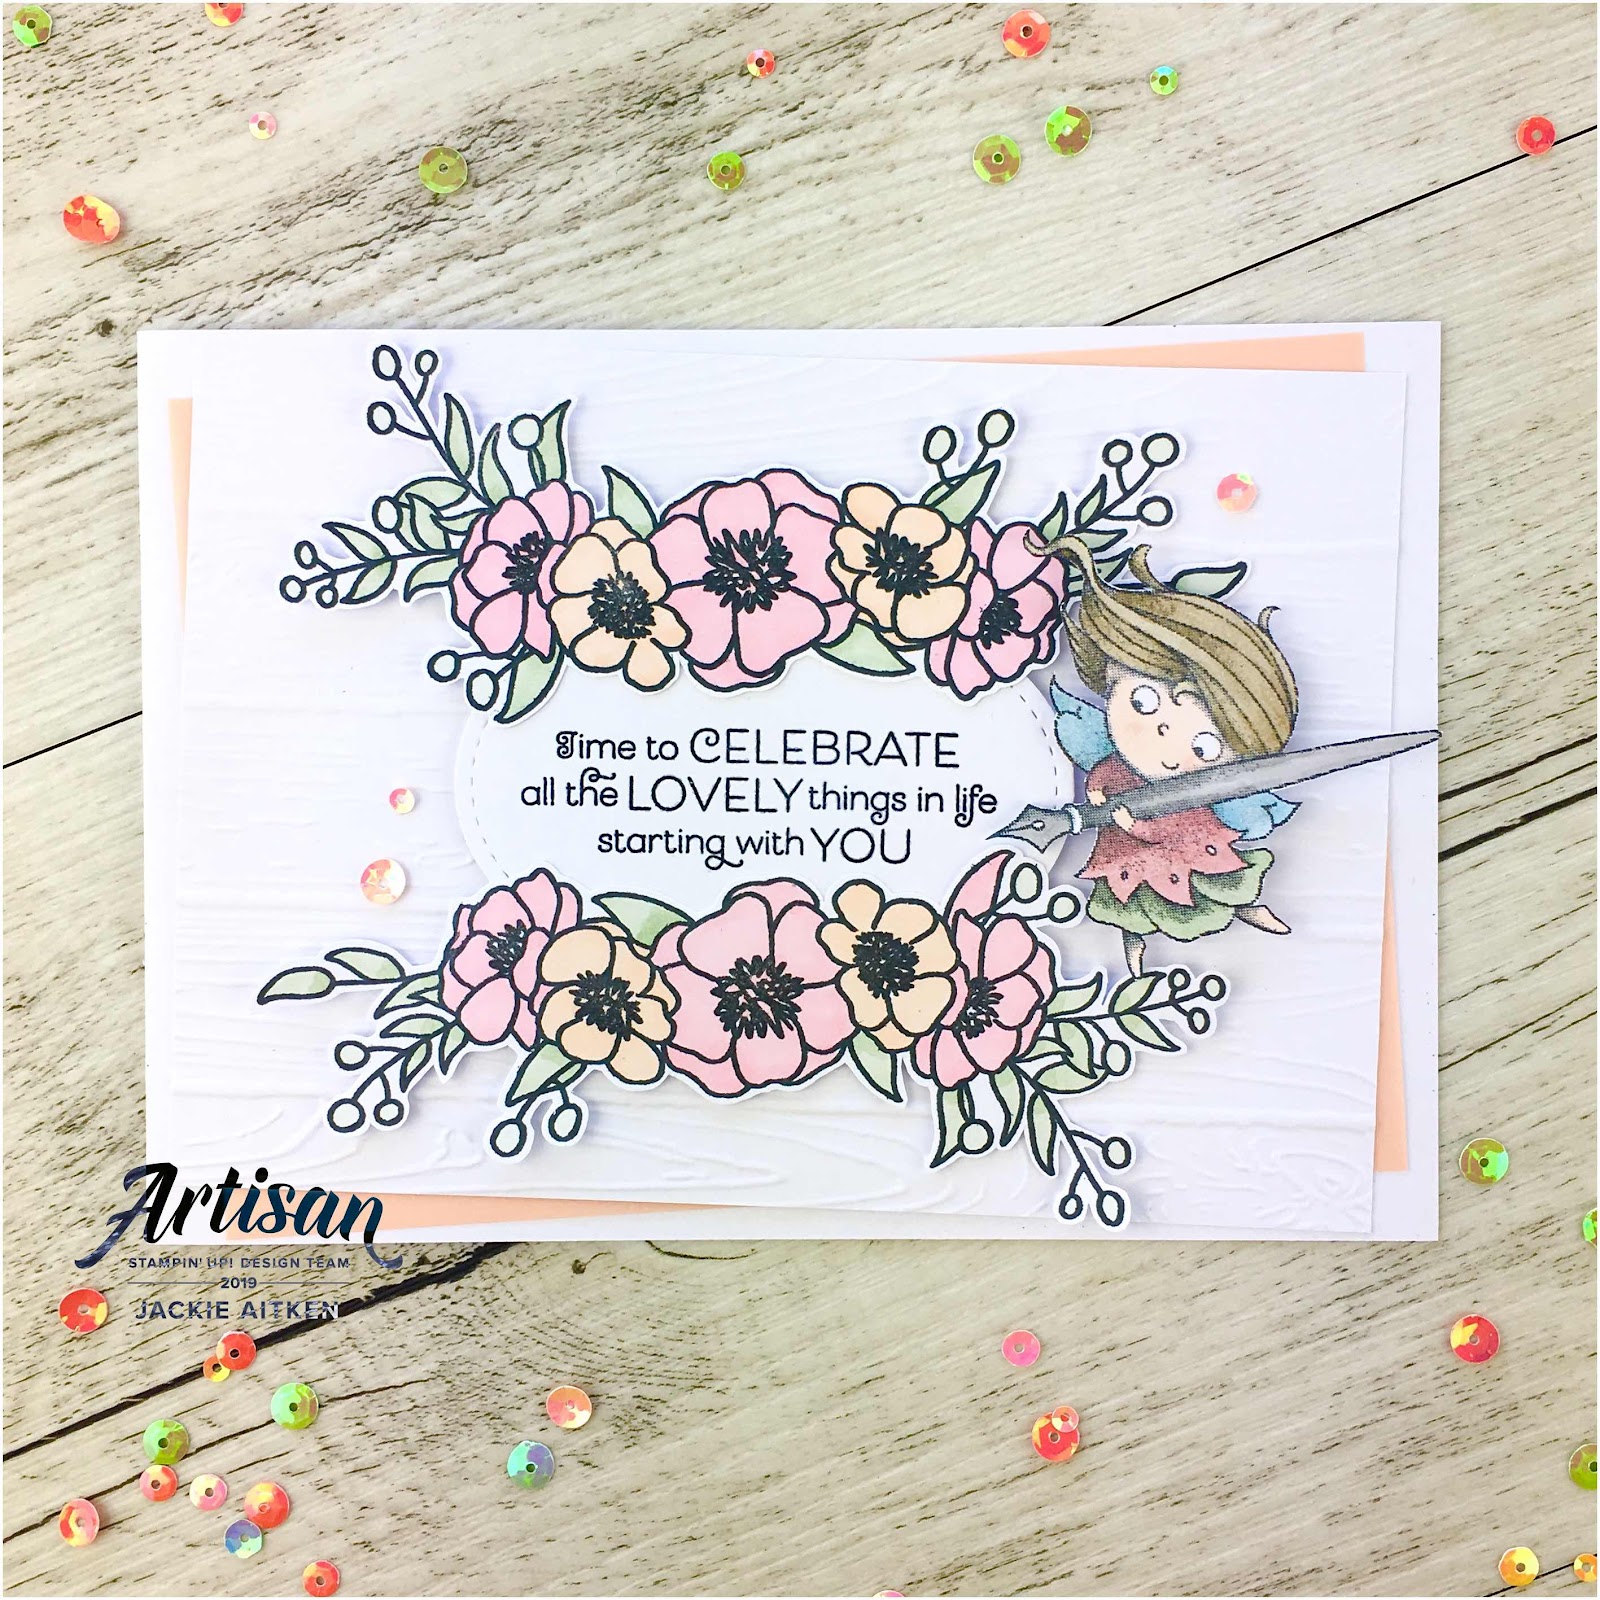
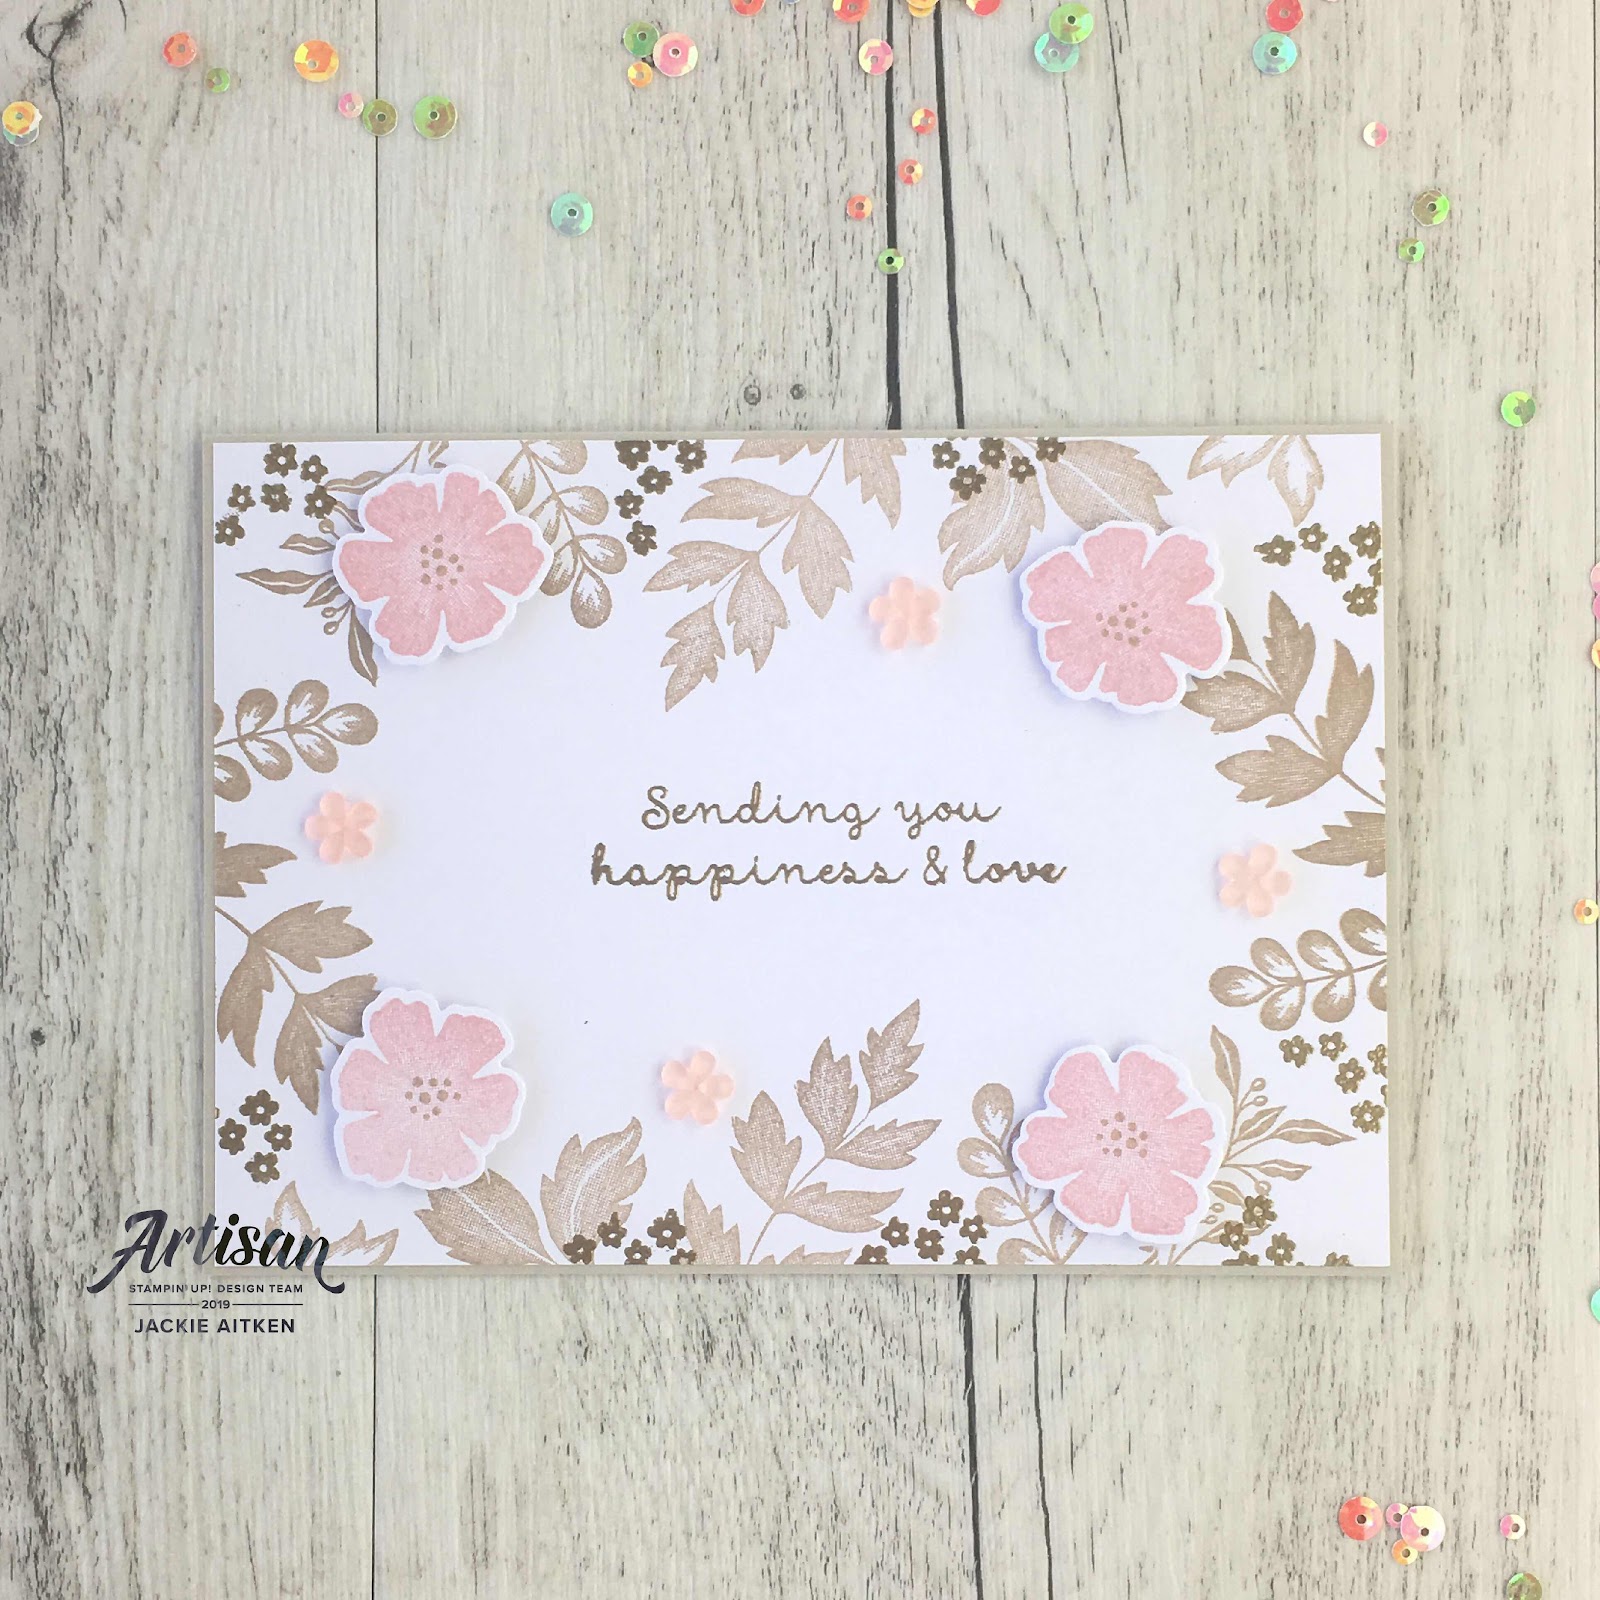
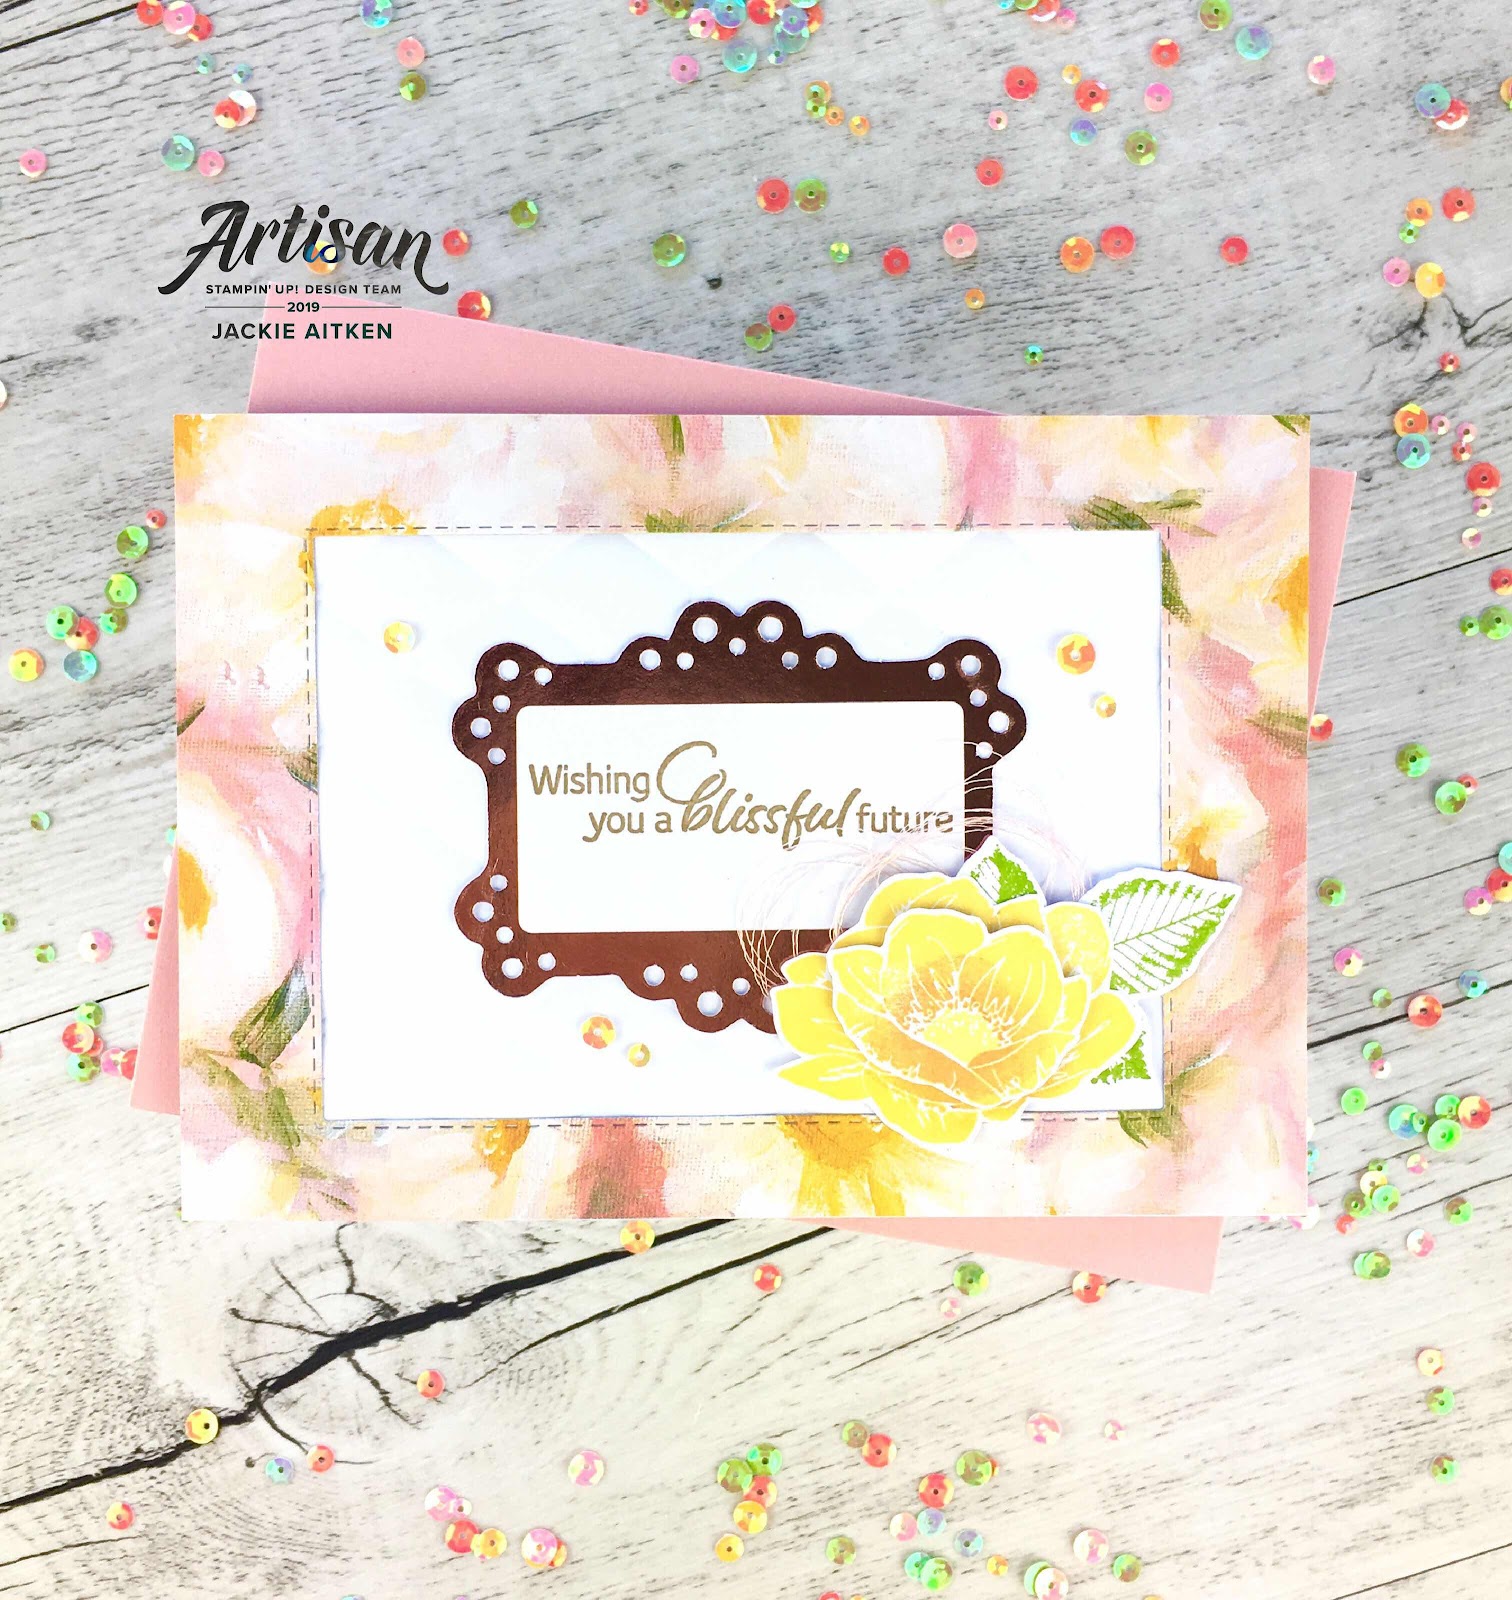
The first card is a clean and simple beauty which uses the Tufted Embossing Folder for the Night of Navy card front. A simple stamped greeting has been die cut using the Oval Stitched Framelit and the fussy cut stamped images adhered with dimensionals.

Handy Tip - Die cut the Oval shape from the Whisper White layer before adhering to card base. Use die cut for sentiment on the front.


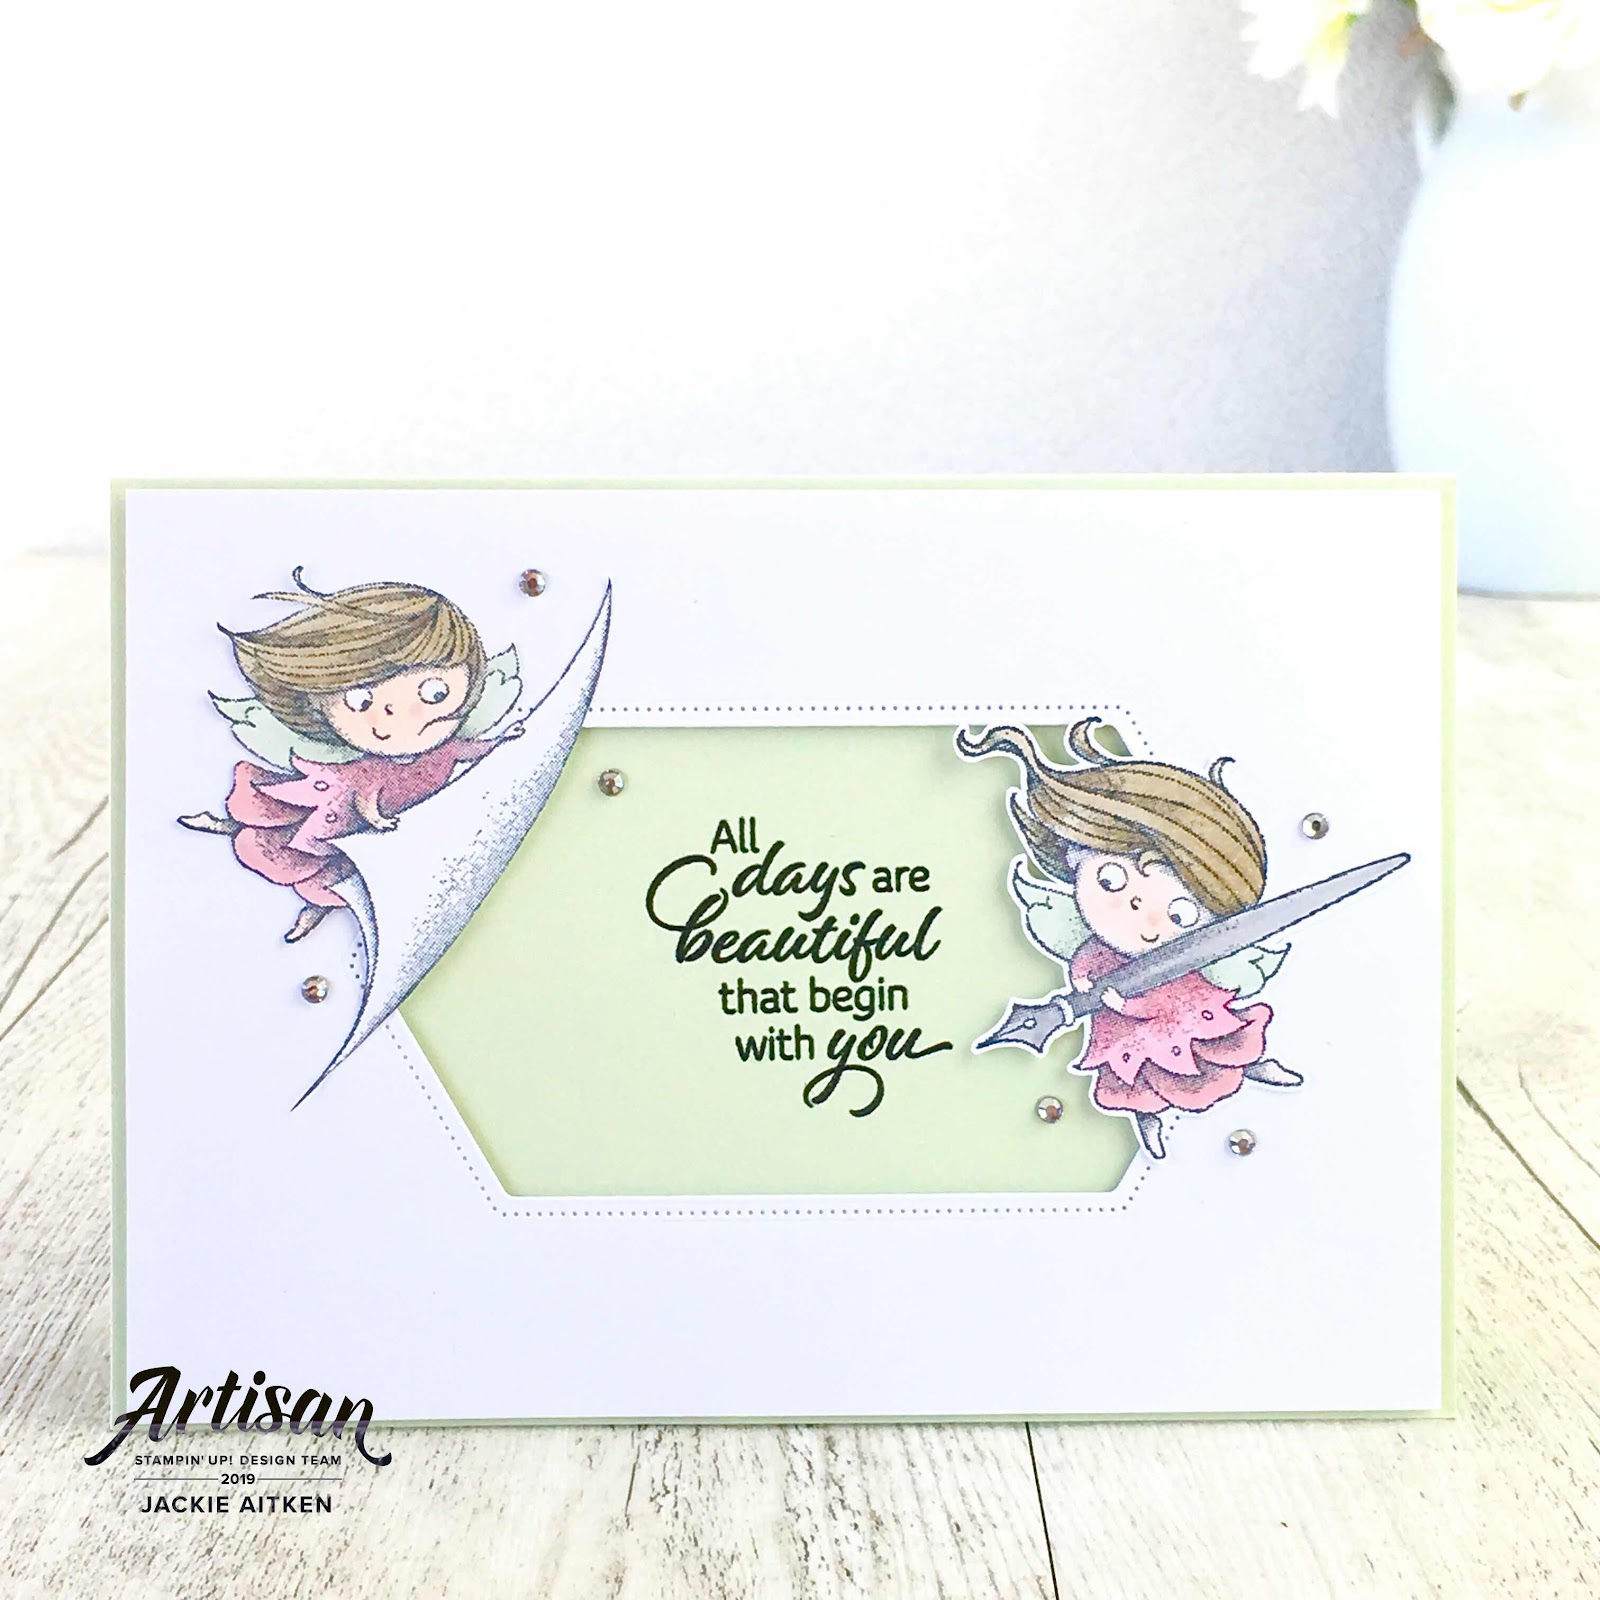
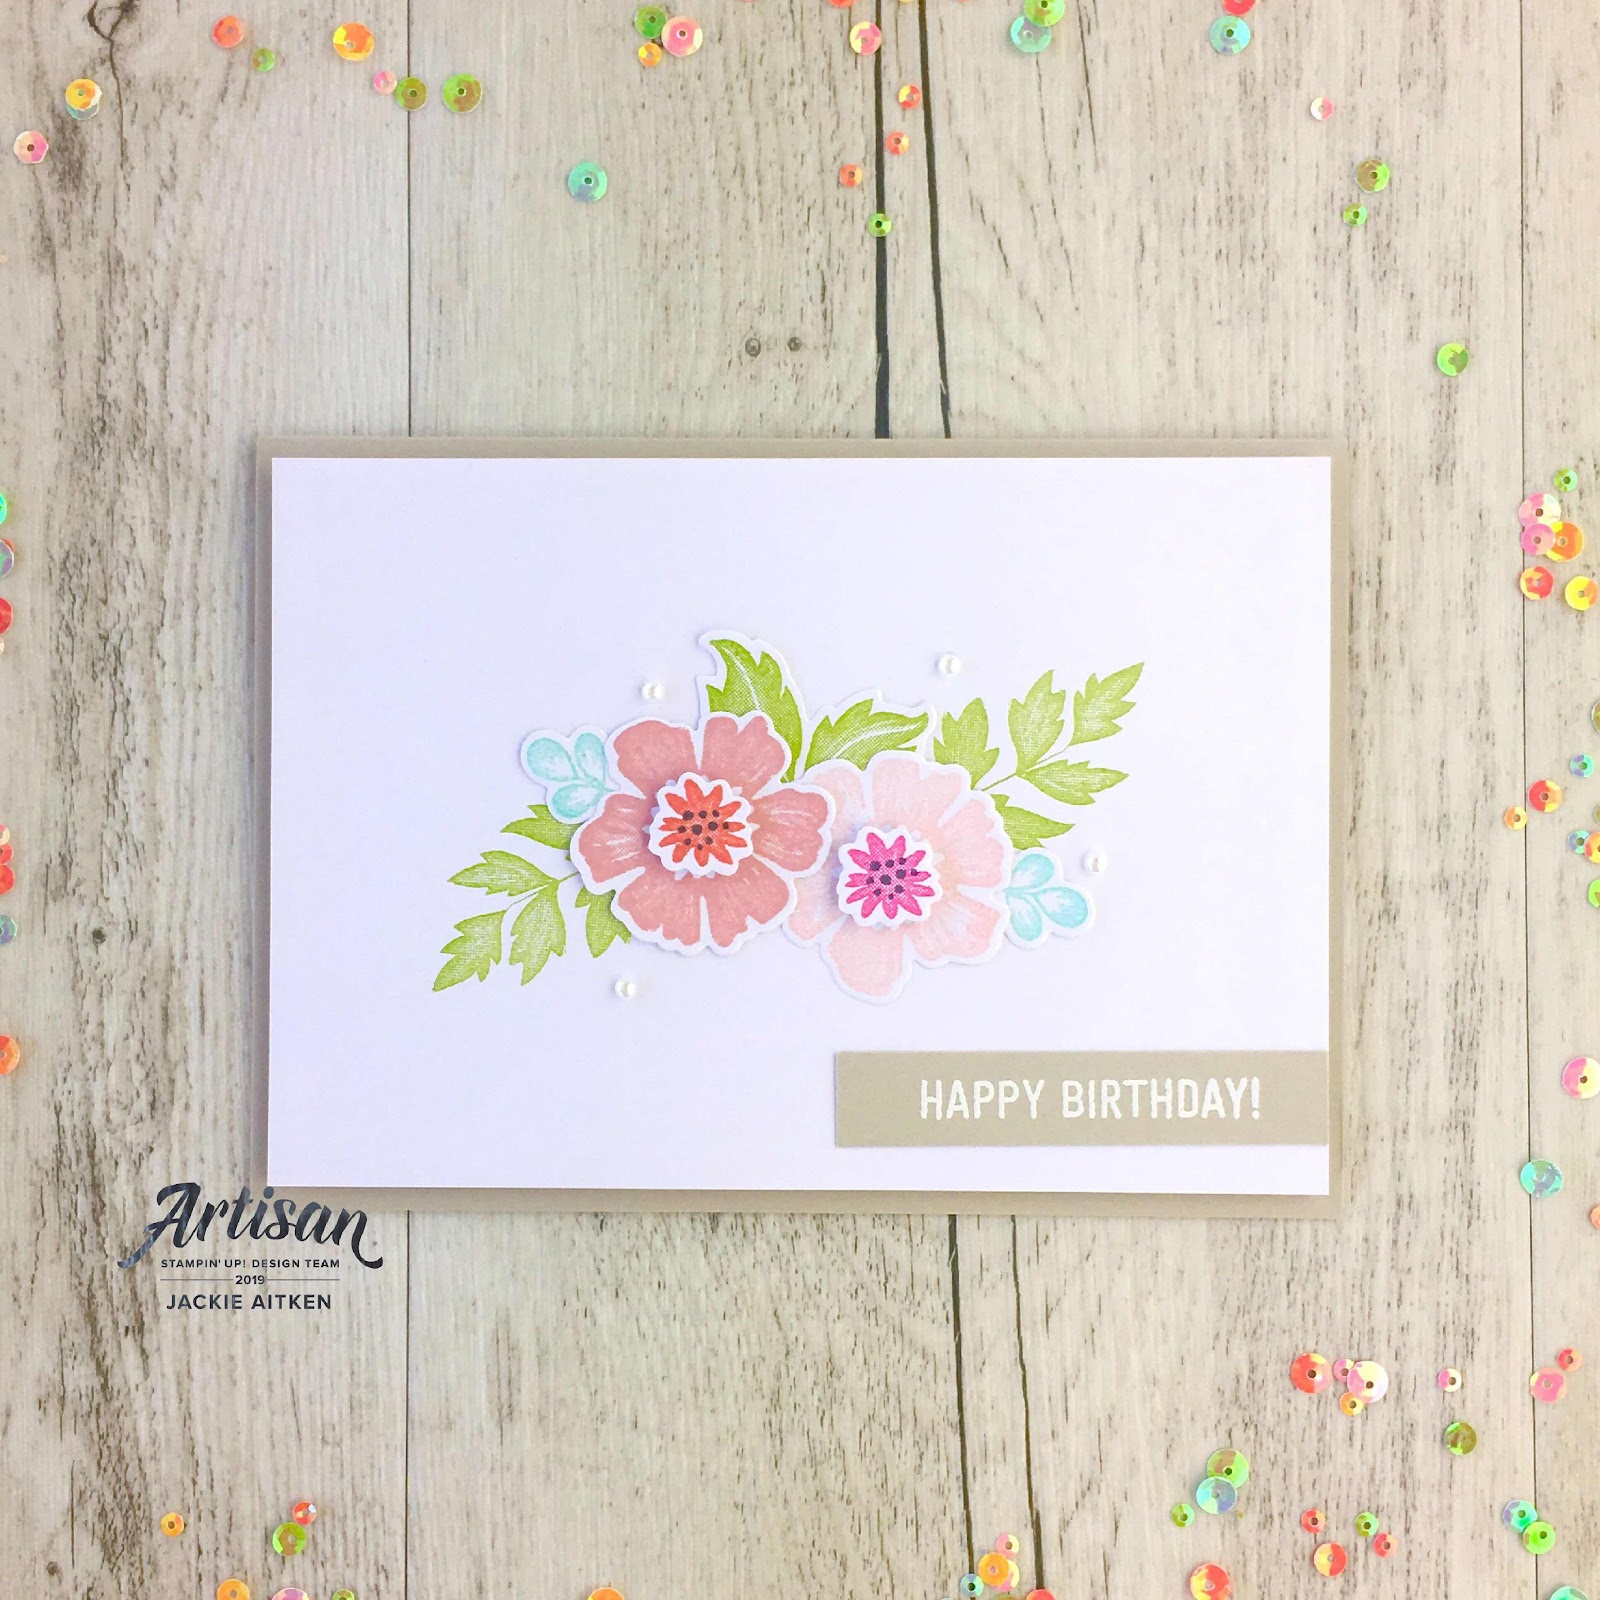
For the second card use the paper saving hint shown above to cut a rectangle from the centre of the Night of Navy Card front before adhering to the base. The Whisper White rectangle you apply next will cover the missing panel. 

Place the three little stamps onto one block and with White Craft Ink, stamp the die cut panel made in the step above and adhere to the Whisper White layer. Fussy cut images and sentiment have been added with Dimensionals over a die cut piece of vellum.


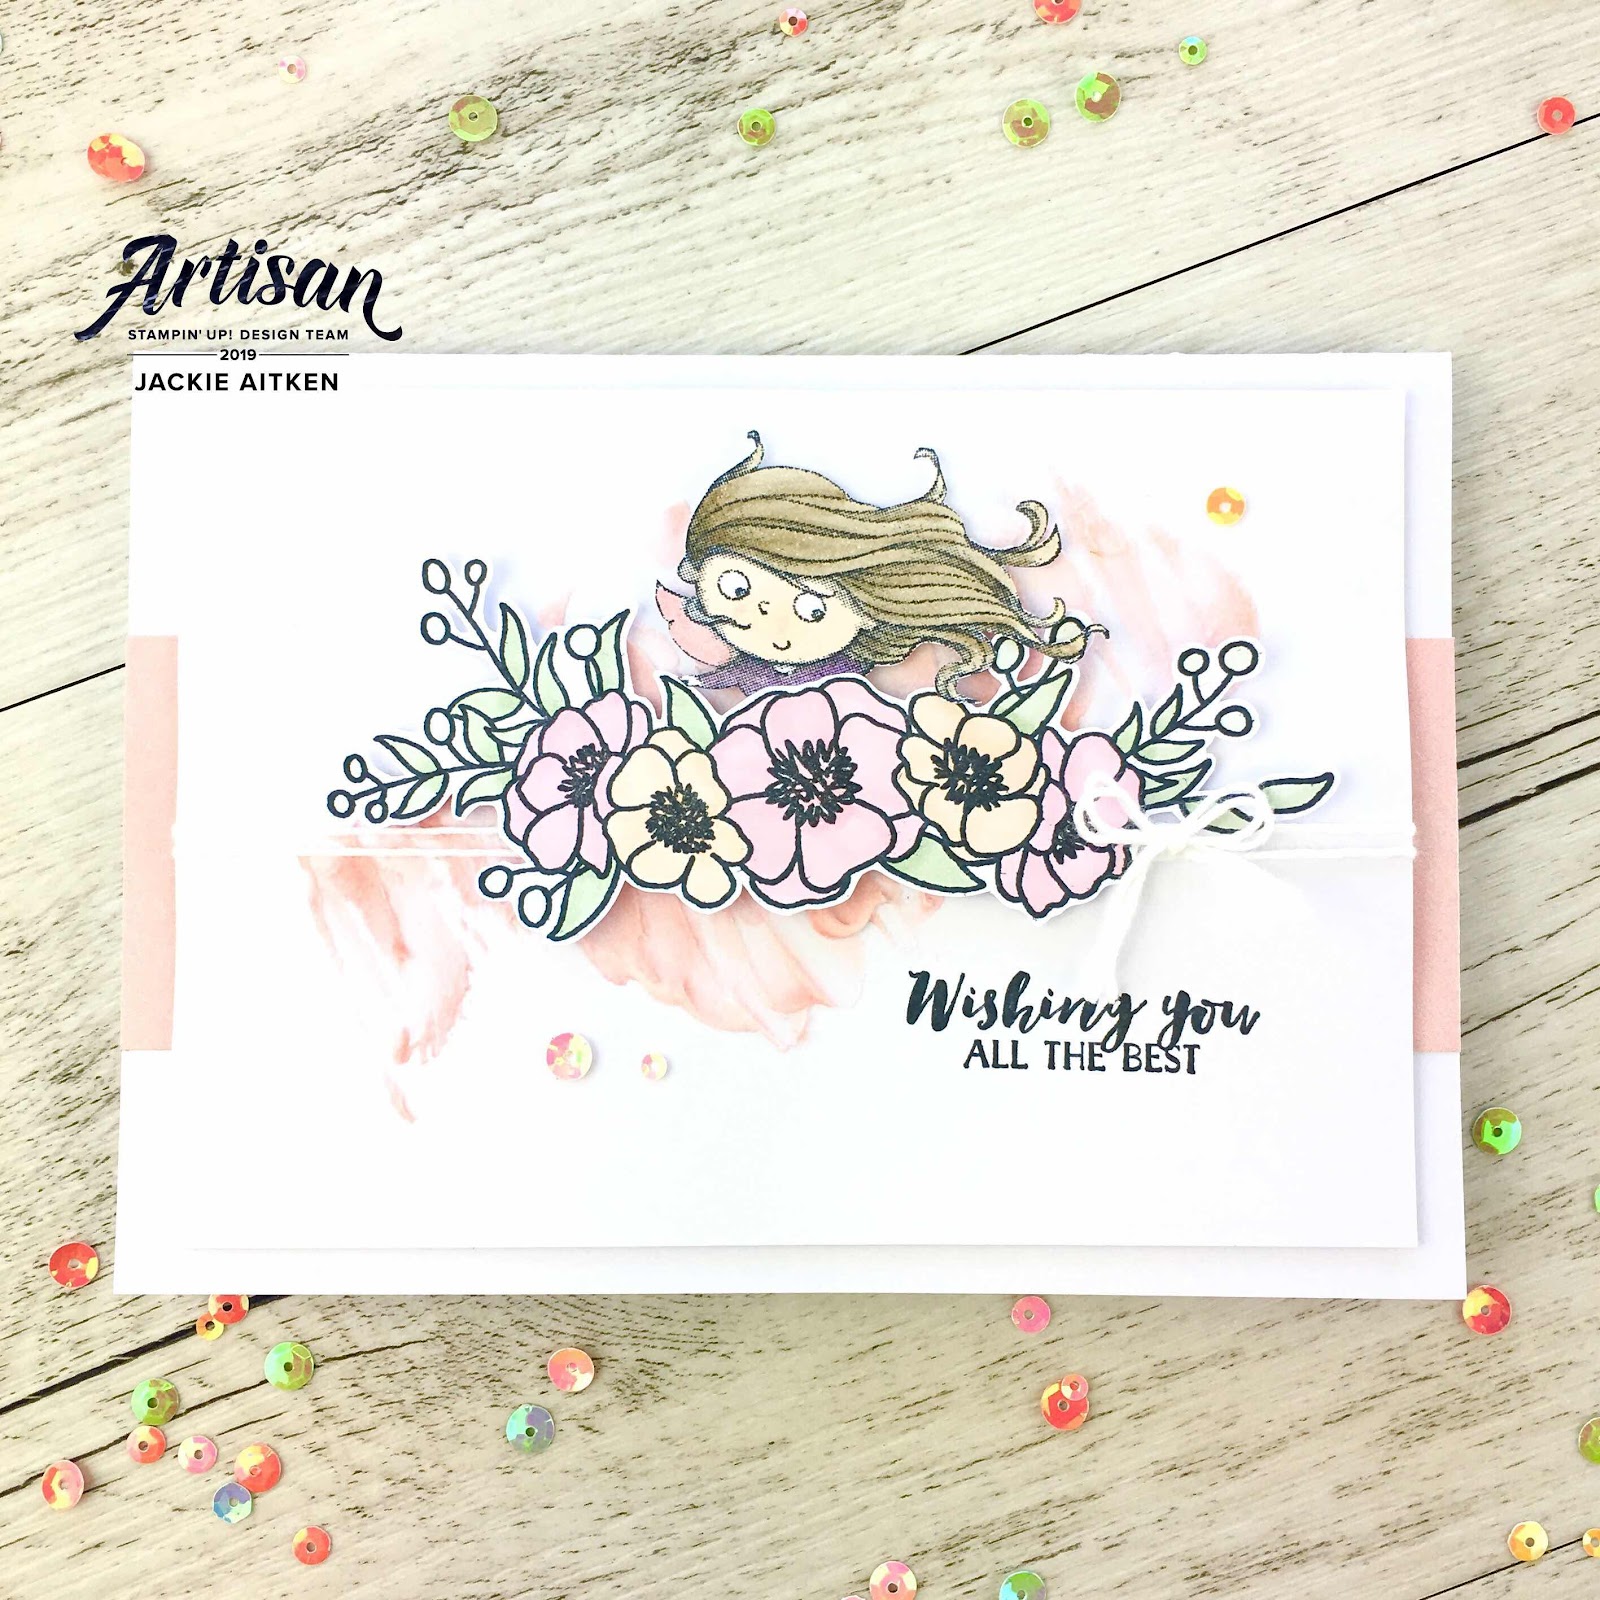
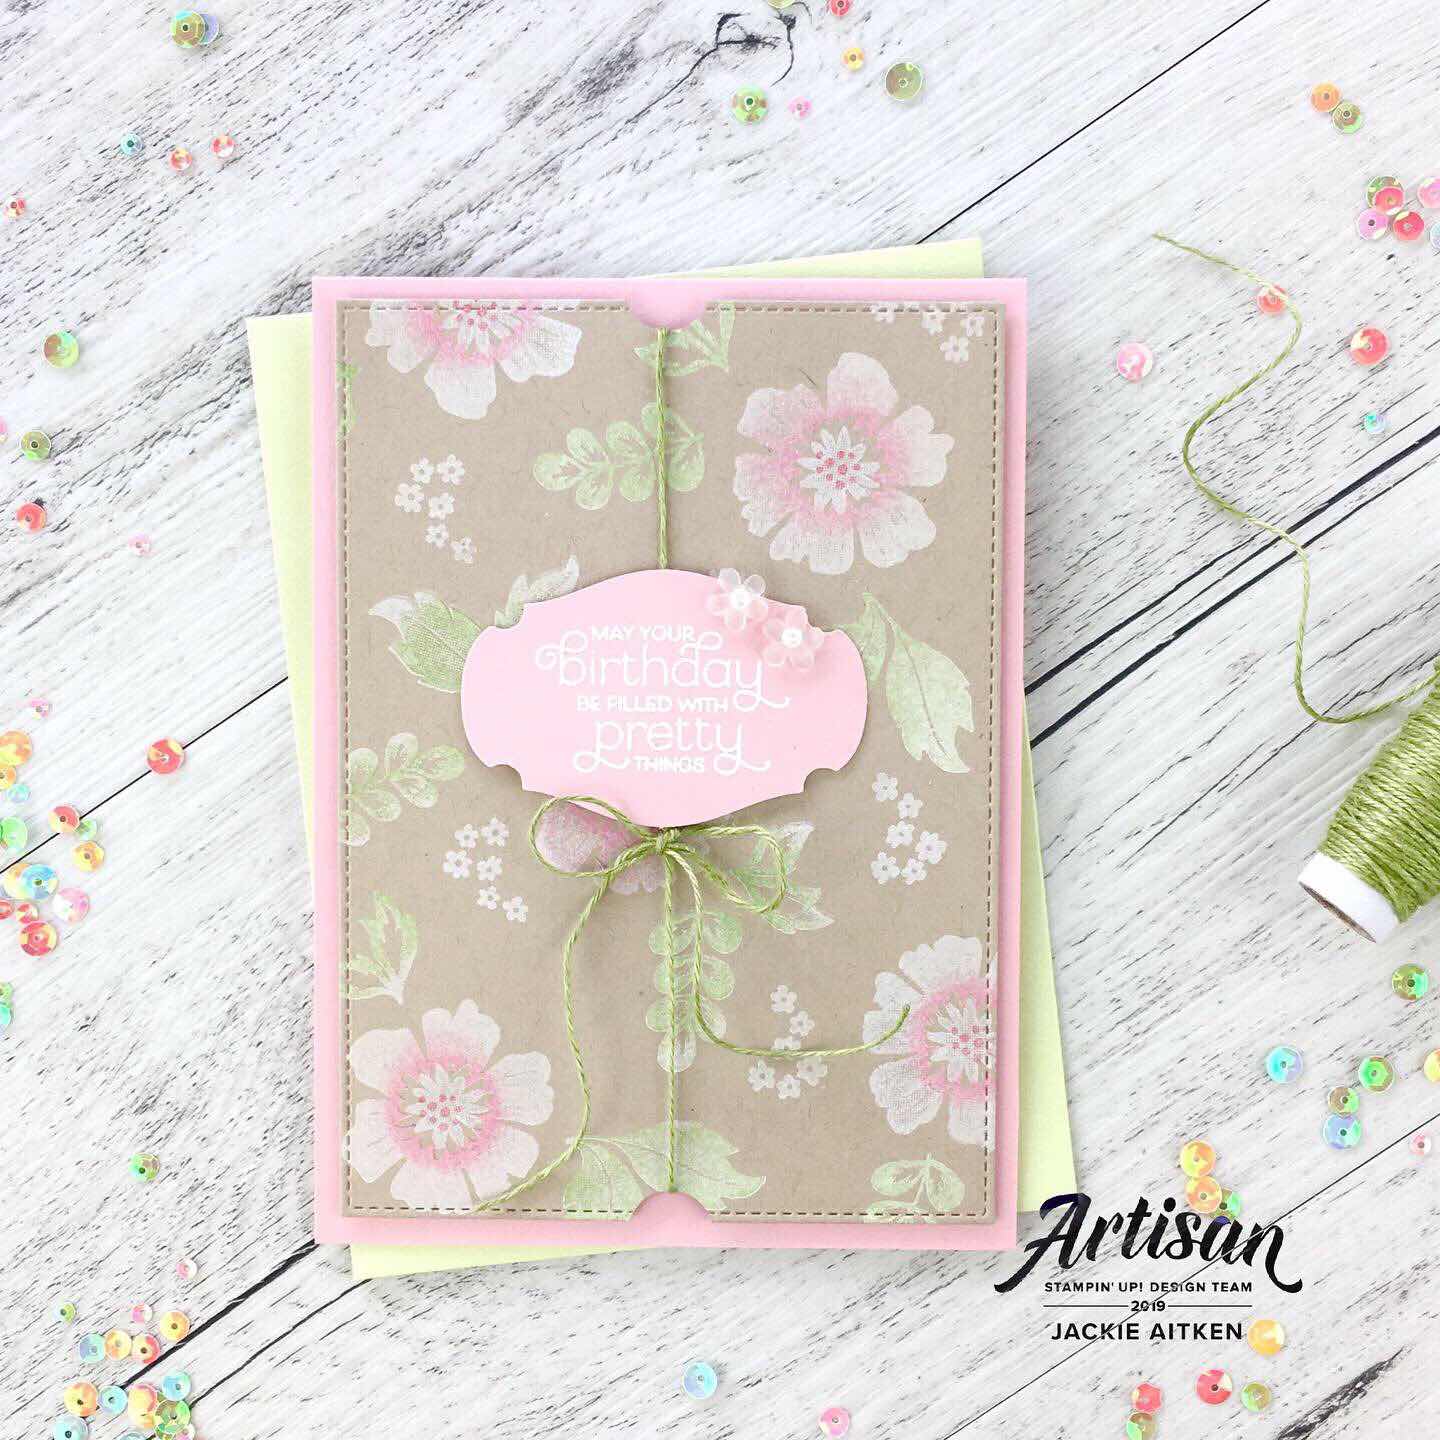
The third card is actually a little folder that contains a card. To create this card all you need is two card bases. Take one card base and remove roughly 2/3 of the card front to create the folder. The second card base will need trimming down slightly to fit perfectly into the folder. Decorate the side panel before adhering ribbon.

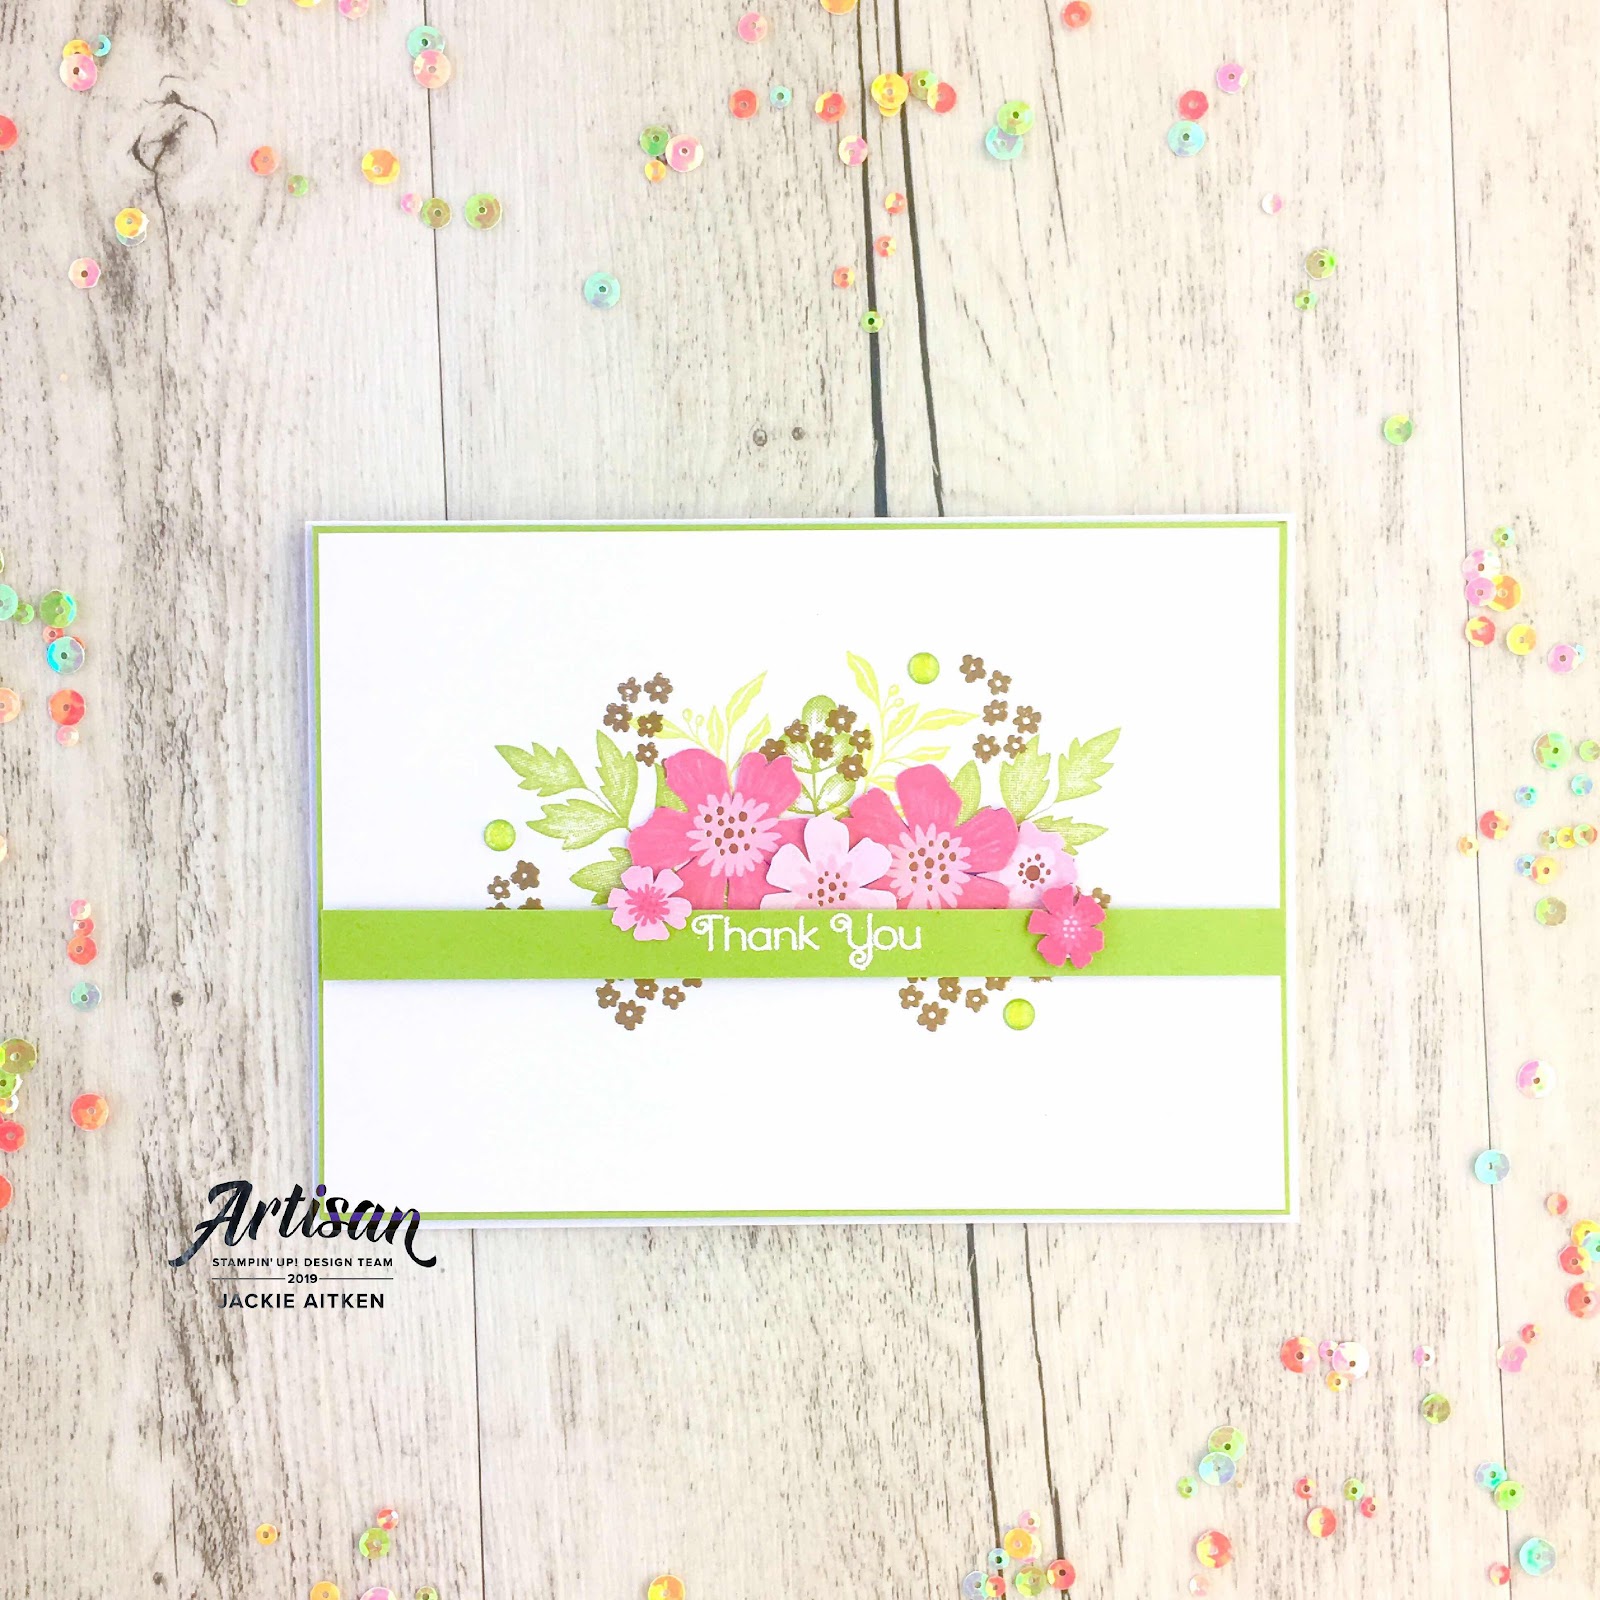
To create the floral paper, stamp the image in first and second generation Night of Navy Ink onto Whisper White card.


The card inside the Folder is designed to hold a gift card. Simply done by adhering a strip of card stock on three sides. A heat embossed vase and coloured/fussy cut stamped image has been added over the card strips.


If you have never made your own DSP, I hope you will give it a go. It really doesn't take a whole heap of supplies. Just a couple of colours in card stock, ink pads and blends with two amazing stamp sets, and the options are endless!

To complete the Acetate Card Box Gift Set, stamp plain white envelopes in Night of Navy ink with coordinating stamps.


Contact your local Stampin' Up! Demonstrator to see what type of events they hold. Attending a workshop or class is a fantastic way to connect with other crafty minded people in your community. Most Demonstrators provide everything needed to create amazing projects so don't think you need anything special to attend a class. You will learn fun and possibly new paper crafting techniques while making new friends and creative projects.

Be sure to follow the Blog Hop all the way through for even more amazing projects and class/workshop ideas. Up next in the Artisan Design Team Blog Hop is Jennifer Picard.


Artisan Design Team Blog Roll

 Jackie Aitken - that's Me :)


Thanks so much for stopping by today. We appreicate the time you have invested to visit our blogs and hope you have enjoyed what we have to share.  All the items used to create the projects in today's post can be found in the product list below.

Product List
Whisper White Craft Stampin' Pad
[101731]
$14.00