SOCIAL MEDIA

Thursday 31 August 2017

Just Add Ink #375 - Sketch


Hello Crafty Friends,

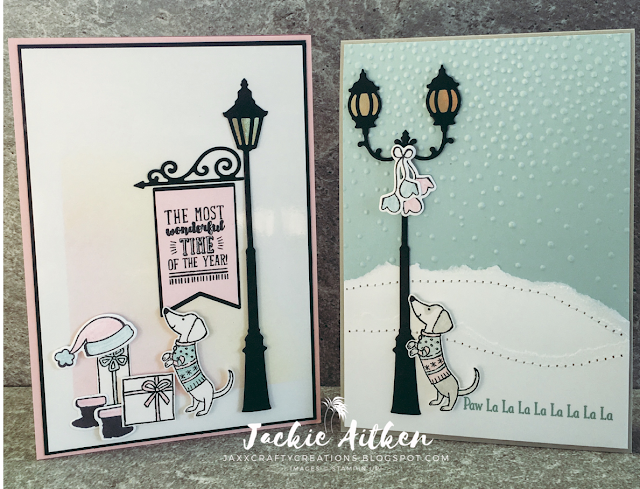
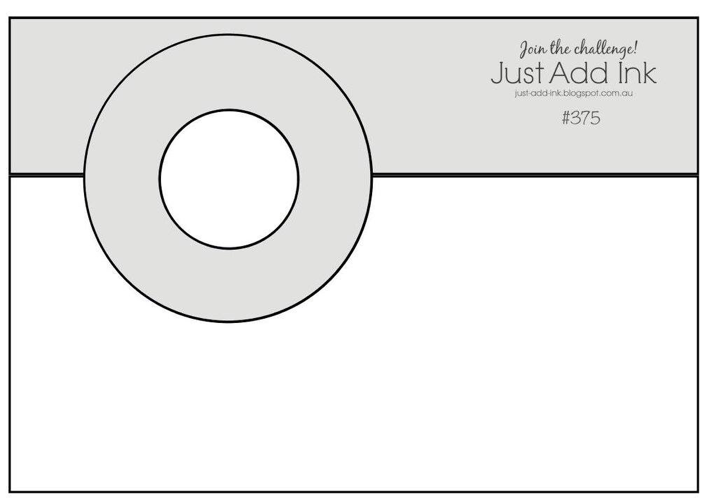
Hope your Friday is treating you well. It's challenge time over at Just Add Ink and Kim has challenged us with a sketch.  I loved the simplicity of this sketch,  I decided to rotate the orientation, to create two tent fold cards.

http://just-add-ink.blogspot.com/2017/09/just-add-ink-375sketch.html

The first card has a glossy white card front. Using a stencil from the Party Pattern Decorative Masks, I sponged Black Momento Ink, lighting the saturation gradually towards the centre. Then I removed the mask and lightly sponged Flirty Flamingo and Daffodil Delight inks.


The card front was adhered to a layer of black card before adhering to the Flirty Flamingo card base. A vellum circle was cut using the Stitched Shapes and glued to the card front with a dab of Tombow.

The sentiment from Birthday Delivery was white heat embossed on black card and a layer of silver glimmer card was attached to the bottom.  The flower and leaves were die cut using the Eclectic Layers Thinlits and adhered to the vellum circle.


The inside of the flower is also glossy card with Flirty Flamingo & Melon Mambo inks applied with an aqua painter.
 
The second card uses the large flower and a leaf from the Falling Flowers stamp set. I stamped the images in Archival Black onto Shimmery White card and water coloured with Powder Pink, Blushing Bride, Wild Wasabi and Daffodil Delight. The centre image was stamped first and then masked and repeated to create the panel in the sketch.
 

I used the Circle Stitched Shapes to cut the two circles and raised with dimensionals for the outside ring and foam strip for the inside ring. The sentiment from Teeny Tiny Sentiments, was white heat embossed on black card and punched using the window word punch (now retired)


As always, the amazing Design Team have created and shared some stunning projects using this weeks challenge sketch, be sure to check them out here. Why not join us and play along.

Until next time, stay awesome
 
Wednesday 30 August 2017

Brightly Lit Lamppost & Ready For Christmas

Hello Crafty Friends,

Hope you are having a fabulous day. It's been a busy day in the crafting studio. I have had over ten cards "in progress", spread over my counter for weeks. I finally ran out of room to start a new project, so was "forced" to finally put these cards together. 

I love Christmas and love Christmas cards in non-traditional red and greens. My Christmas tree is white. We decorate it in bright, bold colours like Hot Pink, Turquoise and Lime Green.  It probably has something to do with Christmas being in the middle of summer here in Australia. Its Beach and BBQ time, making it hard to relate to a wintery Christmas with snow, snowflakes, sweaters and scarves. But I do dream of having one white Christmas.

stampin up christmas cards, brightly lit bundle, ready for christmas


Today's cards use the Lamppost Thinlit from the new Brightly Lit Bundle. I have also used the little sausage dog and presents from the new Ready for Christmas stamp set, sentiment from Santa Paws, hat, boot and mittens from the Santa Suit Bundle.


stampin up, ready for christmas, brightly lit bundle, christmas cards

Starting with a piece of Glossy White card stock, I masked the bottom and left hand side to create a frame, then sponged some Powder Pink and Daffodil Delight. The little dog, presents, boots and Santa hat were stamped in Black Momento ink and coloured using the Subtle's Stampin' Write Markers.

The lamppost was die cut in black card and the lantern backed with gold foil. The sentiment was stamped onto Powder Pink card and cut down slightly so it had a border when adhered to the die cut banner.


The second card has a Sahara Sand card base with a layer of Soft Sky. The Soft Sky card has been embossed with the Softy Falling EF. The snow banks were made by tearing some whisper white card  and then sewn to the embossed Soft Sky card. I then adhered this to the card base with tombow.

stampin up, brightly lit, ready for christmas, christmas card

I freakin' love this sentiment! Every time I stamp it, I sing it lol.  The lamppost was again cut from black card and backed with gold foil. The little dog was adhered with mini dimensionals.

The mittens were made using the Santa Suit Bundle. Two sets of mittens were cut and coloured using Stampin' Write Markers and adhered with a mini dimensional.
Thanks for visiting my blog today. Until next time, stay crafty


Tuesday 29 August 2017

Joy of Sets #005 - Letter J


Hello Crafty Friends

Its challenge time over at Joy of Sets. For this fortnights challenge we are using the Letter J. Pull out a stamp set , current or retired, with the letter J in its Title and play along with us.

https://joyofsetschallenge.blogspot.com.au/2017/08/jos-005-letter-j.html

I chose to make a Piano themed card using the Jar of Love stamp set, minus the Jar. I love the flowers in the Jar of Love bundle, they are my go to for any small floral images that don't require colouring or fussy cutting.  Do you have musician friends? If so these cards are perfect. They are relatively easy to make and also a great way to showcase the new Music Script background stamp.


The Piano card uses the Floral images from Jar of Love and Tranquil Tulips. I wanted a pink toned Floral arrangement laying across the top of Piano. I also wanted my lid to open leaving the keys on what is the inside of the card.


This type of card is made using one full sheet of A4 card. I scored the long side at 10.5cm and the short side at 14.85cm. Then cut away one square or essentially what is one card front from a sheet of A4.


Next I folded it into place and cut a curved edged to the card front. This should open sideways to reveal the music sheet underneath. Then u lift the music sheet (tent fold) to reveal the card inner and keyboard.
 
The sentiments from Colourful Seasons were heat embossed in White on the front and stamped in Black Momento on the inside. The keys have been made using the Window Words punch (now retired)
 

The Guitar is very basic and easy to make.  Using Layering Circles to make the cuts in the card front and the border around the outside. 

I have stamped the Music Sheet Background Stamp onto whisper white and adhered behind the cutout with tombow. The strings are metallic gold thread. The bottom bar was made using the retired window words punch. The sentiment from Pocketful of Sunshine was heat embossed in white on black card and adhered with dimensionals.

 
The Joy of Sets Design Team have created some inspirational cards, using retired and current stamp sets, why not pull out a stamp set with the letter J in its title and come play along with us.

Until next time, stay crafty & awesome


Thursday 24 August 2017

Just Add Ink #374 - Inspiration


Hello Crafty Friends,

Hope you are having a fabulous day.  It's challenge time over at Just Add Ink and this week we have an Inspiration Challenge. When I saw the inspiration picture I was instantly drawn to the texture and colour. I saw all the wood textures and the white tones with slight blue hues, and the silver spoon!

http://just-add-ink.blogspot.com/2017/08/just-add-ink-374inspiration.html


My daughter loves white cards and I have made this one to go with a gift she is about to receive for her amazing achievement in Year 12 Ancient History.

 
I pulled out my favourite stamp set - Birthday Blooms, and heat embossed the large floral image on Vellum with white powder. I fussy cut the image and flipped it over and sponged some Soft Sky.


A stitched circle of whisper white was adhered to the whisper white card front then cut on the right hand edge - enough room to allow a strip of silver glimmer paper to show when adhered to the card base.


Vellum leaves were punched and adhered using tombow and a sponge, then the card front was embossed using the Wood Grain Embossing Folder (retired).


The vellum flower was attached to the circle on the card front and the congratulations sentiment from Floral Phrases - stamped in Soft Sky, was slightly curled and adhered over a nest of silver metallic thread. I added a few white sequins and then adhered the card front to the card base with silver glimmer strip on the right hand side.
 
The Design Team over at Just Add Ink have created some amazing projects for this inspiration challenge, be sure to check them out. We would love for you to join us and play along.
 
Until next time, stay awesome


Monday 21 August 2017

Santa Sleigh Accident - Santa Suit Bundle

Hello Crafty Friends,

Hope your day is going great. Today's card uses two new bundles from the 2017 Holiday Catalogue - Brightly Lit and Santa's Suit.

I saw a fun card last year with the Sleigh bundle and Foxy Friends bundle crashing into a tree. So thought I'd do my version of "Santa should have gone to Specsavers" card. Specsavers is a chain of Optometrists here in Australia, NZ and I think possibly the UK too.
stampin up, santa's sleigh bundle, santa's suit bundle, brightly lit, christmas card, funny card


To fit all the die cuts on without squashing everything up I decided to make a square 6"x6" card. The card base is Sahara Sand, to which a layer of Real Red card was added. 

The Whisper White card front was stamped with the sentiment from Christmas in the Making, inked in Black Momento. The card front was then embossed using the Softly Falling Embossing Folder.

The Brightly Lit Bundle Dies were used for the lamppost, the Santa's Suit Bundle for Santa and his clothing and the Santa's Sleigh Bundle for the Sleigh. 
You could crash Santa's Sleigh into many objects and change out the sentiment to some fun, crazy things like my hubby suggested - Go Home Santa, you're drunk! or ....uh oh someone spiked Santa's eggnog! Lol boozy Santa, lucky he is crashing into soft snow and no other innocent bystanders were harmed in the production of this card.

Until next time, stay awesome 


Sunday 20 August 2017

Brightly Lit Bundle - Stampin Up - Christmas Card

Hello Crafty Friends,

A quick post to share a card I made using the Brightly Lit Bundle. As mentioned in an earlier post, I managed to make 8 cards in one session with this cute bundle. The dies are simple to work with and the stamps and sentiments are ever so adorable.


stampin up, brightly lit bundle, christmas card, gold and vanilla, handmade christmas


This card is very similar to the card I shared in an earlier post, (see here), this one has different DSP and shows a different lamppost and style of lantern. I have also added a sign using one of the sentiments.
On a black card base I added a layer of very vanilla card. Then a layer of the Bundle of Love DSP. The Lamppost, lanterns and banner were cut from black card, with the lanterns backed in gold foil. The sentiment was stamped on very vanilla card and cut down by hand so it had a black border when adhered to the die cut.


stampin up christmas card, brightly lit bundle, gold and vanilla, christmas in the making


The sentiment on the bottom of the card front is from the stamp set, Christmas in the Making, and was stamped in Black Momento Ink onto Very Vanilla card. Very Vanilla card was also used to make the curved stitched snow layers.
Using a circle from the Stitched Shapes Framelits, I cut a piece of vellum and placed it behind the lamppost for a light glow effect.


stampin up christmas card, brightly lit bundle, gold and vanilla, christmas cards


The reindeer from the Santa Sleigh bundle was cut from gold foil and adhered with dimensionals, amongst the snow covered ground. So many variations are possible with these dies, I have a fun one to share with you tomorrow.
Until next time, stay awesome


Stampin' Up! Brightly Lit Christmas Lamp Post Card

Hello Crafty Friends,

The 2017 holiday catalogue is packed full of wonderful Christmas goodies! I told myself I wouldn't need too many new Christmas themed items, then I saw the Catalogue, and well, lets just say I blew my budget on mainly Christmas items lol. One of the bundles I was instantly drawn to was the Brightly Lit Bundle.
I don't know what it is, but I had to have the lampposts! I also thought that it could be used for other types of cards, not just Christmas.  The Thinlits enable you to create two different styles of lampposts, each with a single lantern, a twin or you can make it a triple.


stampin up christmas card, brightly lit bundle, santas sleigh bundle, christmas card, gold and vanilla


For this card I have only used the die cut lamppost pole, a single lantern, and the detailed flag trim (cut down). To a Sahara Sand card base, I added a layer of the Bundle of Love DSP, with gold foil added to the edges. I then placed a layer of vellum to tone down the DSP which is vanilla based, as I was using whisper white on the card front.


stampin up christmas card, gold and vanilla, santas sleigh bundle, brightly lit bundle


Two layers of whisper white card were die cut in waves to represent snow. The lamppost and lantern were die cut in Black card with the lantern backed with gold foil. The wreath was heat embossed in white powder onto gold foil card and two gold die cut stems were added under the Old Olive ribbon bow.


I wanted a long sentiment to run along the bottom, so chose to use one from the Christmas in the Making stamp set. I stamped it with Black Memento before adhering all the layers. The reindeer from the Santa's Sleigh Bundle was cut from gold foil card and added with dimensionals.


I had so much fun with the Brightly Lit bundle today, I managed to make 8 different cards. I will share those over the coming days.

Until next time, stay awesome