SOCIAL MEDIA

Thursday, 17 October 2019

Just Add Ink #479 Colour Combination

Hello Crafty Friends

Welcome to Just Add Ink Challenge #479. This week we are playing with a fabulously pretty colour combination: Coastal Cabana, Pear Pizzaz and Whisper White.

Image may contain: text

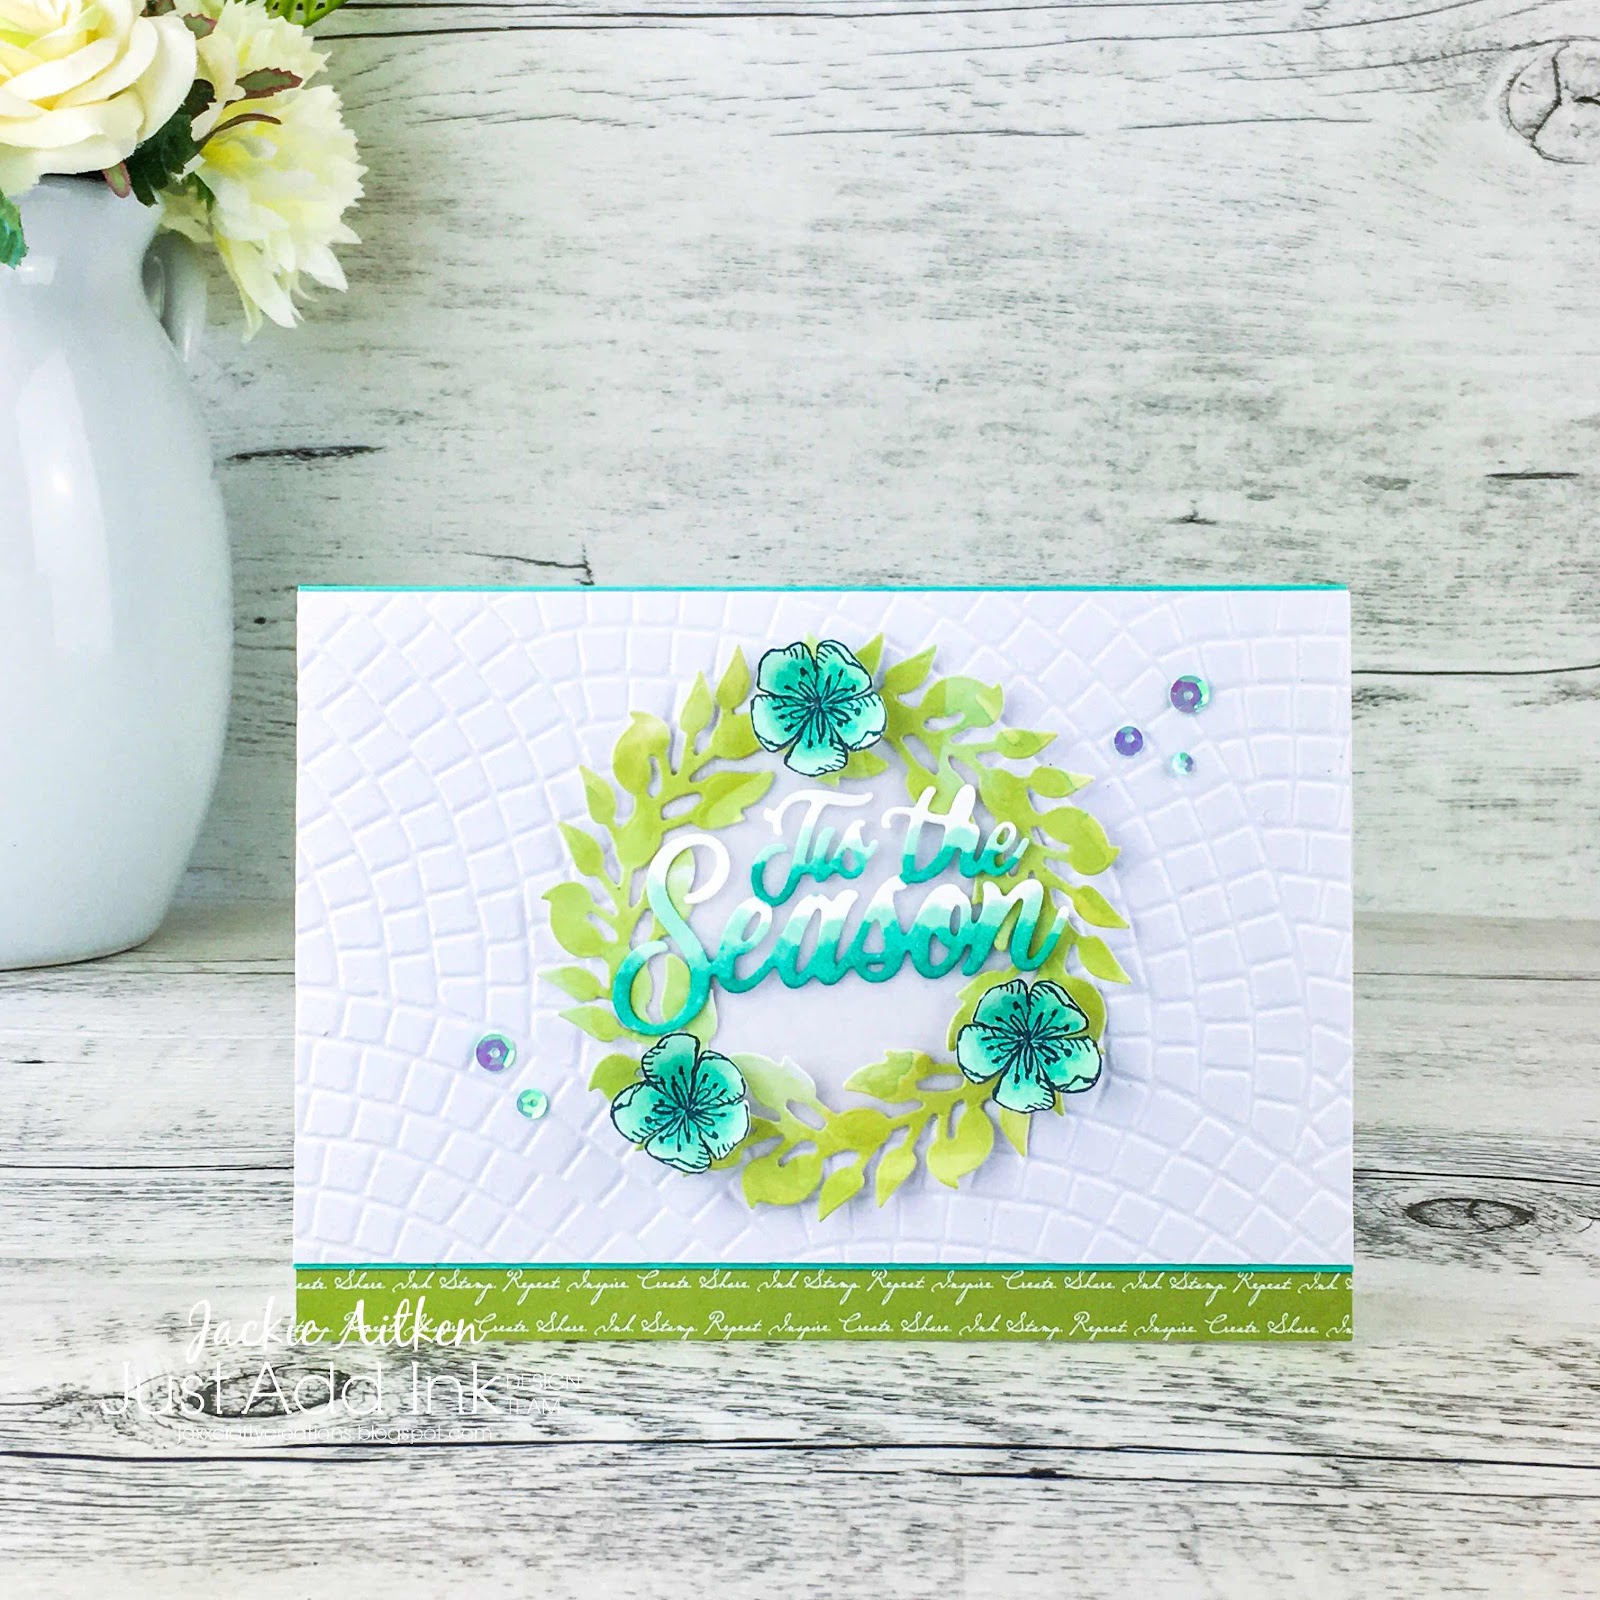
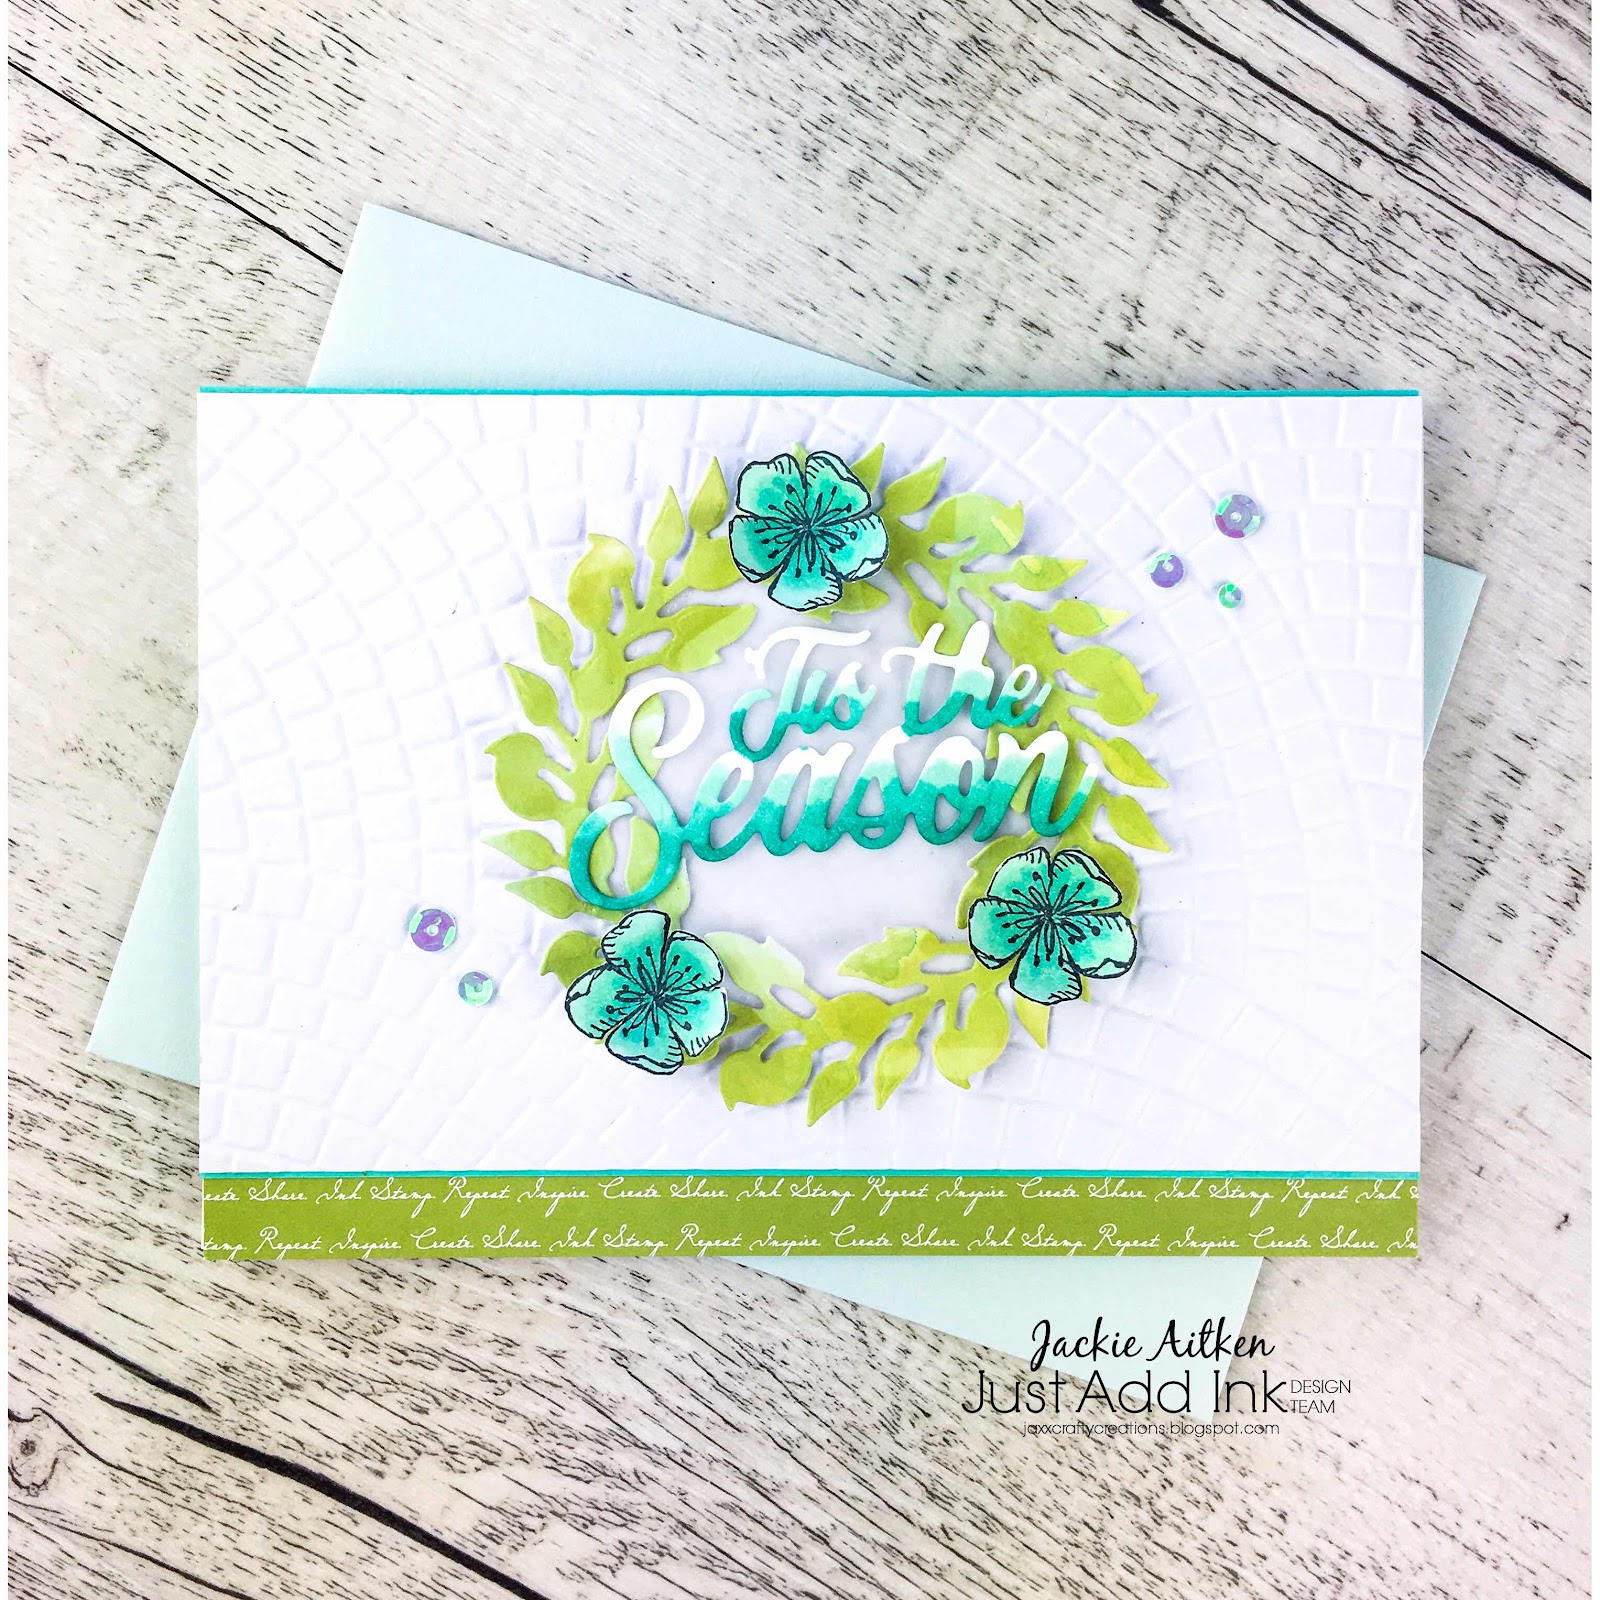
I must confess this is not the card I originally created for this challenge.....that card is possibly in the post! Yep, its gone and no photo's were taken.......so I quickly whipped up this clean and simple creation using left over bits n pieces that didn't make it onto other projects.

At this time of year the majority of my paper crafting projects are Christmas themed. With loads of unused die cuts floating around my workspace, I decided to add the challenge colours to a few and chuck them together for this non traditional Christmas Wreath with a summery floral touch.


Pear Pizzaz ink has been applied to the wreath using an Aqua Painter. I did the same to the "tis the Season" die cut with Coastal Cabana ink, applying more ink to the bottom of the die cut to create an ombre effect.  The die cut started to "bend" a little so I dried it with a heat tool and ran it through the big shot using the "Subtle" embossing folder to flatten it out.


The flowers from Free As A Bird Stamp set have been stamped in Staz On and then coloured with Coastal Cabana ink.  Once dry, I curled them a little and then attached to the wreath. Before adhering the die cut sentiment to the wreath I attached a vellum circle.

I have embossed the Whisper White card front using the Mosaic 3D Embossing Folder, attached strips of Coastal Cabana card to the top and bottom and then adhered it to the card base which has a strip of Pear Pizzaz DSP along the bottom.

To finish the card I added a few bluish coloured sequins and then quickly ran downstairs and photographed it for this blog post before I lost this one too! Lol

We would love for you and your crafty friends to play along, if you have a blog you can add your creation to the Just Add Ink gallery here. Don't have your own blog? No problem! Just send us an email  to  just-add-ink@hotmail.com with a photo attachment. We will upload it to our challenge entry blog for you.

Thanks so much for stopping by today. Until next time stay awesome and stay crafty.


Sunday, 13 October 2019

Stamping Sunday Blog Hop - Snowfall Accents Puff Paint

Hello Crafty Friends
No photo description available.

Welcome to Stamping Sunday Blog Hop for October. This month the Stamping Sunday Design Team are showcasing another new product from the Holiday Catalogue - The Snowfall Accents Puff Paint.

Omg this item is so much fun to play with. Add texture or 3D effects by applying the paint to your projects and then using a Heat Tool, watch the magic happen as the paint puffs up. Perfect for snowy scenes especially those with snowmen!

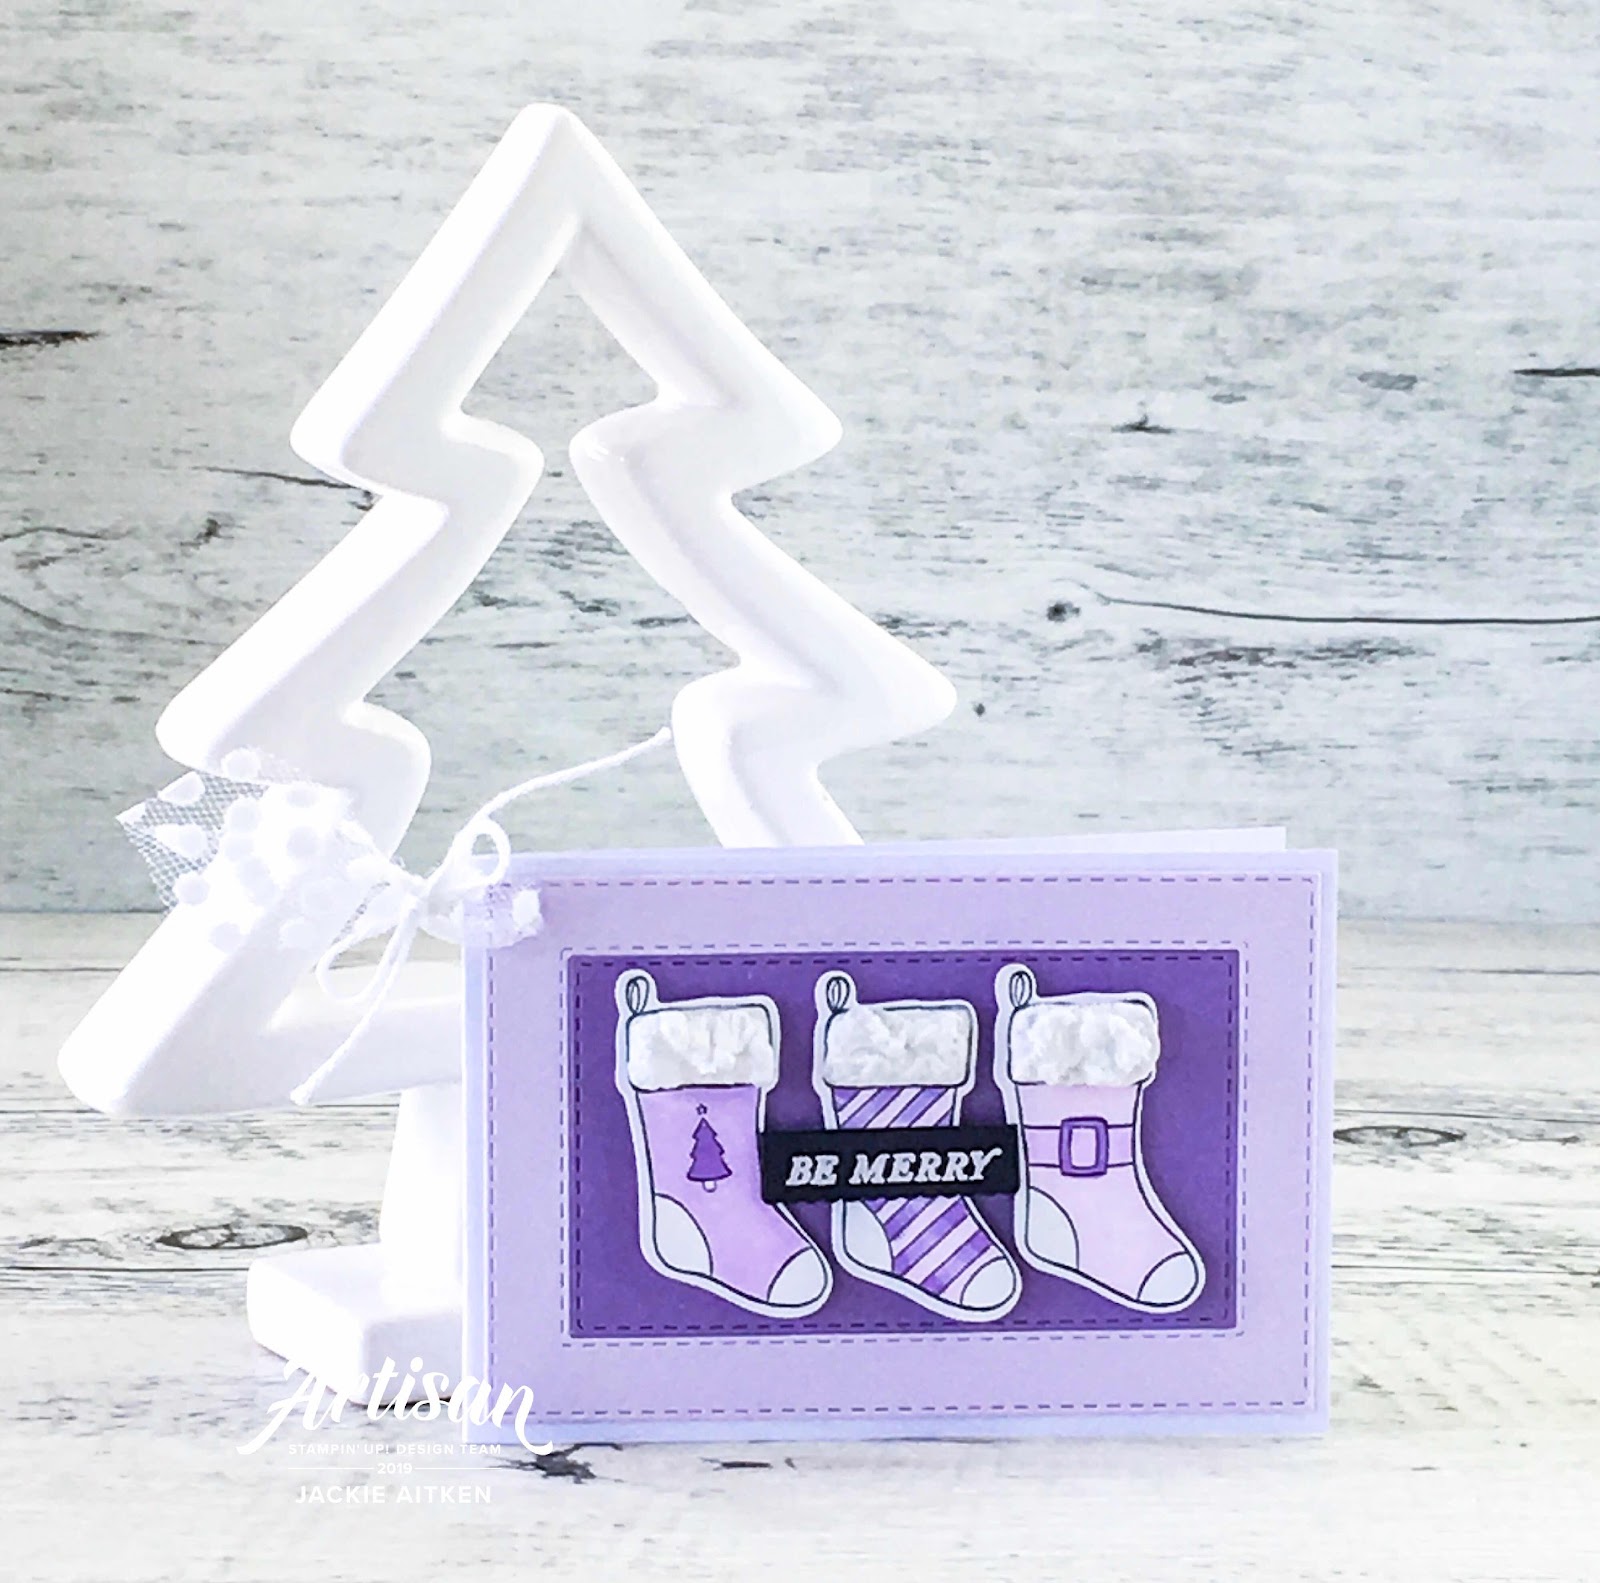
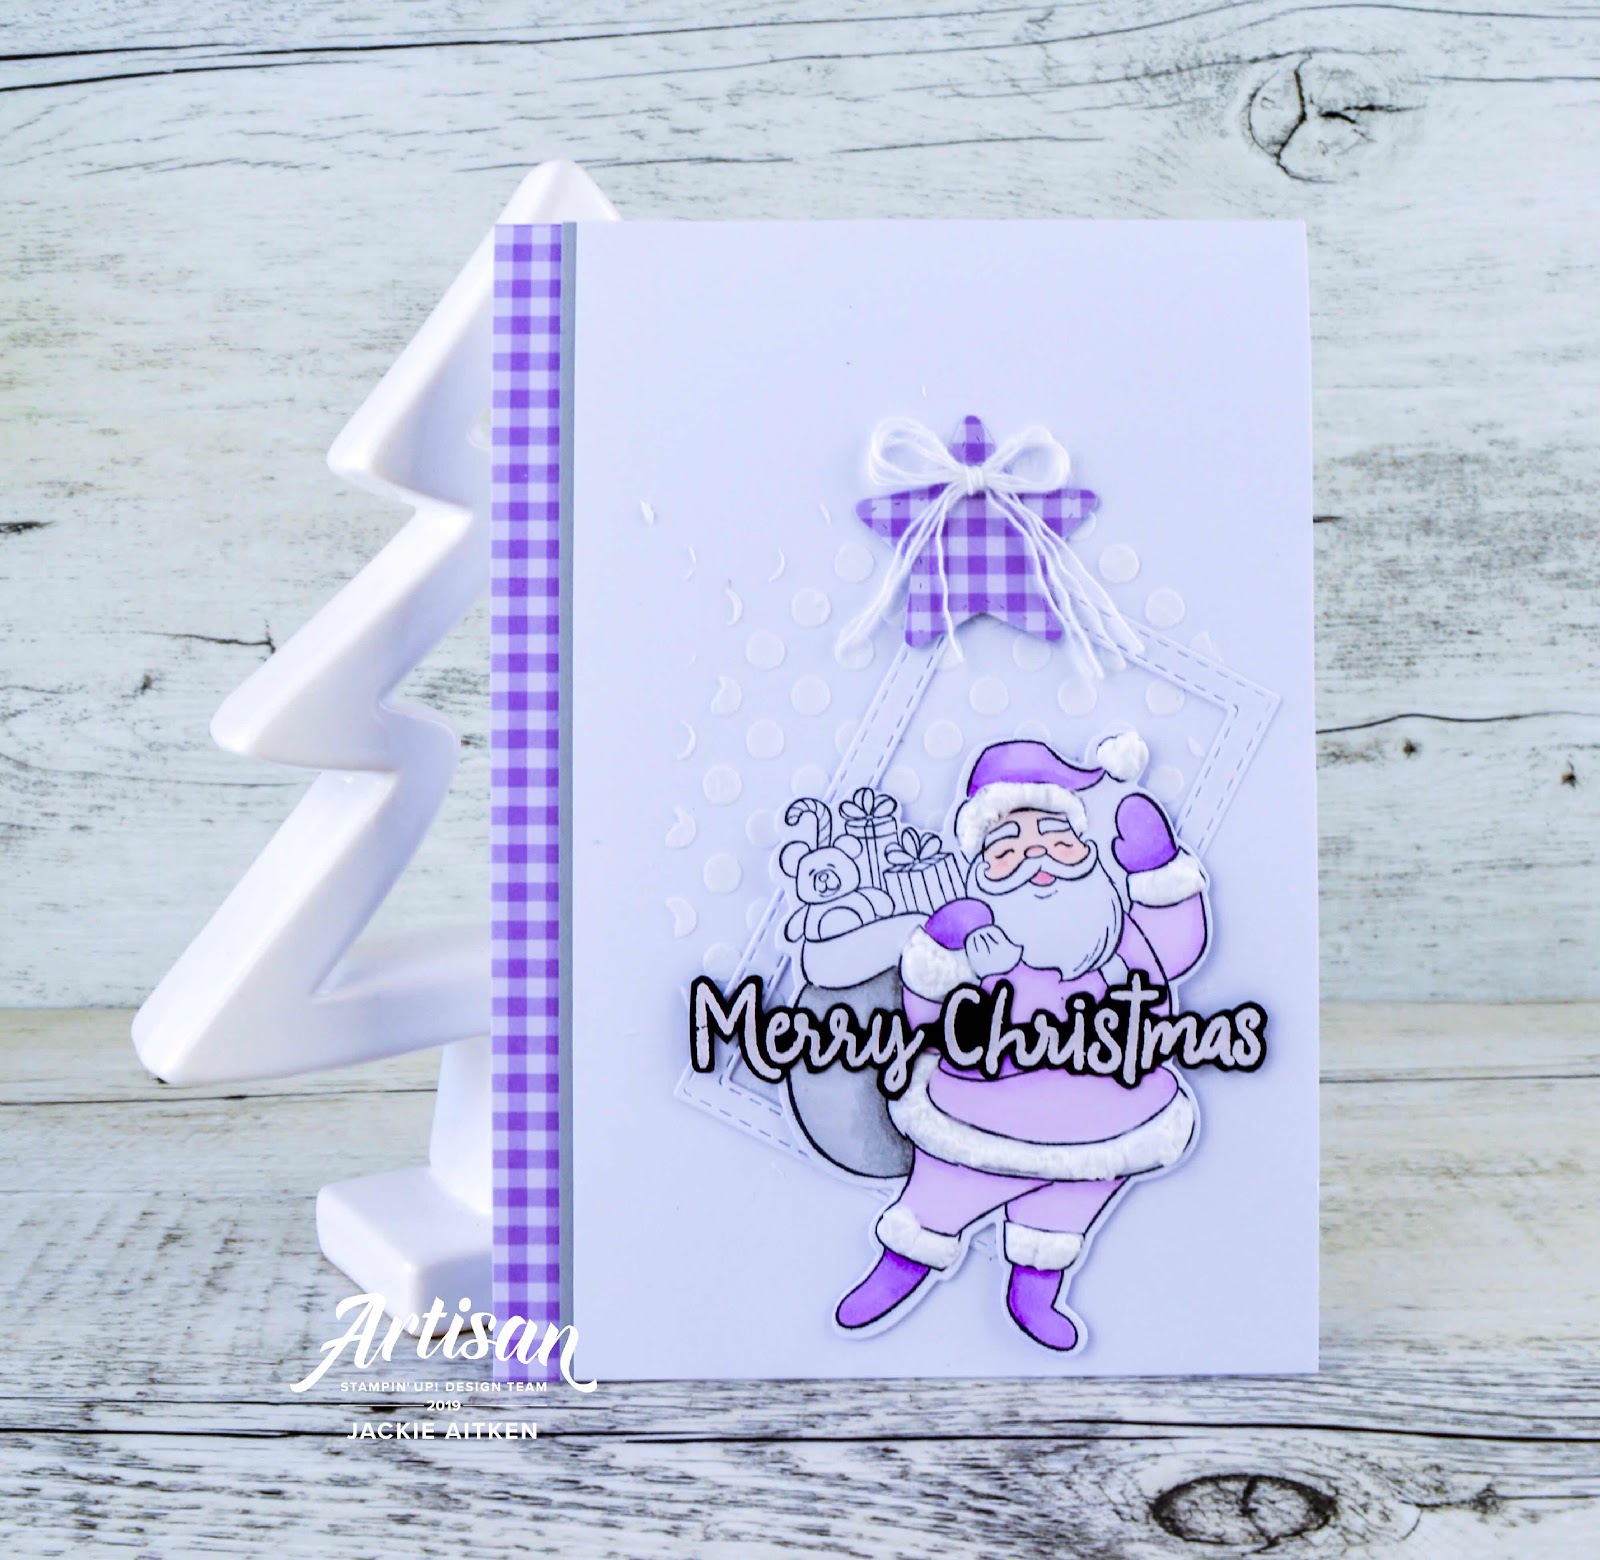
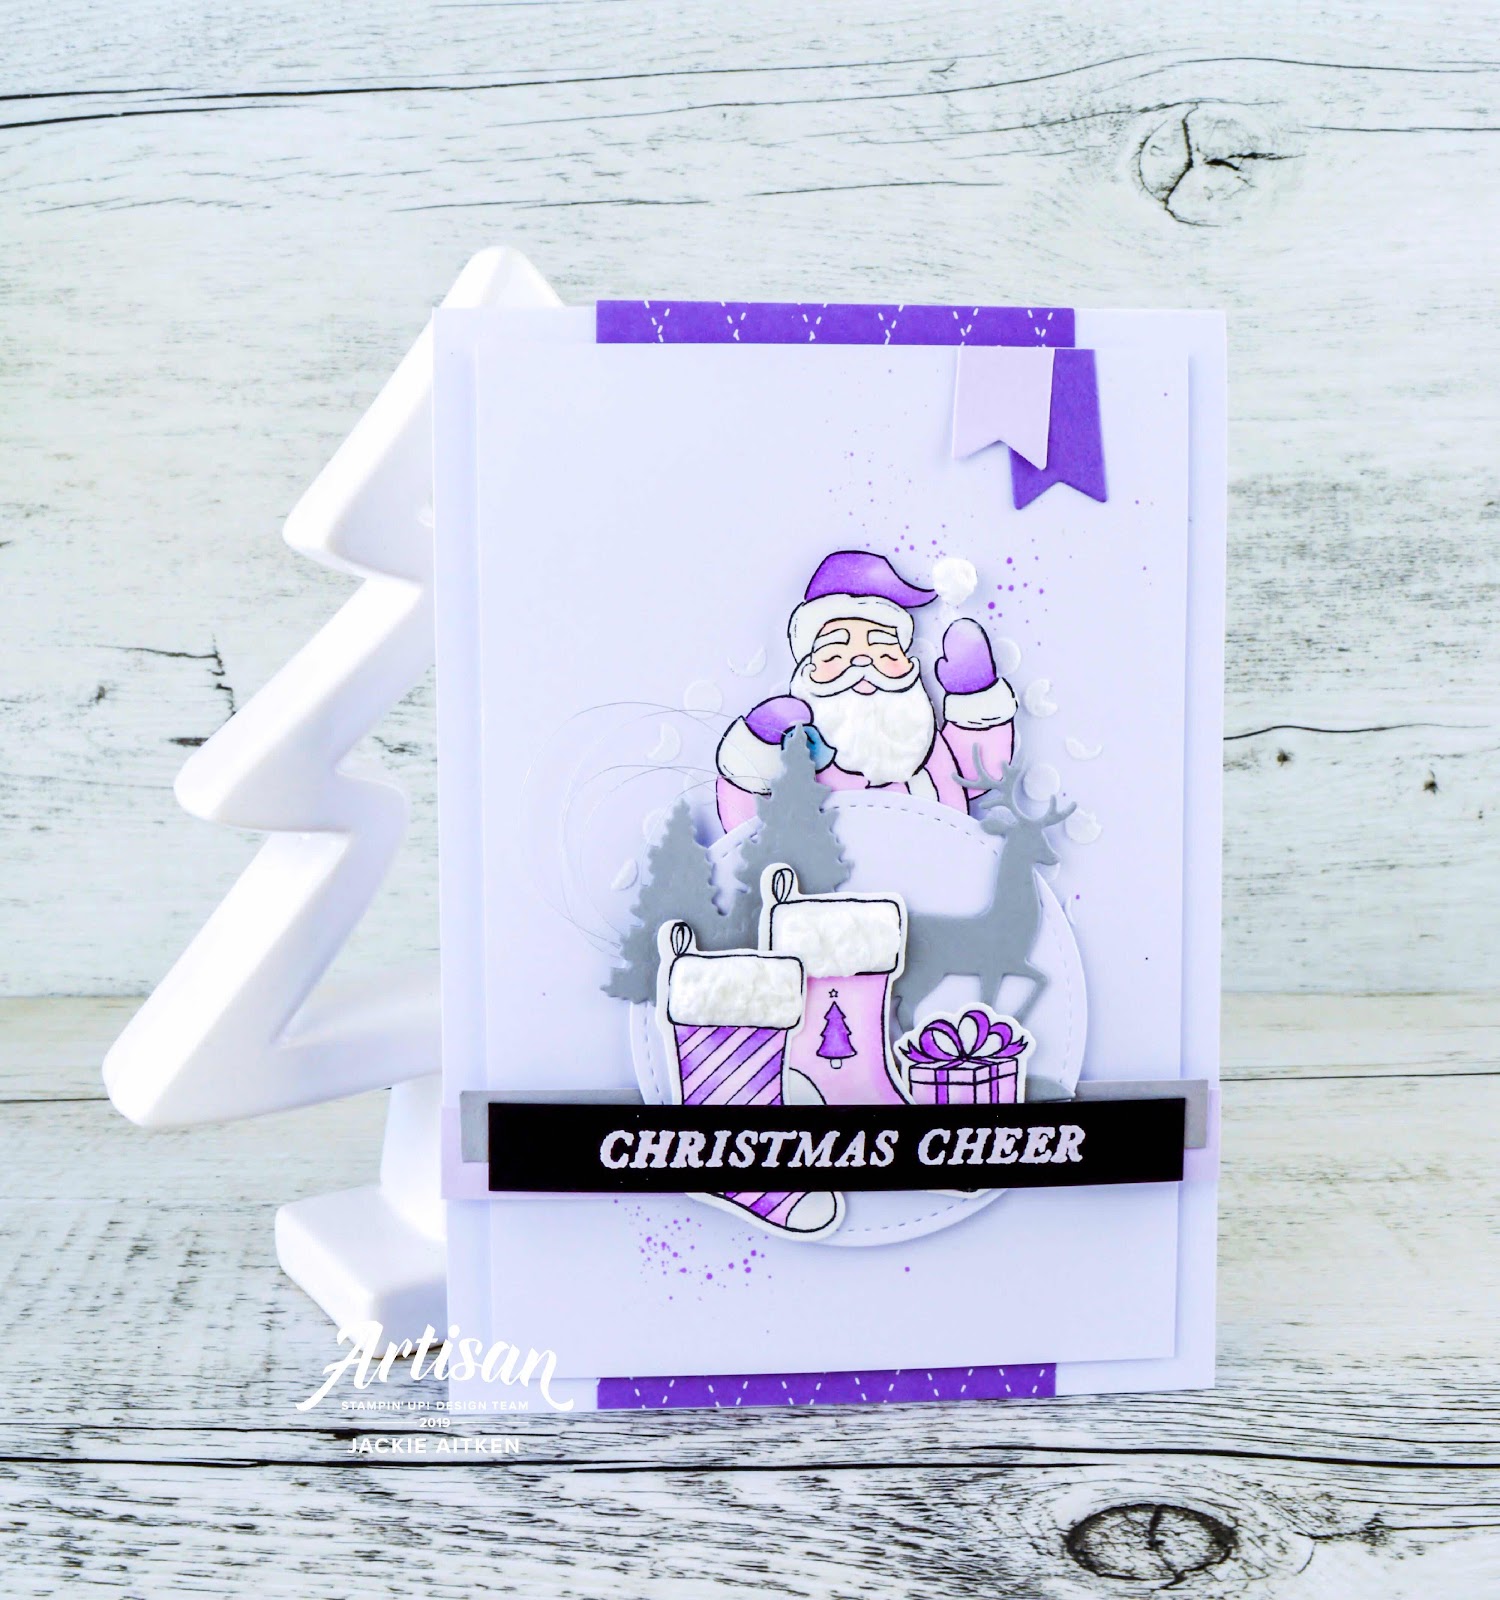
I love non traditional Christmas colours for my festive season creations, and decided today's projects I would use a colour combination of Highland Heather and Gorgeous Grape. I have also used items from Holly Jolly Christmas Bundle, Snow Globe Scene Dies along with sentiments from Tidings All Around and Snowman Season stamp sets.


I have three creations to share with you today, one for each level crafter. I prefer to not do the whole "step up the same card', instead opting to use the same elements, stamp set or colour scheme in all three creations.

For crafters who are just starting their stamping/papercraft experience, a gift tag is perfect as its small and not as daunting as a full card front.


The Snowfall Accents Puff Paint is reasonably easy to use, with a steady hand and a heat tool the die cut Stockings have a new lease on life. Using the Paint around the "tops" of stocking to mimic a fluffy cuff.


Casual crafters will enjoy the variety of features in this card as it uses a few different techniques and products - embossing paste, stamping, colouring with Stampin' Blends, die cutting, heat embossing and fussy cutting. Puff Paint has been added to Santa's hat, cuffs and waistband.


For the Avid crafter this card I added more die cut and stamped elements. The card front has embossing paste, ink splatters, more coloured and fussy cut images, metallic twine and Puff Paint on the Stockings Santa's hat and cuffs.

That is all for me today. Be sure to keep hopping for more inspirational and creative ideas and projects using the Snowfall Accents Puff Paint. Up next is my friend and fellow Artisan, Manuela Geiswinkler with her amazingly gorgeous 'puffy' projects. Enjoy x

Blog Hop Participant List


Thursday, 10 October 2019

OSAT Blog Hop - Spooktacular

Hello Crafty Friends
OSAT
Welcome to the One Stamp At A Time Blog Hop for October. This month the talented Design Team are sharing fabulously fun creations with a SPOOKTACULAR theme. You may have arrived having just visited Martin Stone with his spooky projects. Be sure to follow the hop all the way through for more inspiring Spooktacular creations just in time for Halloween.

Now, I must confess I totally love everything about Halloween creations but its not celebrated hugely here in Australia so its not something I get to do often. I had so much fun with the projects I have to share today and so wish I had little children so we could do the whole Halloween thing.


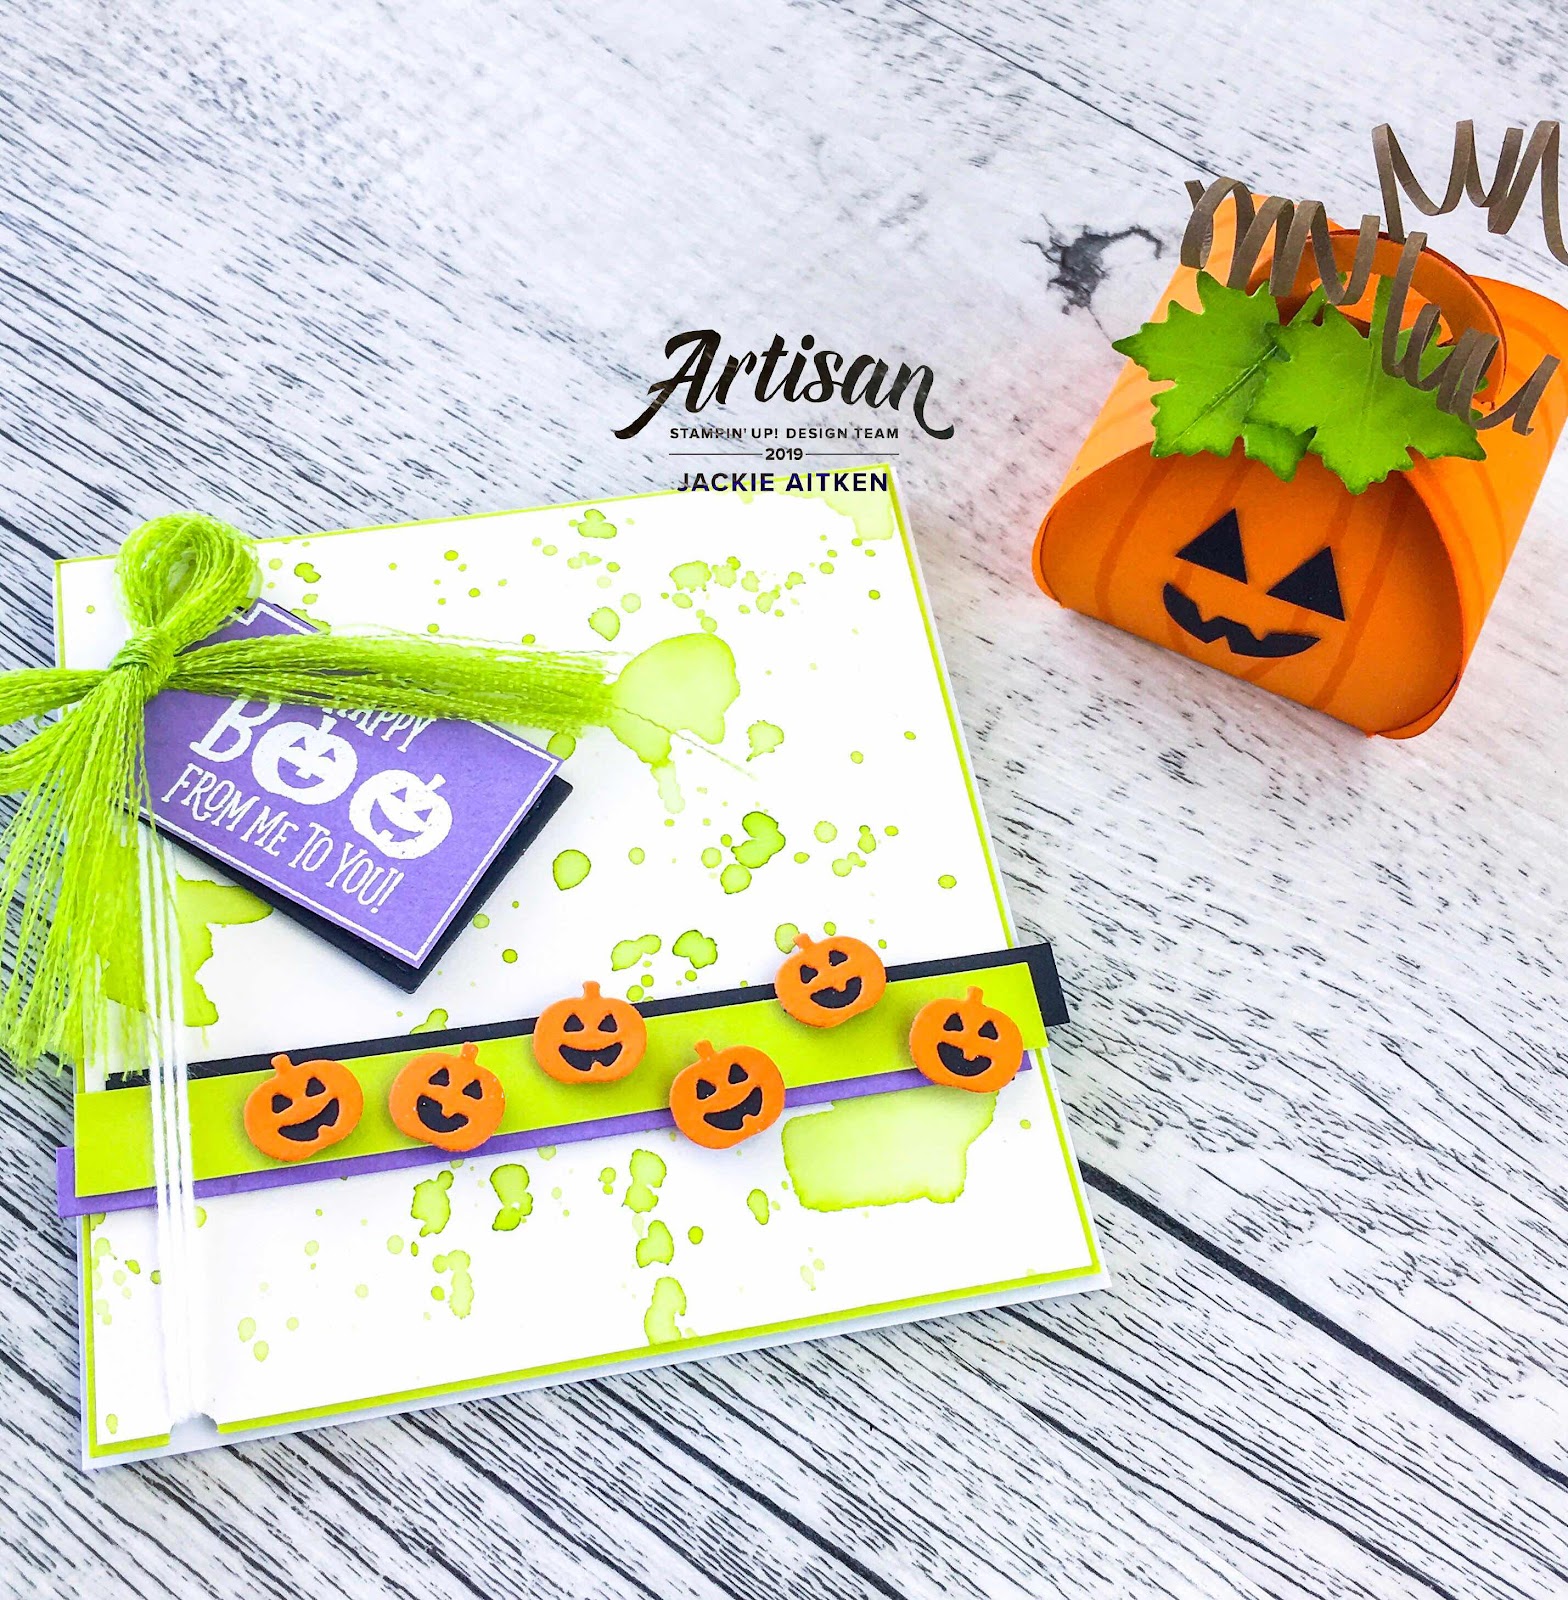
Shimmery White card stock has been splashed with Granny Apple Green ink using an Aqua Painter and cut down to fit the front of a 4" Note Card layered with GAG Card.

The Greeting from the Tags Tags Tags bundle has been white heat embossed on Highland Heather card and die card. I have also used the uber cute little pumpkin dies from the same bundle, cut from Pumpkin Pie card sand layered over Black.

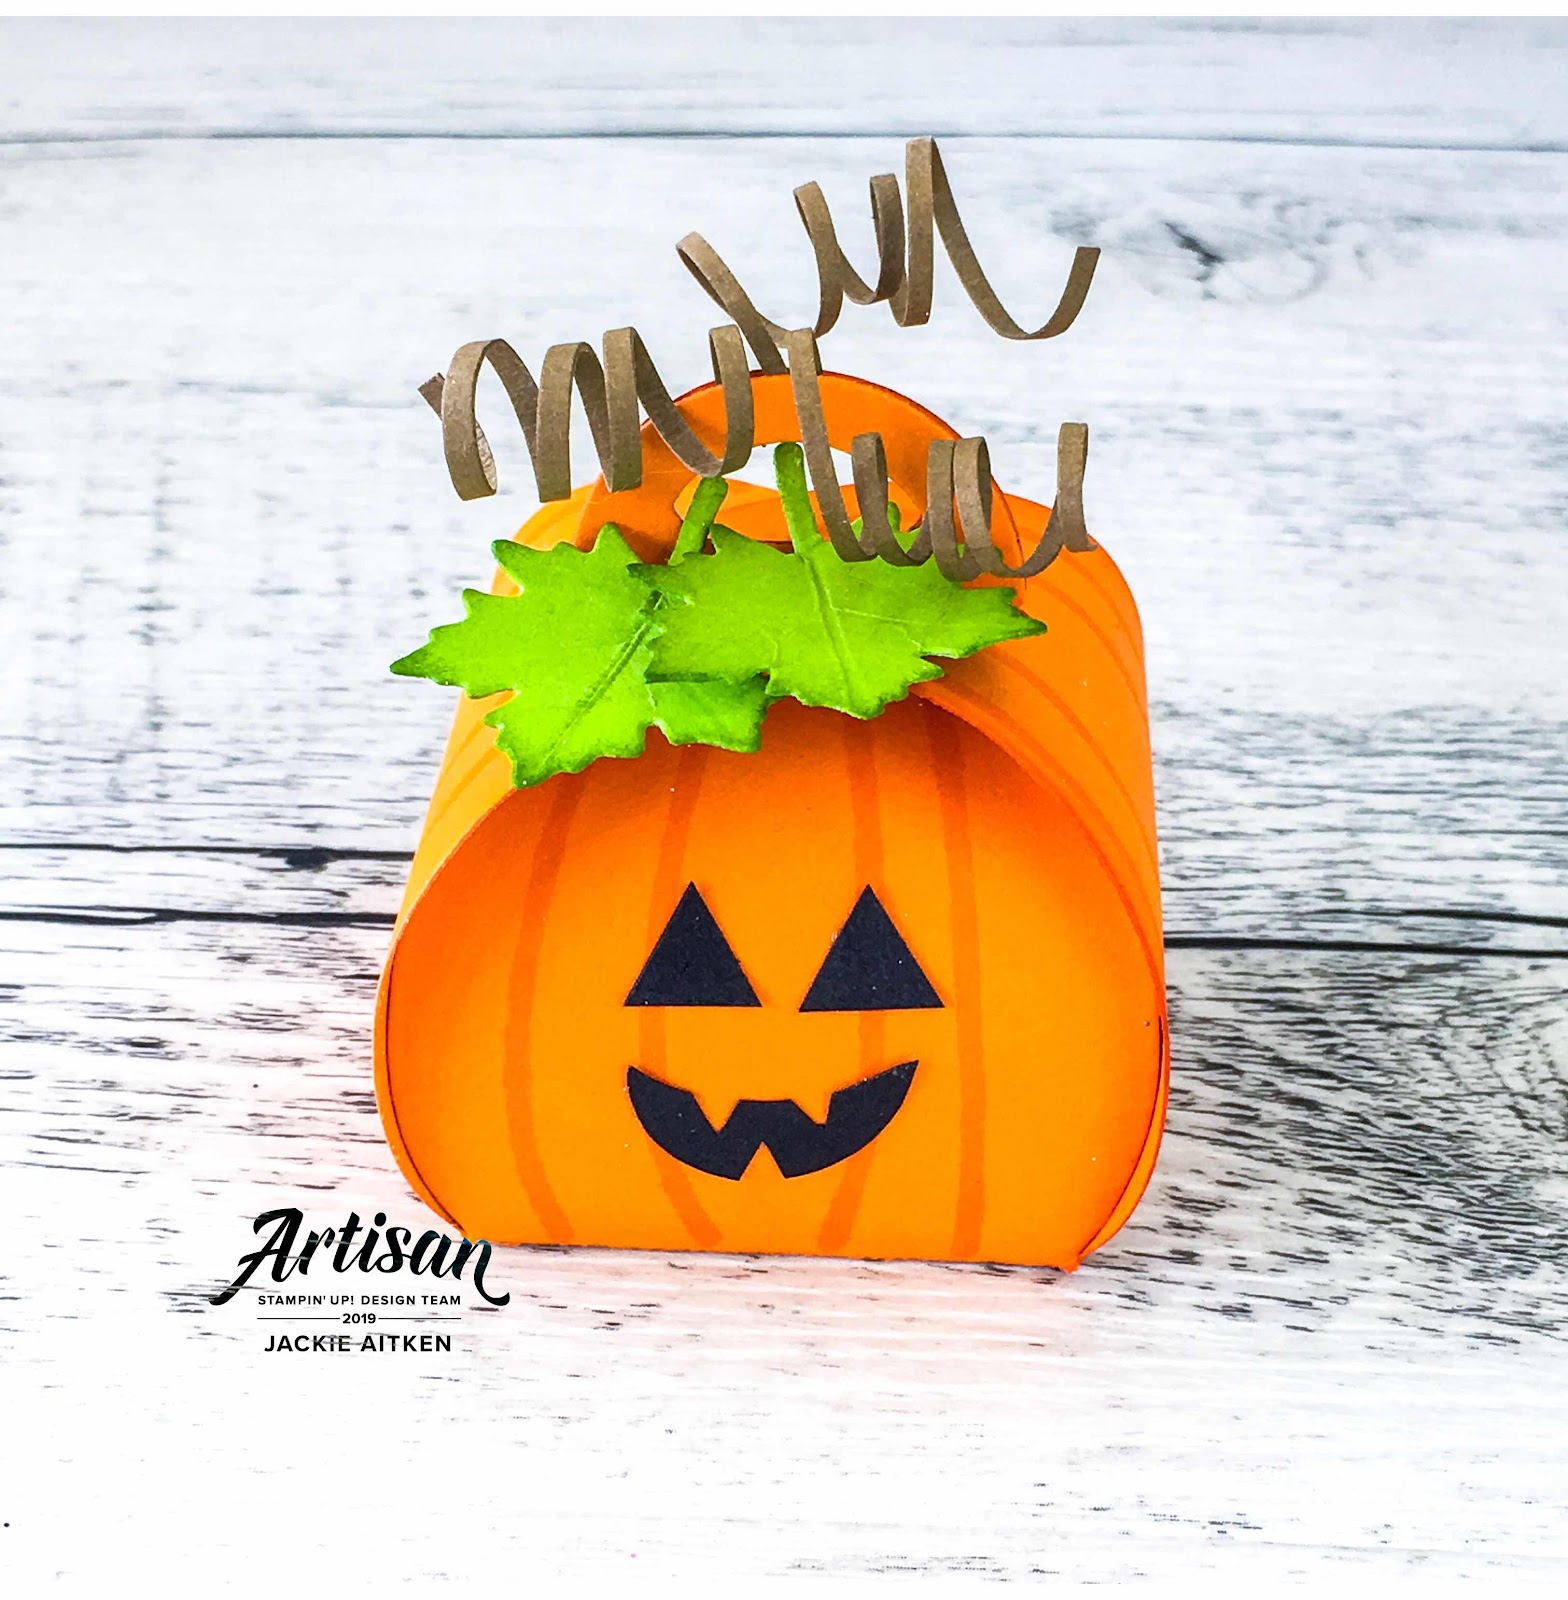
How cute is the little Pumpkin! And its a gift box to boot!! One quick pass through the Big Shot and you have the cutest mini curvy keepsake package.


Before constructing the gift box, I ran a few lines down the Pumpkin Pie card stock with a Stampin' Blend. Black card stock has been snipped into the triangle shapes for the eyes and wonky mouth. Early Espresso strips were curled and added to the top with Tombow along with a couple of die cut leaves.

Thanks for stopping by today. Be sure to hop all the way through the Participant List below for even more inspiring creations with a SPOOKTACULAR theme. Up next is Jo Anne Hewins with her amazing projects.

Blog Hop Participant List


Thursday, 3 October 2019

Just Add Ink Challenge #477 - Sketch

Hello Crafty Friends,

Welcome to this weeks Just Add Ink Challenge #477 - Just Add A Sketch. I do love sketch challenges, they always produce some of my favourite creations. I love how each person interprets a sketch differently and even if they use the same products and sketch, the end results are always different.
Image may contain: text

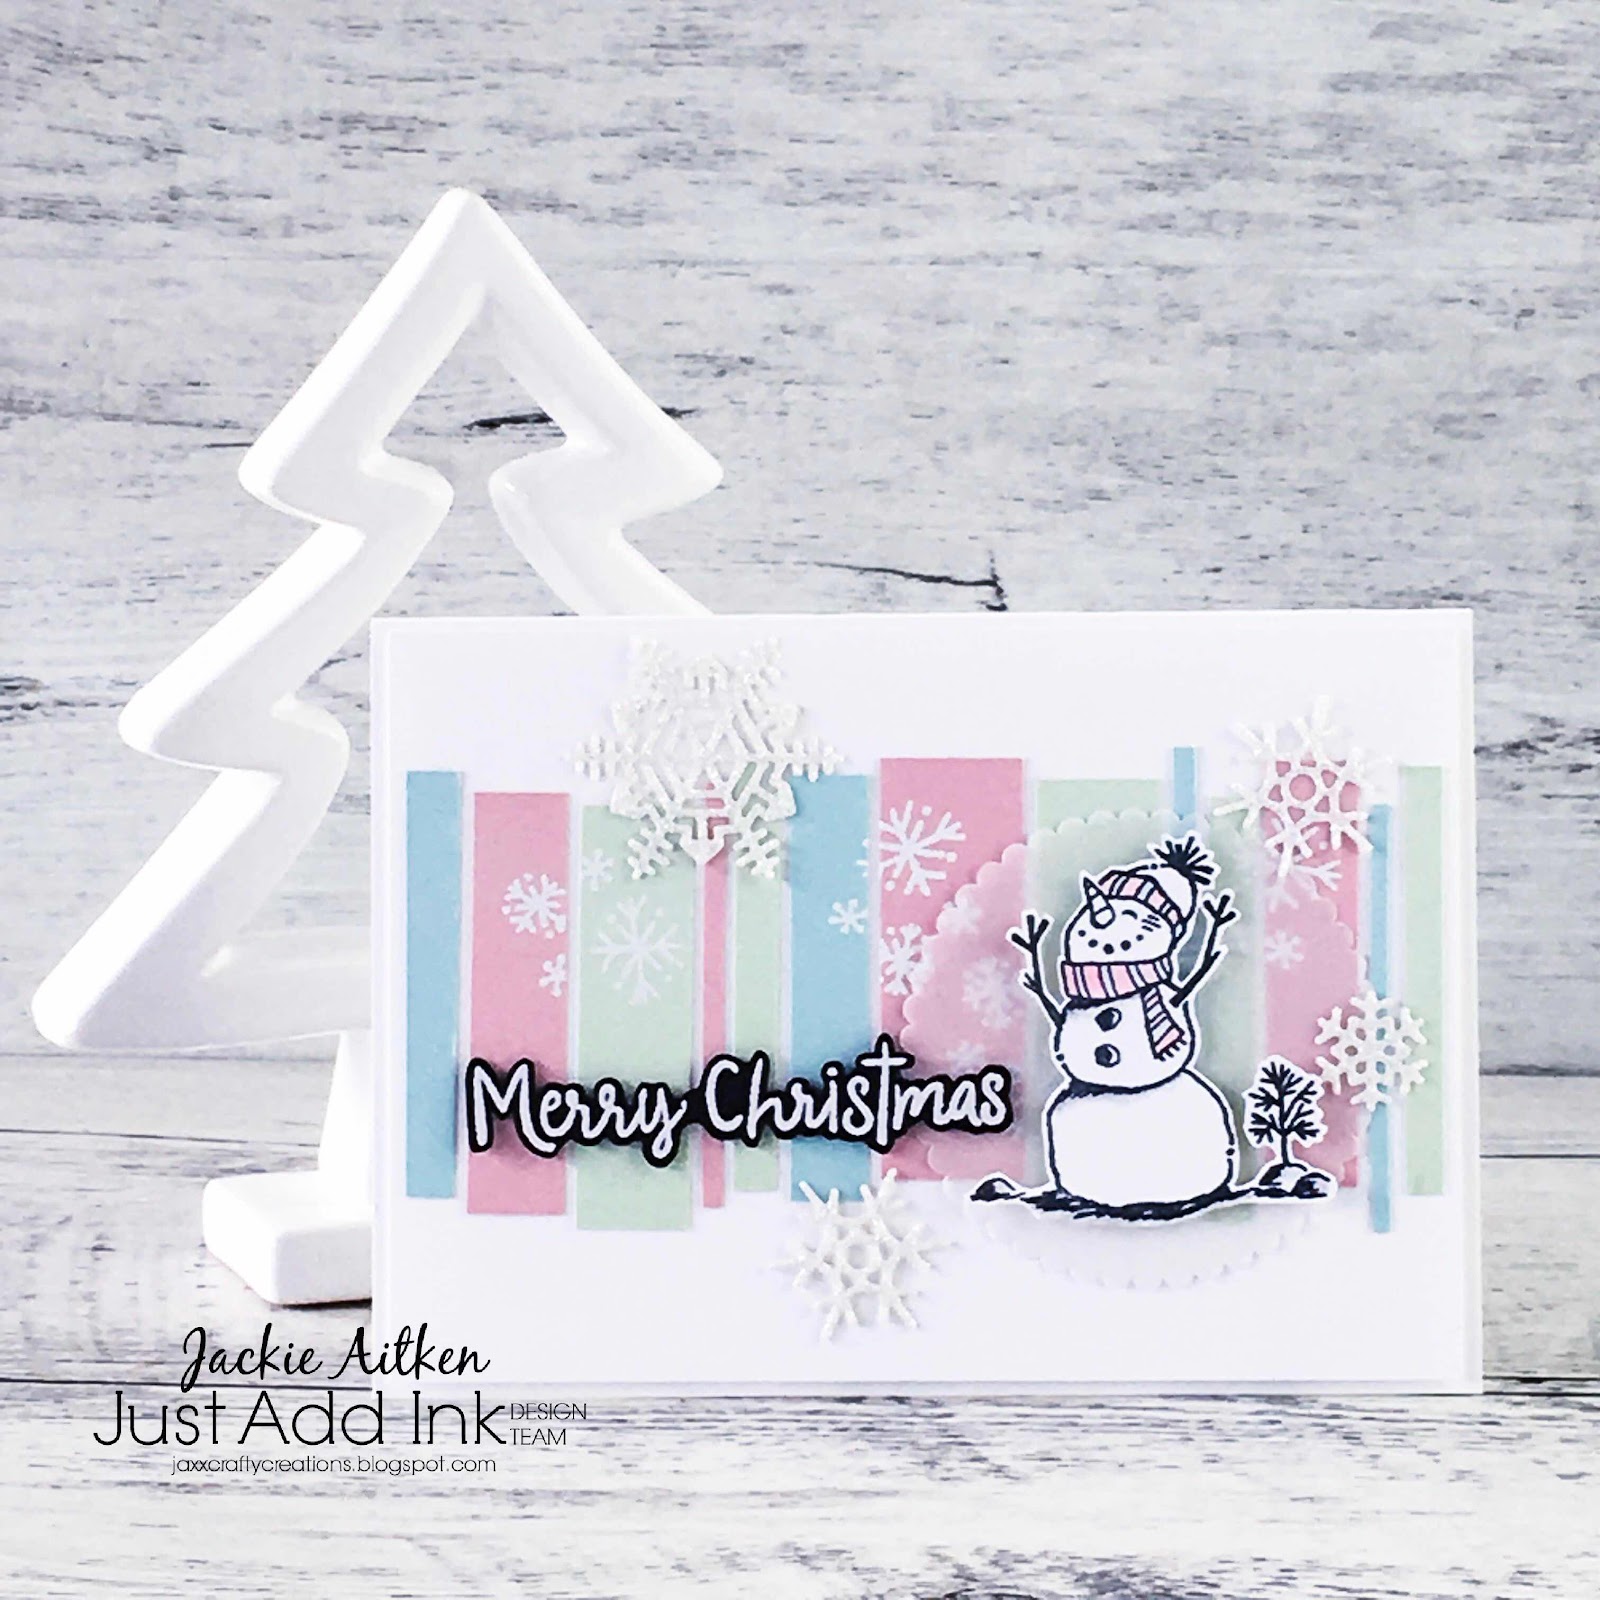
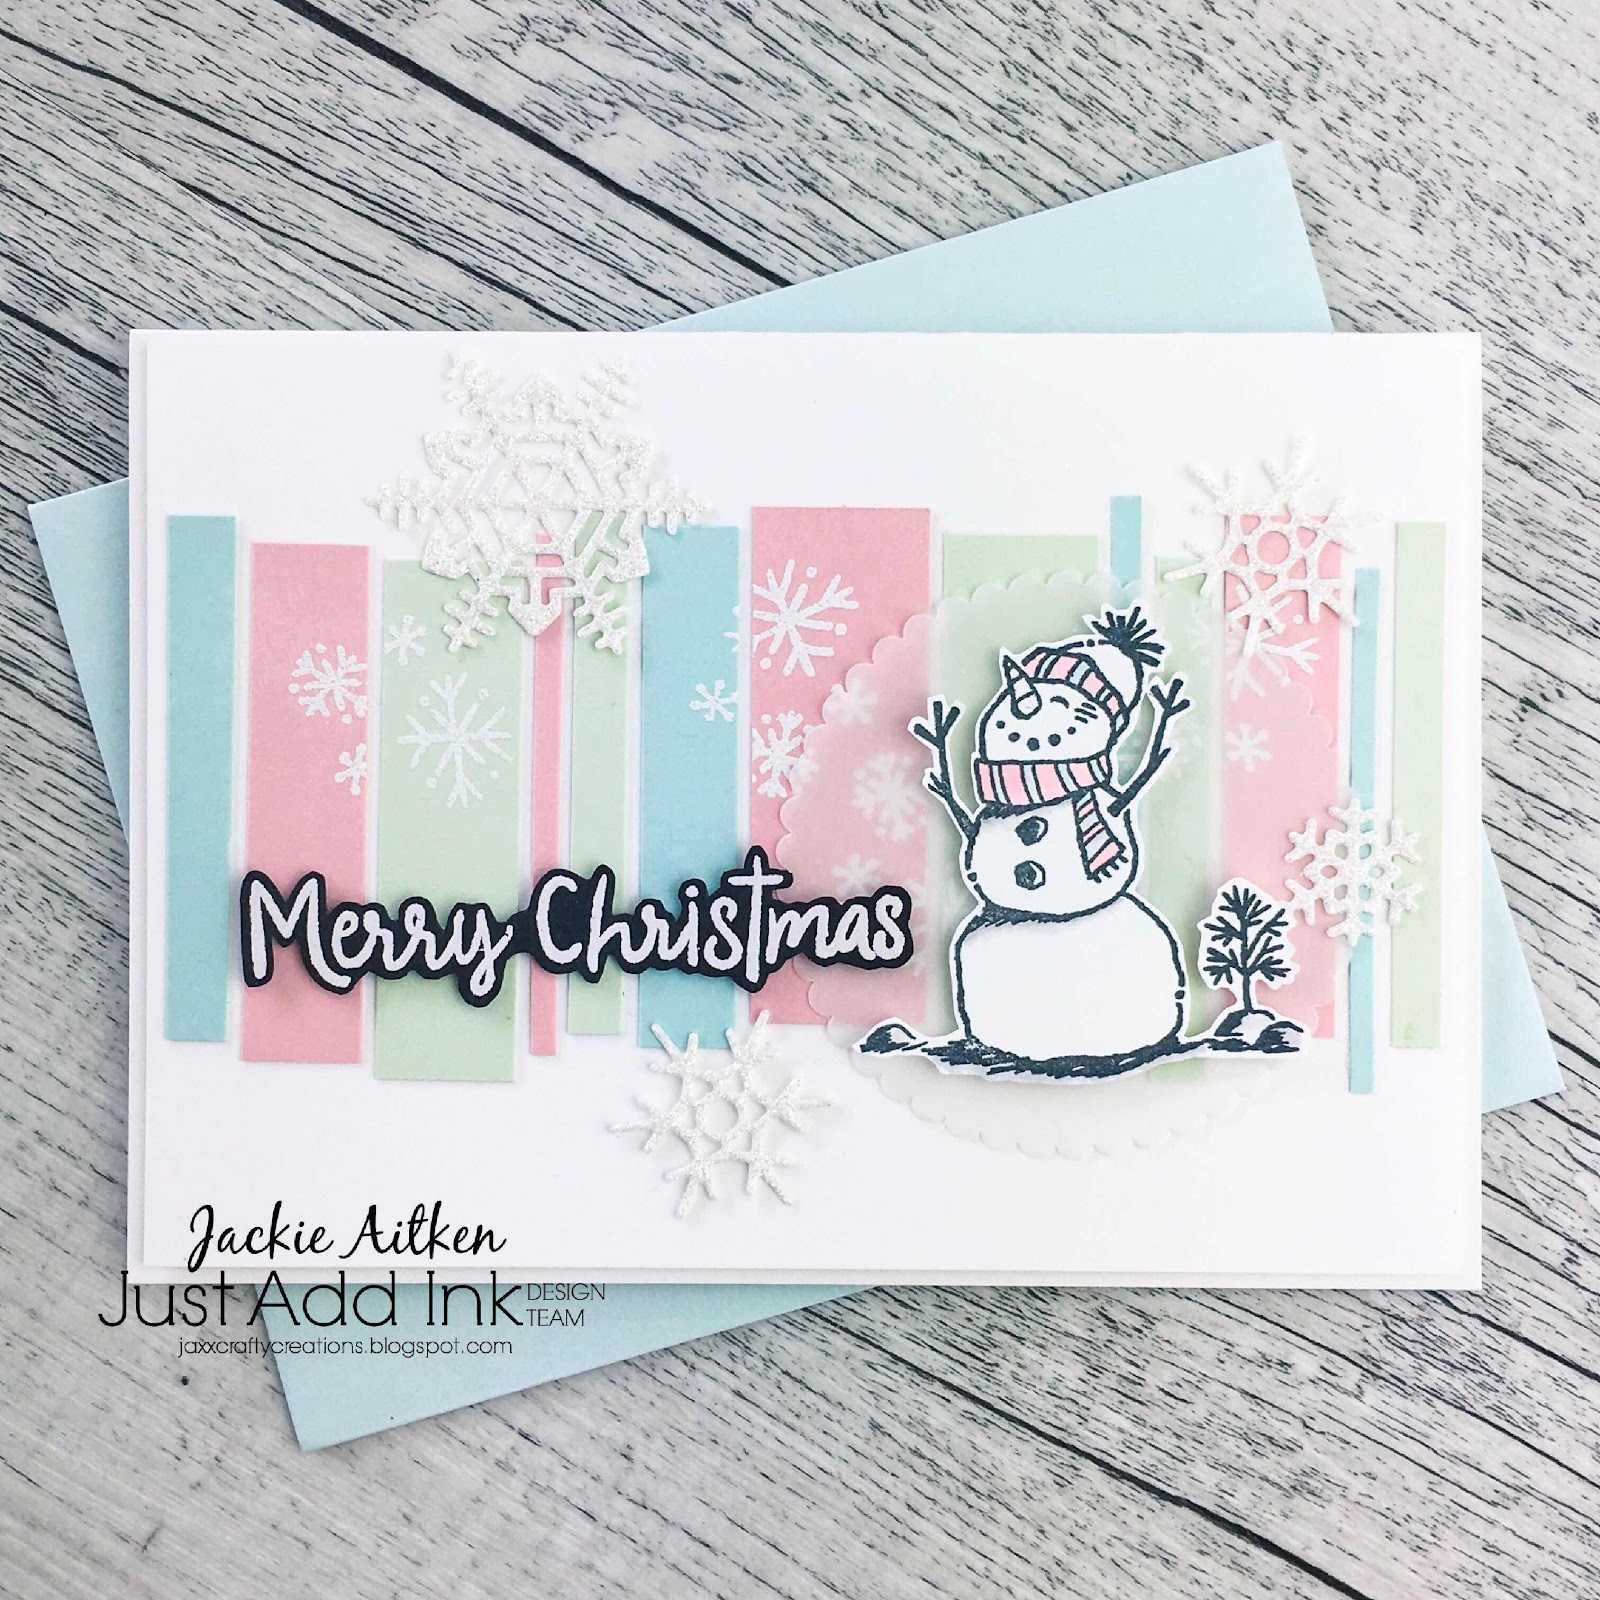
I have a non traditional coloured Christmas card to share with you today. I decided to flip the orientation of the sketch and went with a horizontal version. To create the panel that runs along the back of the card front, I have used offcuts in Blushing Bride, Pool Party and Soft Sea Foam card stock, cutting the scraps into different widths and adhering with Tombow.


White Heat Embossed snowflake images were added to the striped panel with a few snowflake die cuts made from White Glimmer Paper scattered around the card front.

The snowman image from Snowman Season Stamp Set  has been stamped, coloured and then fussy cut and adhered over a vellum scalloped circle die cut.

The "Merry Christmas" sentiment has been white heat embossed onto Black card and fussy cut before adhering with black mini dimensionals - yep Black Dimensionals. These little fangdangles are great in black especially when adhering to black card as they become almost invisible!


That's all for today, crafty friends. Be sure to stop by all the Just Add Ink Design Team members blogs for more inspiration using this weeks Just Add Ink Sketch Challenge.

We would love for you and your crafty friends to play along, if you have a blog you can add your creation to the Just Add Ink gallery here. Don't have your own blog? No problem! Just send us an email  to  just-add-ink@hotmail.com with a photo attachment. We will upload it to our challenge entry blog for you.

Thanks so much for stopping by today. Until next time stay awesome and stay crafty.


Tuesday, 1 October 2019

Stampin' Up! Artisan Design Team Blog Hop - Christmas Is Here

Hello Crafty Friends,

Welcome to a special Artisan Design Team Blog Hop where today we are sharing our creativity using the new Christmastime Is Here Suite.  If you’ve hopped on over from Emma, you’ll have seen her stunning creations.  Be sure to Hop all the way through for a heap more inspiring projects using this exclusive, limited time collection of coordinating products.

No photo description available.

Christmas Is Coming Early This Year with Festive Floral's & A Gorgeous Bracelet!!!!

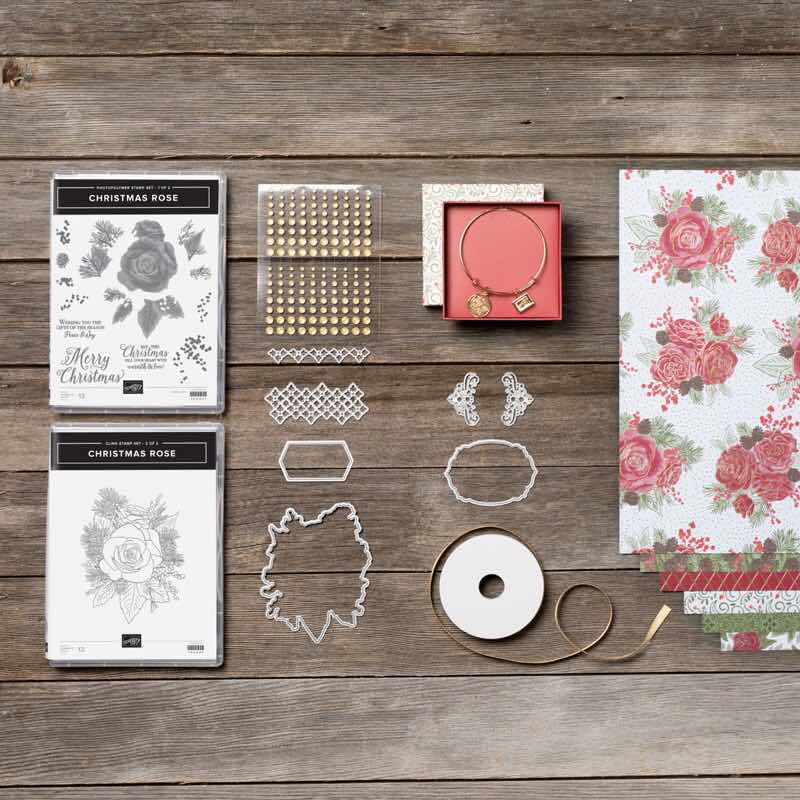
We hope you’re ready to make this holiday season magical, because the Christmastime Is Here Suite is, well . . . here! This exclusive, limited-time collection of festive, floral coordinating products has everything you and your customers need to share love, joy, and creativity this holiday season. And yes that is an uber cute limited edition Stampin' Up! Bracelet!!!

The Floral inspired theme is perfect for all markets, with no specific emphasis on "seasons" it is ideal for creating Christmas projects for friends and family no matter where in the world they live.

SO WHATS INCLUDED?

Christmas Rose Stamp Sets - The large Outline stamp is a Cling stamp with the detailed images being photopolymer. There is also the coordinating:
Roses Dies
Gold ¼” Shimmer Ribbon
Gold Glitter Enamel Dots
Christmastime is Here Designer Series Paper
Charming Rose Bracelet
Colours are: Cherry Cobbler, Early Espresso, Mossy Meadow, Poppy Parade, Gold Foil.

HOW MUCH  FOR ALL THIS GORGEOUSNESS YOU ASK?

Entire Suite - AUD$195.25
Stamp & Die Bundle - AUD$106
DSP - AUD$25
Ribbon - AUD$12.25
Embellishments - AUD$14
Bracelet. AUD$38

For more information please refer to the Demonstrator Site or contact your local Stampin' Up! Demonstrator.

DEMONSTRATOR PREORDER 1 Oct - 31 Oct

Preorder Limits Apply
*Limit one per demonstrator for non-consumable items (e.g., Christmas Rose Stamp Set, Charming Rose Bracelet, etc.).
*Limit two per demonstrator for consumable items (e.g., Gold 1/4" (6.4 mm) Shimmer Ribbon, Gold Glitter Enamel Dots, and Christmastime Is Here Specialty Designer Series Paper).

The Christmastime Is Here Suite will be available as an entire collection, as a Stamp & Die bundle as well as some individual items. So if you love the DSP as much as I do then you will be able to stock up and create a whole pile of Christmas Rose projects.

I have a few cards to share with you today.....I know I know, but seriously this Suite was so easy to create with I just couldn't stop. The large die that is designed to cut the stamped image also die cuts one of the images from the Designer Series Paper. And an added bonus is the other floral images are easy to fussy cut! So you see, it was super easy to create this collection of cards as a lot of the work is the stunning DSP. Which makes it extremely versatile for all level crafters. Beginner, Casual and Avid crafters can let their creativity shine as there are no predesigned samples.


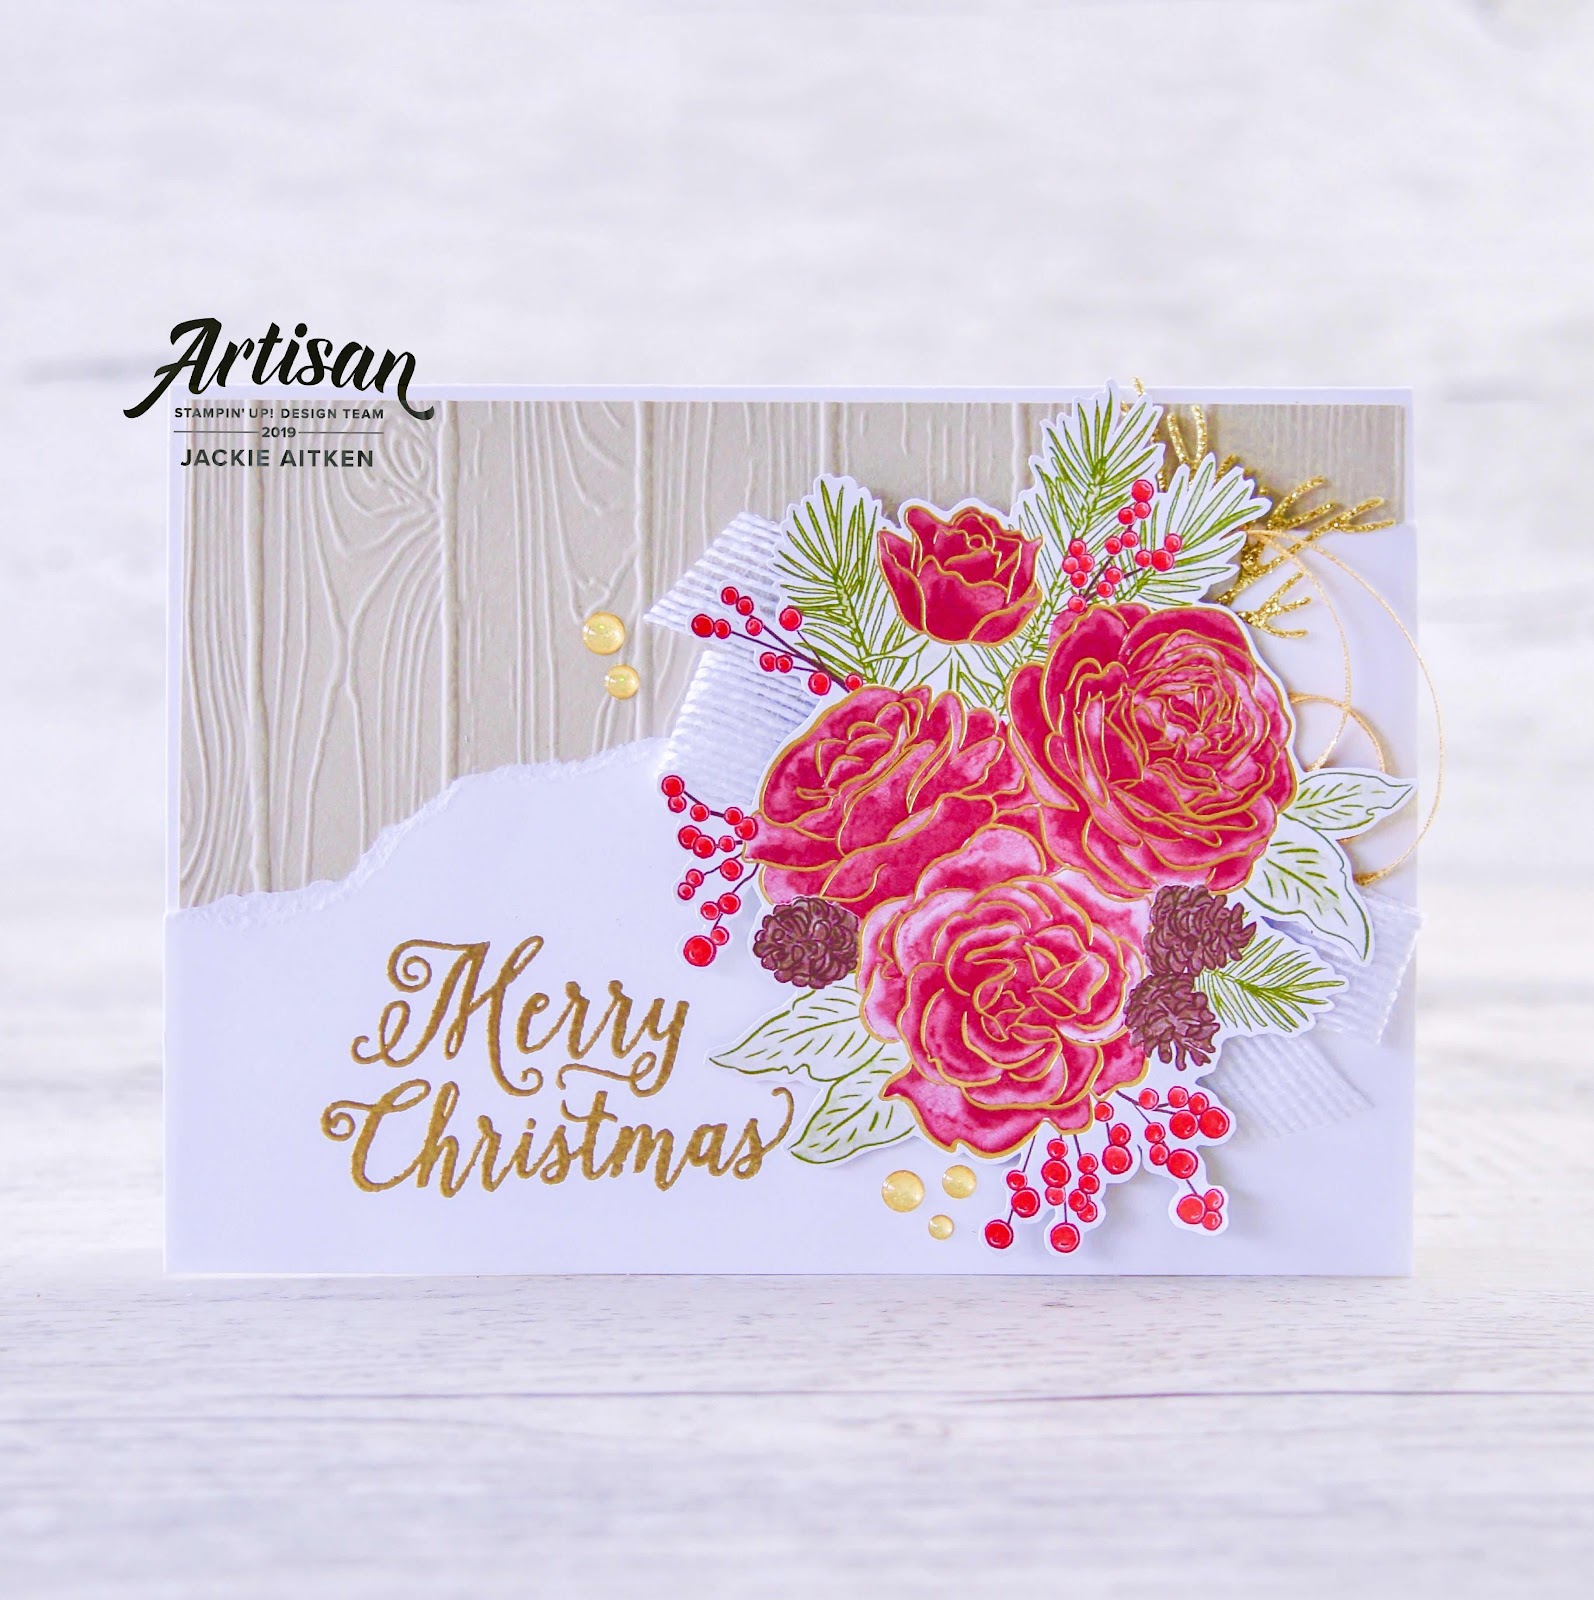
The first card I have to share uses a fussy cut image from the DSP. A few extra roses were fussy cut and have been added with dimensionals directly on top of the matching part of the image for a bit of depth. I started by gold heat embossing the sentiment onto my whisper white card front. I then tore the card front diagonally. Next, Sahara Sand card stock has been embossed using the Pinewood Planks Folder and adhered to the Thick Whisper White card base. 

I then adhered the torn card front to the embossed layer and before fixing the fussy cut Rose cluster I have added some Polka Dot Tulle Ribbon and the edge of the Gold Ribbon underneath. To finish the card I added a couple of the Glitter Enamel Dots.


The next card is basically the same as the first. I have changed the orientation and therefore also where the heat embossed sentiment sits. Using the same fussy cut image and torn edge card front, the only other difference aside from orientation is the ribbon added underneath - this time replacing the Tulle Polka Dot with Whisper White Flax Ribbon along with the "other" edge of the Gold Ribbon cut for the previous card. 


The third card has a completely different layout with a strip of DSP running down the left hand side, lined with Gold Foil card and then the embossing paste card front. Using the new Decorative Masks, I have applied white embossing paste to the card front with the "dotty" mask. I love the texture embossing paste gives and seeing I tend to favour whisper white card fronts, it adds interests and takes your cards to the next level.

I have left the Gold Ribbon "whole" for this card but have also added what was left from stripping the edges of the ribbon to make the two previous cards. I call this Ribbon Fluff and its easy to get by simply removing the edging of the ribbon and pulling out the remaining threads. Use it like metallic thread and voila you have another look.


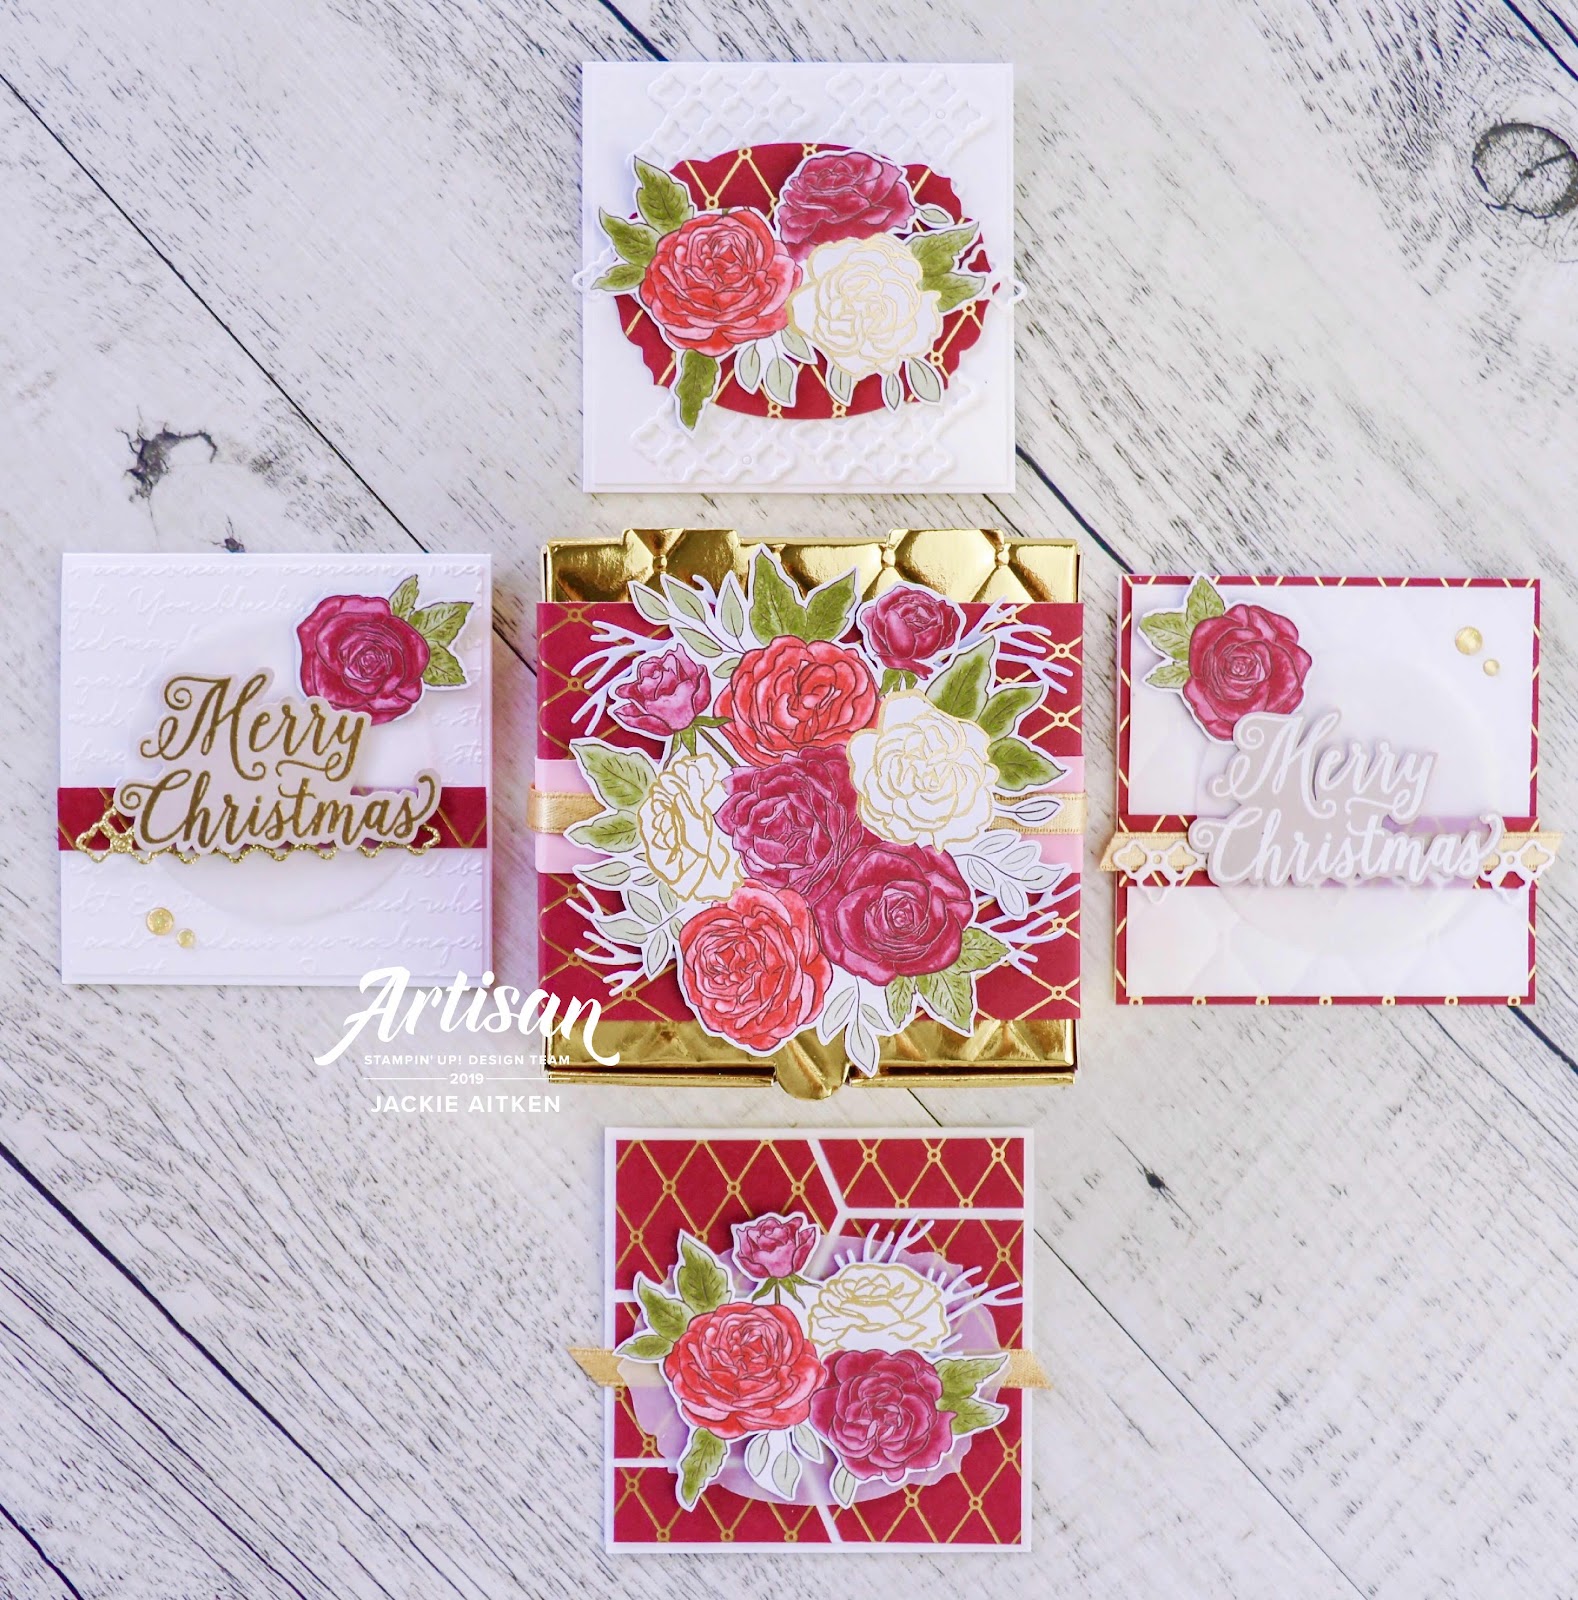
Next up I have created a few little note cards that fit into the new GOLD Pizza Boxes. The Gold Foil accents in the DSP coordinates perfectly with the boxes. These note cards have been made using the coordinating dies to create the card fronts or embellish.


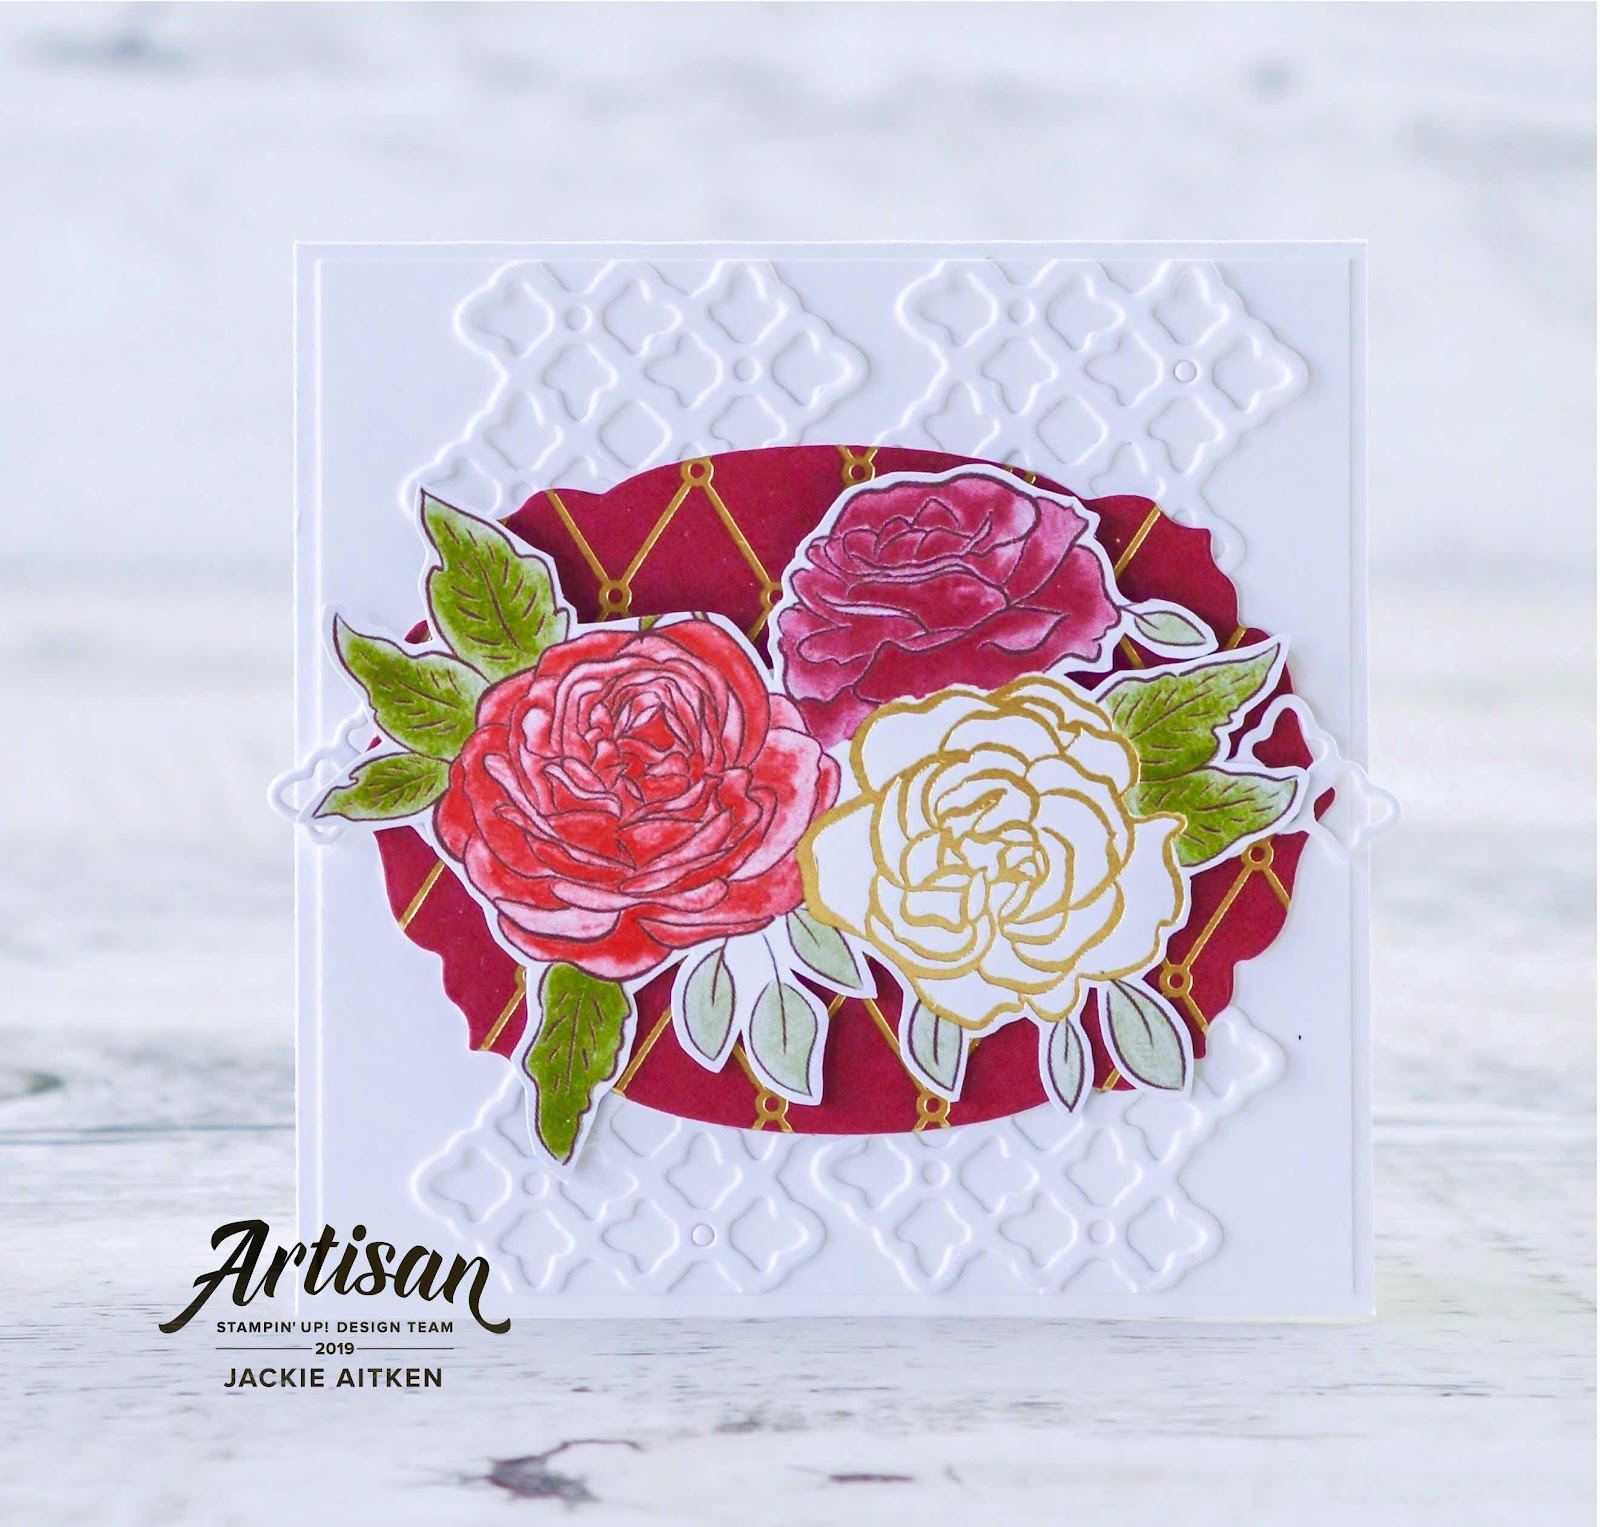
For this note card Gold Glimmer card stock has been die cut using the pretty border die and tucked under the Gold Heat Embossed sentiment.  A strip of DSP has adhered to the embossed card front along with a single fussy cut Rose image.


The next card has a card front created with the detailed lattice die, cut twice from whisper white card and adhered to the card front. The DSP has been die cut using the pretty frame die with fussy cut images adhered over the whisper white border die cut used to cut the Glimmer Card stock in the note card above.


DSP has been adhered to the card base with a white embossed card front added over the top. I have used the Tufted Embossing Folder for this one. A strip of the same DSP used for the card base has been added along with some Gold Ribbon and Whisper White die border die cut. The same fussy cut Rose used in the first note card was used for this one - just swapping sides from Right to the Left hand side above the Heat Embossed-Fussy Cut sentiment. 


The last little note card uses the elongated hexagon die to cut the DSP and create the background. Vellum and Gold Ribbon sit underneath the fussy cut image which has been adhered using  dimensionals.


That is all from me today. I hope you have enjoyed what I’ve shared and I’ll hope you’ll enjoy this new Product Suite, as much as I have. Seriously, you won’t want to sit on the fence on this one. Being Bang on Trend and offering such fabulous coordinating products for the price, you’ll want to order early. Demonstrators can order from October 1st and Customers from November 1st. 

DON'T MISS OUT! ADD THIS STUNNING SUITE TO YOUR NEXT ORDER & ROCK THAT STUNNING BRACELET AS YOU HAND OUT YOUR BEAUTIFUL HANDMADE CREATIONS!!!!

Up next in this month Artisan Design Team Blog Hop is my super talented and beautiful friend, Jennifer Picard with her amazingly gorgeous creations. Be sure to follow the hop all the way for even more inspiring idea's and beautiful projects from the 2019 Artisan Design Team.


Participant Blog Hop List

Jackie Aitken - That's Me.

Until next time stay awesome and stay crafty


Wednesday, 25 September 2019

Be Inspired Blog Hop - September - Case The Catty

Good Day Crafty Friends


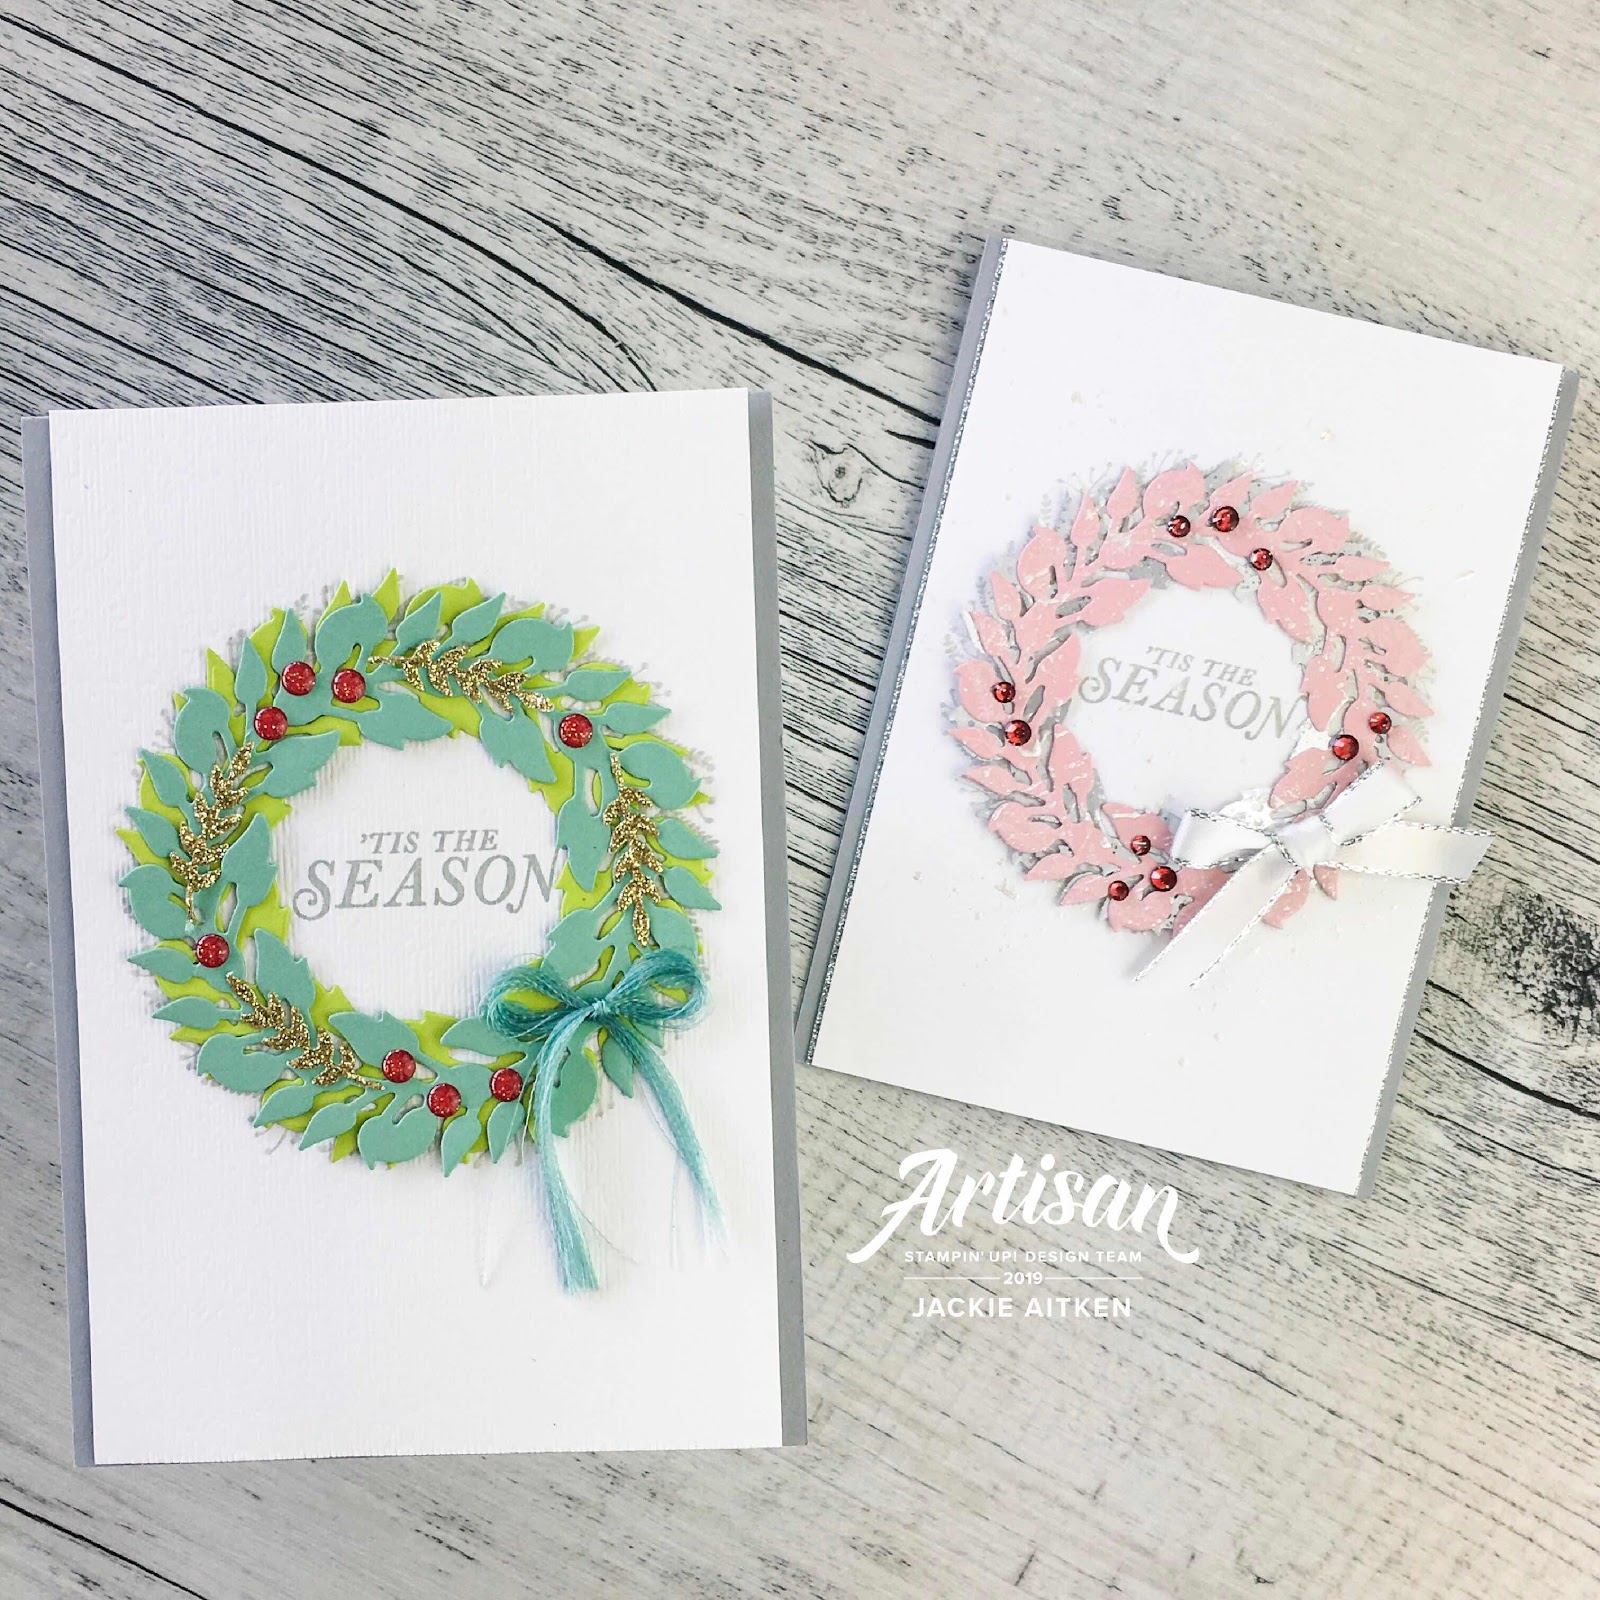
Welcome to the Be Inspired Blog Hop for September. This month the talented Design Team are sharing creations which have been Cased From The Catalogue. 

What does it mean to CASE? Some crafters like myself would say, Copy and Selectively Edit, others prefer Copy and Share Everything. Either way, gaining inspiration from others creations and making them your own is a fabulous way to break outside your usual style, use products you wouldn't normally use and saves time. I chose to CASE the sample for the Tidings All Around Bundle on Page 3 of the Holiday Catalogue. 

Stampin' Up, Jaxx Crafty Creations, Tidings All Around, Wreath Cards, Christmas Cards, 2019 Holiday Catalogue, Be Inspired Blog Hop, Shimmer Paint,

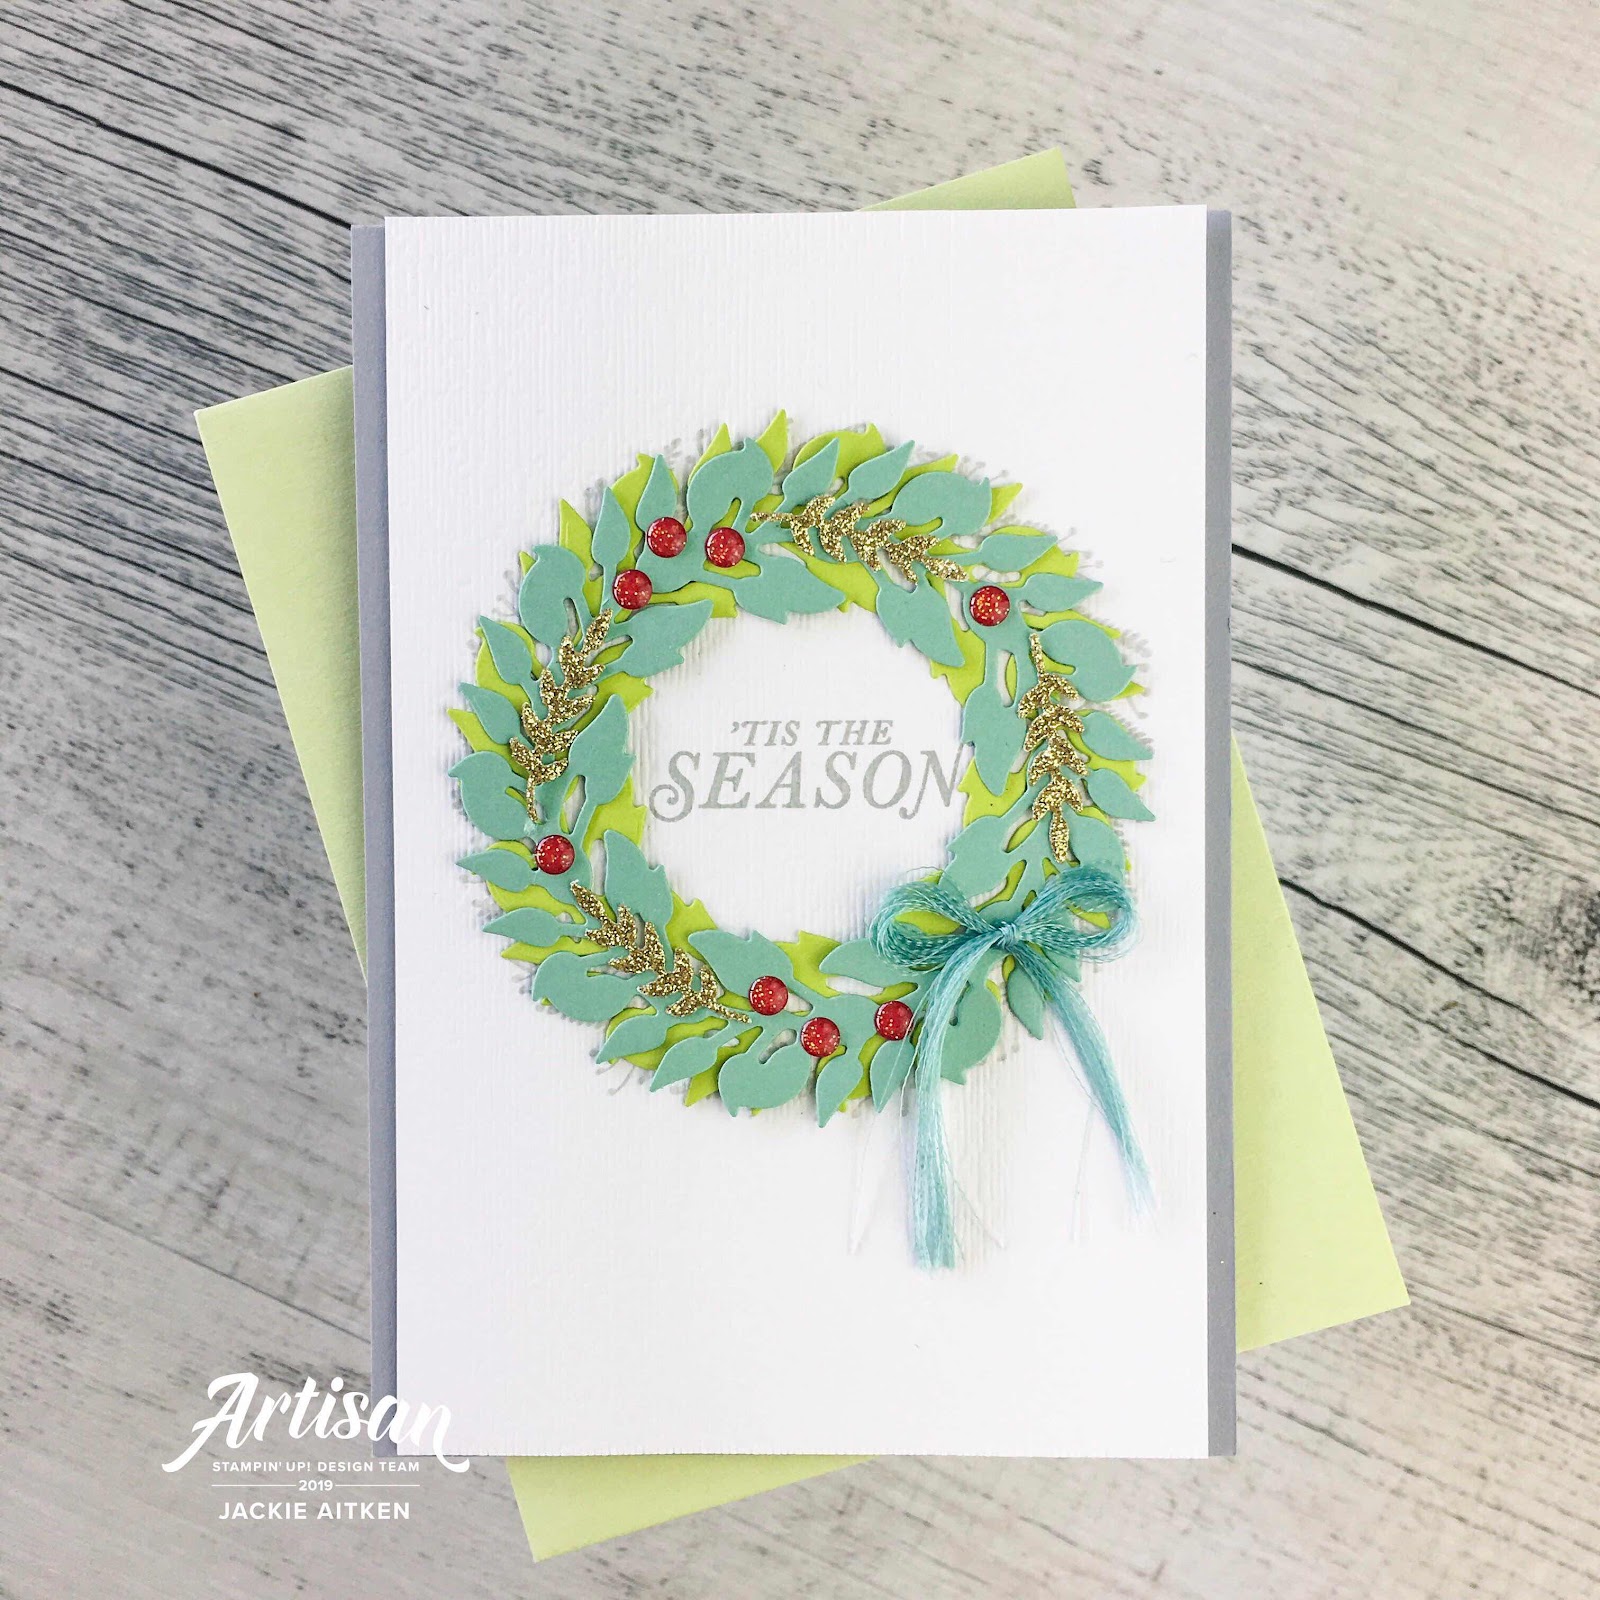
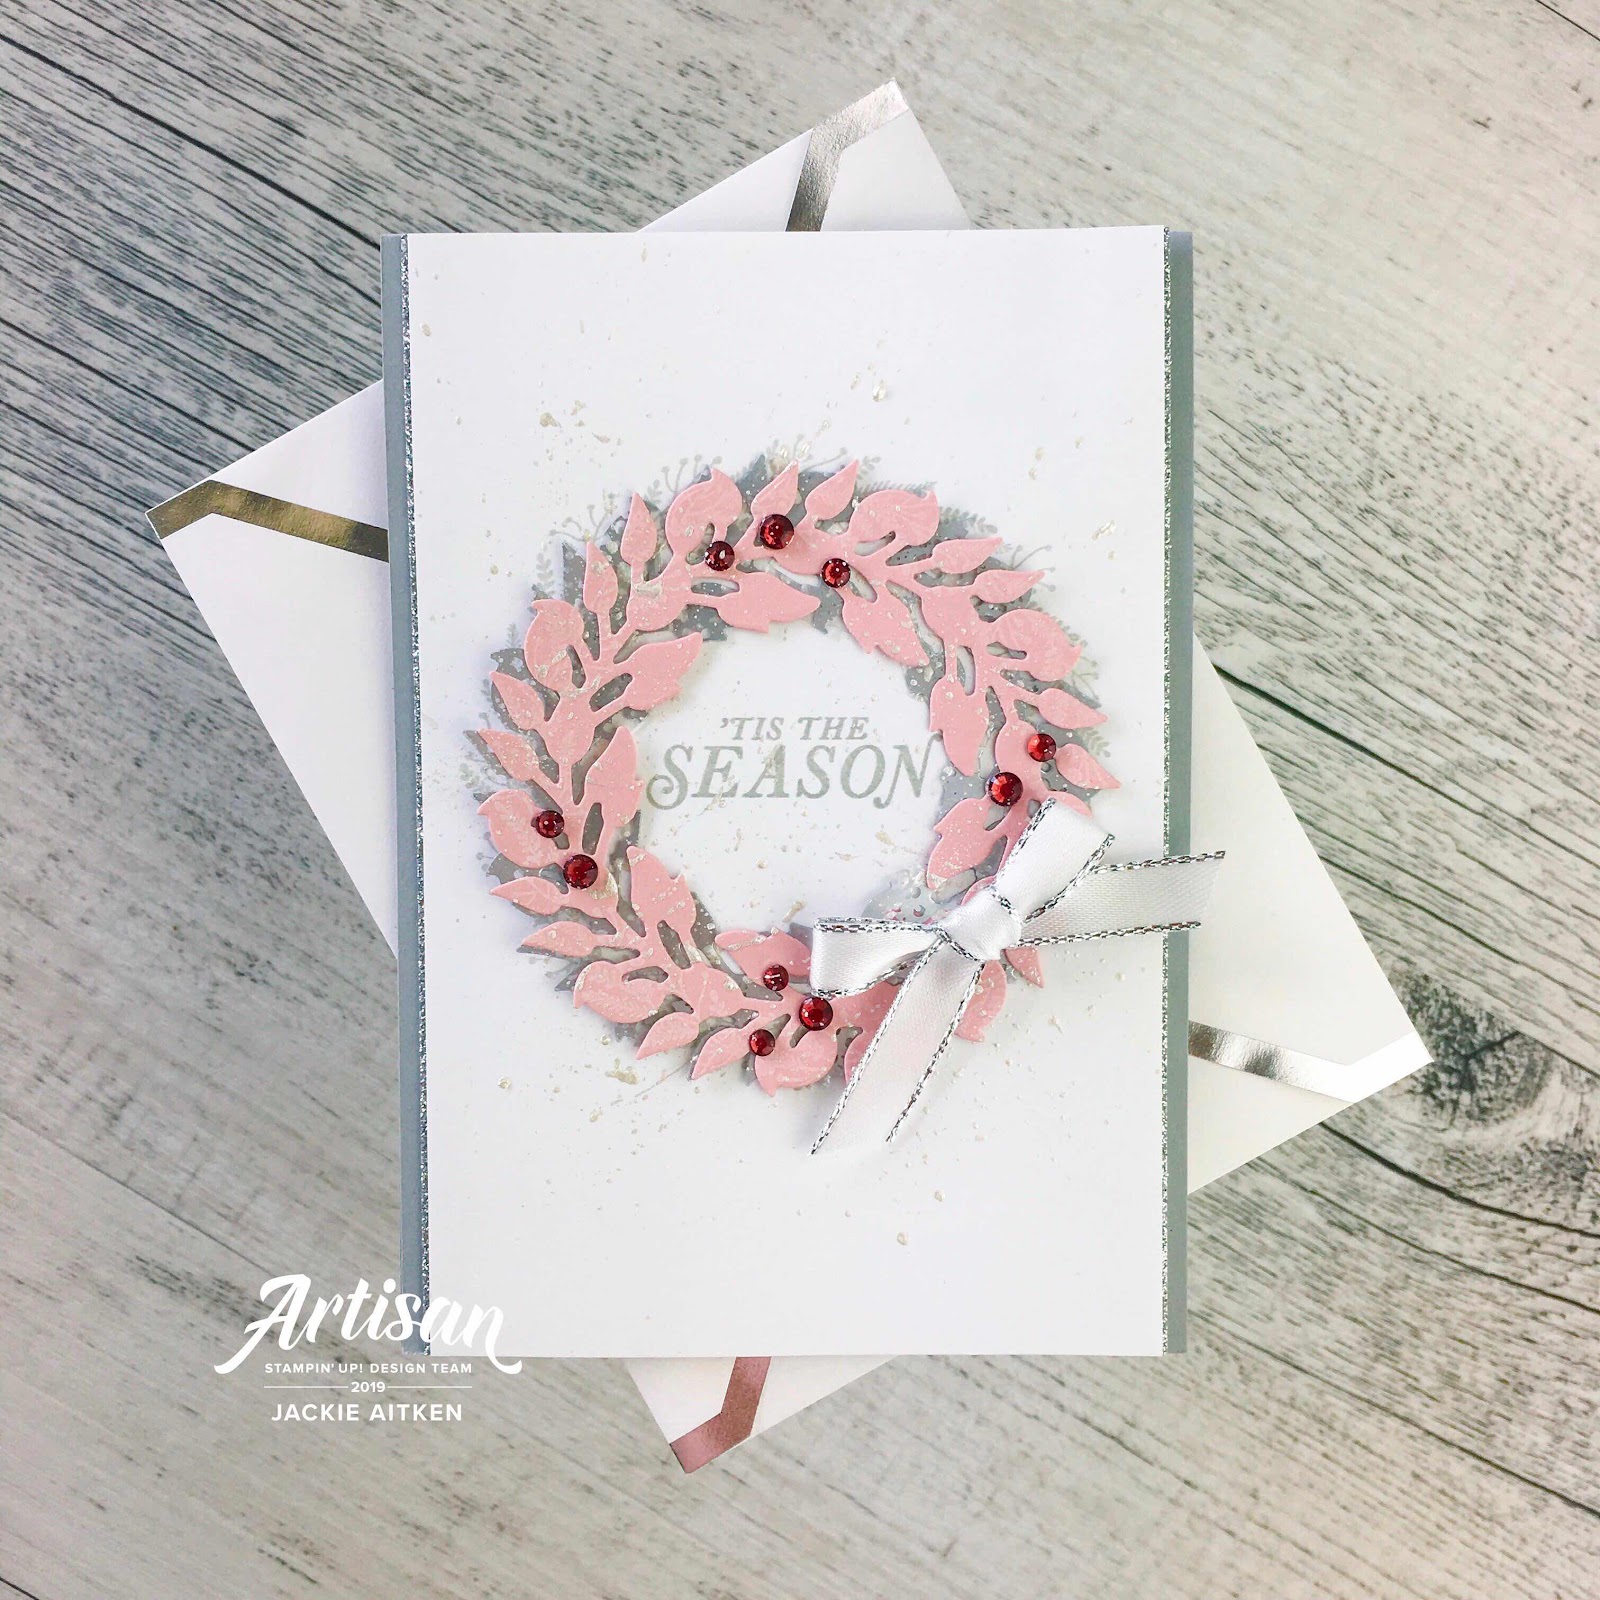
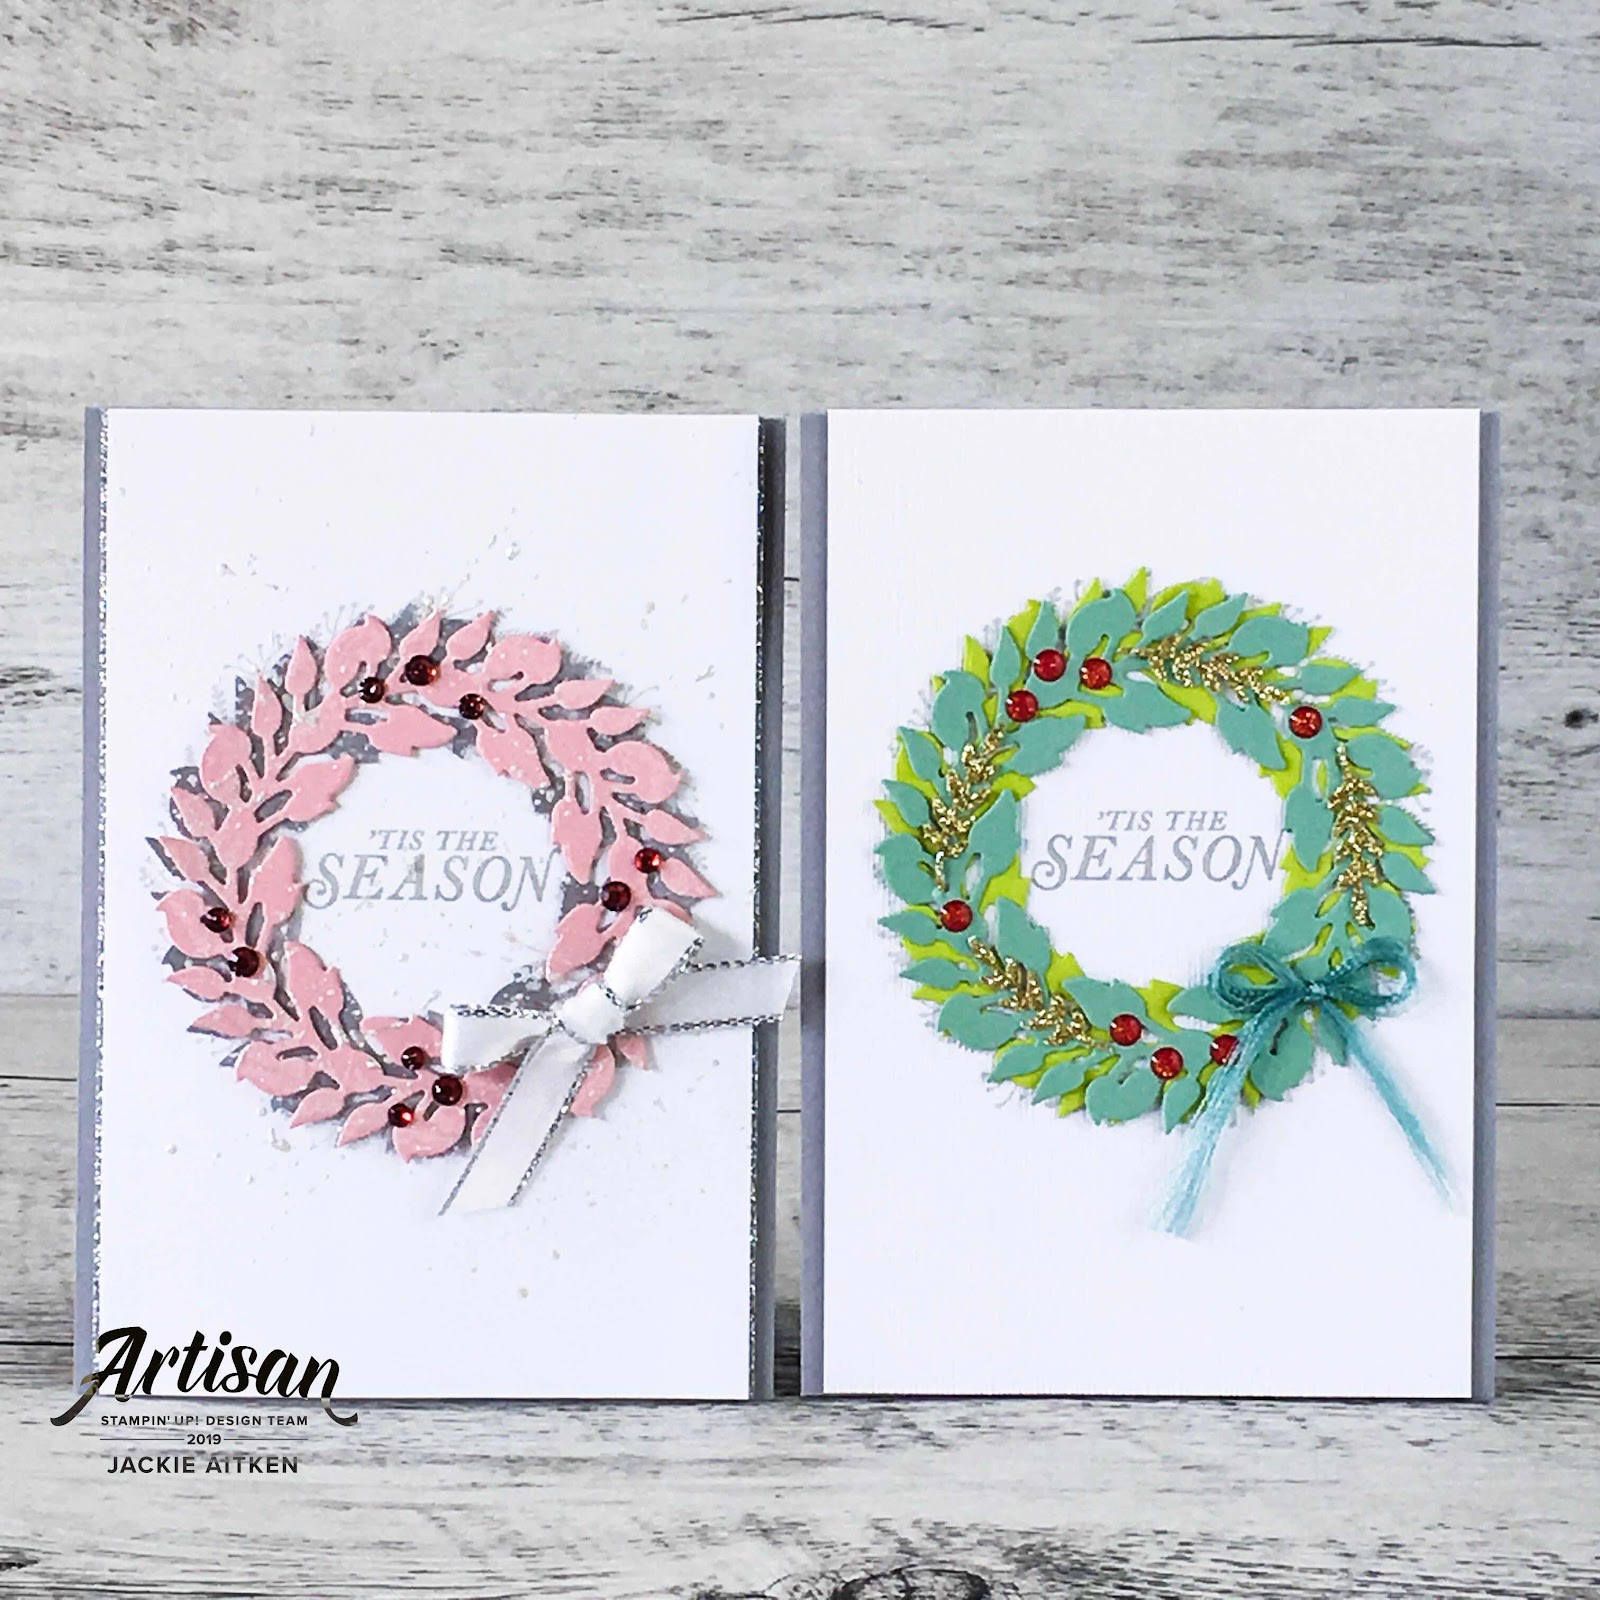
Keeping the layout the same as in the Catalogue, both cards have the same card Smoky Slate Card Base and Card Front.

To the Whisper White card front, the wreath image from Tidings All Around Stamp Set has been stamped in Smoky Slate ink, along with the sentiment that sits in the middle of the wreath. Before adhering to the card base, the stamped card front was embossed using the Subtle Embossing Folder.

Stampin' Up, Jaxx Crafty Creations, Tidings All Around, Wreath Cards, Christmas Cards, 2019 Holiday Catalogue, Be Inspired Blog Hop, Shimmer Paint,

Granny Apple Green and Mint card stock were used for the wreath die cuts and the Toile Tidings Glitter Enamel Dots in Real Red along with Gold Glimmer leaf die cuts to embellish the wreath.

To create the fluffy bow I have cut the edge from 1/4" Textile Mint Macaron Ribbon and shredded to reveal the fine threads. 

Stampin' Up, Jaxx Crafty Creations, Tidings All Around, Wreath Cards, Christmas Cards, 2019 Holiday Catalogue, Be Inspired Blog Hop, Shimmer Paint,

The second card has been created using Blushing Bride Cardstock and Mercury Glass Acetate for the die cut wreaths. Cherry Cobbler Rhinestone Jewels were added before splattering Frost White Shimmer Paint all around the wreath. 

Silver Glimmer card has been adhered to the edged of the card front before adhering to the card base. Whisper White/Silver 3/8" Ribbon has been used to create the bow which has been attached using a Mini Glue Dots.

Stampin' Up, Jaxx Crafty Creations, Tidings All Around, Wreath Cards, Christmas Cards, 2019 Holiday Catalogue, Be Inspired Blog Hop, Shimmer Paint,

That is all from me today. Thanks so much for stopping by and hopping with us. The Be Inspired Design Team appreciate the time you have invested to visit our Blogs. Be sure to follow the hop all the way through for loads more inspiring creations. Up next in this month Blog Hop is super talented Cathy Caines - enjoy x
No photo description available.