SOCIAL MEDIA

Thursday, 31 January 2019

Butterfly Gala Blog Hop with Talented Friends

Good Day Crafty Friends,

Today I am hopping with fellow South Pacific Artisan Design Team Members Rochelle Blok, Narelle Farrugia, Tanya Rees and Angela Meiritz-Reid.  What is the Artisan Design Team? We are a group of talented and creative Stampin'Up! Demonstrators from around the world selected by Stampin'Up! to blog about projects we create. We participate in monthly Artisan Blog Hops, share Instagram Tips and design for Stampin'Up! Corporate Blog Posts. 

The South Pacific Artisan Design Team members - Rochelle, Narelle, Tanya and myself representing Australia, and Angela being the sole Artisan from New Zealand, have decided to collaborate for this special blog hop to share projects made with the Gingham Gala Suite and coordinating Sale-a-bration products.

Some items from the current Occasions and Sale-a-Bration Catalogues have been so popular they are hitting low stock levels. The Butterfly Duet Punch is one of these items!! It is currently still able to be ordered in the South Pacific market (sold out in the U.S.) so if you are crushing on this bundle, get in quick before they disappear.  If you do miss out, I am happy to advise that the punch will be back in stock in a few months time.

Onto my projects.....I have two creations to share with you today - a little bird cage with matching card.

Stampin' Up!, Artisan Design Team 2019, Gingham Gala Suite, Botanical Butterfly DSP, Butterfly Gala, Birdcage, Butterfly Card,

Both the card and bird cage feature the Butterfly Botanical DSP which is a free product item that can be earned during Sale-a-Bration. What's Sale-a-Bration you ask? Only the best sale promo ever!!!

Heres a quick "how to" earn freebies during Sale-a-Promotion. (Australian market)

1. SHOP - Your choice of free product from the Sale-a-Bration brochure for every AUD$90 order.
2. HOST - Additional AUD$40 in Stampin' Rewards when your party totals are over AUD$450
3. JOIN  -  Option A. Join for AUD$169 and get AUD$315 in product.
                   Option B. Join for AUD$210 and get AUD$315 in product PLUS exclusive Craft &                           Carry Tote valued at AUD$87

My card measures 5" x 5" and has a predominately black and white colour theme, inspired by the Botanical Butterfly DSP, with a few hints of gold foil and embossing with some blushing bride.

jaxx crafty creations, Stampin' Up!, Artisan Design Team 2019, Gingham Gala Suite, Botanical Butterfly DSP, Butterfly Gala, Birdcage, Butterfly Card,

The little bird cage was made by creating two "box lids" from Thick Whisper White Card Stock.  These measured 3" x 3" when glued together. 1/2" Strips of card stock were adhered to the inside of the bottom "lid", left to dry overnight and then this process was repeated for the other end/top.

Another box lid was created for the bottom stand, this time a little longer in length so that I was able to use the Darling Label Punch to create the legs of the bird cage stand. The top portion of the cage was then adhered to the "stand" with Tombow Multi Purpose Glue. Another 1/2" strip of Whisper White card was used to make the circle handle which has been adhered to the top of the bird cage with strong double sided adhesive so it can be hung with ribbon.

jaxxcraftycreations, Stampin' Up!, Artisan Design Team 2019, Gingham Gala Suite, Botanical Butterfly DSP, Butterfly Gala, Birdcage, Butterfly Card,

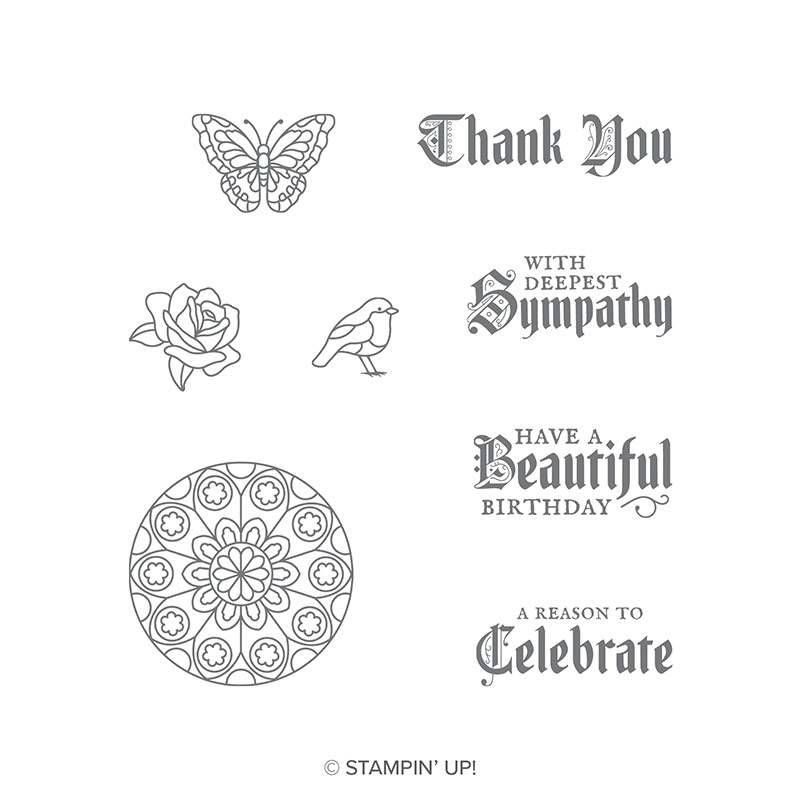
All the Butterflies have been created with the Butterfly Gala Stamp Set and Duet Punch. Gold Heat embossed onto Shimmery White card, water coloured using an Aqua Painter and then punched.

Gold Metallic Thread has been used to suspend the Butterflies from the ceiling of the bird cage. The wooden Butterfly embellishments used are also a Sale-a-Bration item - the outside of the external Butterfly and the foliage for the flowers. I used Tombow to secure them in place as the Glue Dots in the Perth summer heat tend to not be strong enough.

Stampin' Up!, Artisan Design Team 2019, Gingham Gala Suite, Botanical Butterfly DSP, Butterfly Gala, Birdcage, Butterfly Card,

All the flowers were creating by using a tutorial normally used to make Giant Flowers - the kind used for backdrops of photos etc. These are all over the internet, all you need to do is adjust the concept to a mini version. The sentiments used on both the card and bird cage are also from the Butterfly Gala stamp set, white heat embossed on Black card stock.

The inside of bird cage has been lined with the same dotted DSP used on the left hand side of the card. To finish the card a few little gold sequins have been added.

Thanks so much for stopping by today. If you have just arrived at my blog or have missed some of the amazing projects shared by fellow South Pacific Artisan Design Team members , you can start at the beginning with Rochelle Blok, by clicking on the image below.


You can find all the products used to create today's Card and Bird Cage projects in the list below:

Product List

Until next time, stay awesome and stay crafty


Thursday, 10 January 2019

OSAT Blog Hop - Sale a Brate Every Occasion

Hello Crafty Friends

Welcome to our first OSAT Blog Hop for 2019. I hope you and your family had a fabulous festive season and remained to stay sane and safe while enjoying all the festivities and food lol. You are currently visiting Jackie Aitken in Western Australia. If you are following the Blog Hop you may have arrived here having just visited Martin Stone. 

I am so stoked (happy) to be joining the talented and creative OSAT Design Team again this year. Be sure to follow the monthly Blog Hops which are live every second Thursday of the month, for loads of inspiring idea's using Stampin' UP! products.

Image may contain: text
This months theme is SALE A BRATE EVERY OCCASION. With the release of the new Occasions and Sale-a-Bration Catalogues at the start of this month, we now have even more amazing stamps and coordinating products to choose from when creating that special handmade project.

One bundle that I absolutely adore is the Gingham Gala Suite. What is even more fabulous is this suite also has coordinating products in the Sale-a-Bration Catalogue. That means you can earn those goodies for FREE when you make a qualifying purchase. The wooden elements used on my projects today are one of these FREE items - Butterfly Elements #149711 (Page 8 SAB Catalogue).

Butterfly Card, Butterfly Gala, Gable Gift Box, Gingham Gala Suite, OSAT Blog Hop, Sale-a-Bration 2019, Stampin' Up!, jaxxcraftycreations.blogspot.com

The Gingham Gala Suite (Page 35 Occasions Catalogue) is such a delightful suite that includes the Stamp Set, coordinating Punch, Gingham 6" x 6" DSP Pack, Flax Ribbon, Adhesive Backed Sequins and matching CardStock Pack. And as mentioned above, this Suite also has coordinating products in the SAB Catalogue - DSP & Embellishments.

Butterfly Card, Butterfly Gala, Gable Gift Box, Gingham Gala Suite, OSAT Blog Hop, Sale-a-Bration 2019, Stampin' Up!, jaxxcraftycreations.blogspot.com

My card today uses a piece of the beautiful Balmy Blue Gingham DSP. Tilted on an angle with a Whisper White panel tilted on opposite angle is a simple yet effective card front. The Butterfly cluster in the centre includes the Whisper White 5/8"  Flax Ribbon,  which I have pulled apart and splayed out under a wooden Butterfly embellishment.

The sentiment has been White Heat Embossed on Black CardStock and adhered over the cluster with mini dimensionals.

Butterfly Card, Butterfly Gala, Gable Gift Box, Gingham Gala Suite, OSAT Blog Hop, Sale-a-Bration 2019, Stampin' Up!, jaxxcraftycreations.blogspot.com

I just adore the little Gable Boxes from the Annual Catalogue, as they fit bars of soap I make perfectly.  This little beauty has been dressed up to match the card, using the Balmy Blue Gingham DSP, Sahara Sand CardStock, again, the Wooden Embellishments from the SAB promotion, as is the Balmy Blue Organza Ribbon.

Butterfly Card, Butterfly Gala, Gable Gift Box, Gingham Gala Suite, OSAT Blog Hop, Sale-a-Bration 2019, Stampin' Up!, jaxxcraftycreations

If you are loving the Gingham DSP like I do, it does come in four other colours including Daffodil Delight, Grapefruit Grove, Highland Heather and Lemon Lime Twist - so fresh and pretty!

Butterfly Card, Butterfly Gala, Gable Gift Box, Gingham Gala Suite, OSAT Blog Hop, Sale-a-Bration 2019, Stampin' Up!, jaxxcraftycreations

Thanks so much for stopping by today, we appreciate the time you have invested to blog hop with us. Up next in the Hop is Liz Yuille with her beautiful creations. Enjoy x


All the items I used to create the card and gable box in this post can be found below.

Product List


Until next time, stay awesome and stay crafty


HOST CODE - X7N6ZPAC


Tuesday, 5 June 2018

Painted Glass Stamp Set - Pretty in Pink

Hello Crafty Friends,

Just a quick post today to share a few cards made with the stunning new Painted Glass Stamp Set. There are four sentiments and four images and has coordinating dies - Stained Glass Thinlits.
Painted Glass Clear-Mount Stamp Set

 I have combined the stamped images with a few different coloured and size stitched frames, created using the Stitched Shapes framelits - by extending different sized Square Stitched Shaped framelits.

Painted Glass Stamp Set

The rose and butterfly images have been stamped using Momento Tuxedo Ink and coloured using Stampin' Blends. The foliage behind the roses are fussy cut images from the Jar of Love stamp set.

Bakers Twine has been split and placed behind the roses along with some Powder Pink ribbon. The Celebrate You Thinlits were used to die cut the 'amazing' from Silver Foil. A few Artisan Pearls were added to finish the card.

Painted Glass Butterfly Roses

The next card was created using the Butterfly stamp and masking technique. The images were stamped using Momento Tuxedo ink and coloured using Stampin' Blends. Splatters of black ink were applied along with the fussy cut sentiment from Rooted in Nature stamp set. 

The card front was cut down, a layer of black card added to the right hand side before adhering to card base with a strip of Lovely Lipstick In Colour DSP. A few Black Faceted Dots were added and voila the card is complete.

Painted Glass Stamp Set

Page 164 of the Annual Catalogue shows samples using both The Painted Glass Bundle and Graceful Glass Suite - be sure to check it out for loads of inspiration using these stunning items.

Graceful Glass

Until next time, stay crafty


Thursday, 3 May 2018

Painted Glass with Bokeh Background

Good Day Crafty Friends,
Hope you are having a swell day. Its a gorgeous day here in my neck of the woods, although the temperature is just starting to shift, I cannot complain as its been a very mild Autumn. Fingers crossed the same applies to our Winter.
I wont take up much of your time, just wanted to share a recent make using the large image stamp from the Painted Glass set.

painted glass stamp set, bokeh technique, stampin up

I created a Bokeh background and then white embossed the circular image. To tone down the extremely vibrant background, I added a strip of vellum before adhering the cluster of elements in the right hand corner. I don't know what it is, but I always gravitate to that corner.
Do you complete the make and takes at Onstage on the day? I don't lol I stamp the required pieces and drag everything else home and recycle it!! I know, I am such a miser lol.
I have used the strip of Share What you Love Speciality DSP and new 1/4" Rich Razzleberry Velvet Ribbon, from one of the make and takes to create this card. A stitched rectangle was added as a base for the cluster, created by extending the square Framelits. Also, a strip of Gold Foil, a Butterfly die cut and then the stamped butterfly image, also from Painted Glass.
I wanted to add some Gold Metallic Thread but couldn't find it! I know I pulled it out to thread some onto a bobbin and then well....I just don't know! It will show up.

bokeh technique, painted glass stamp set

Creating Bokeh Backgrounds

I always use Shimmery White Card Stock when using any sponging techniques.
Create a stencil with half a sheet of Acetate, using different sized circular shapes. I used both punches and die cuts.
Start by sponging your base colours, in circular motions - always circular. Start off the card on scratch paper and work your way onto the card stock. This prevents ink build up and noticeable sponge marks. Always build colour, meaning, start off light and add layers of colour. Never go in expecting the ink pad colour to be transposed onto the card with just one coating. It takes many layers.
Once you are satisfied with your background, let it dry. I tend to leave them overnight. If you don't wait, you will need a few sponges for the next stage, as the ink can transfer onto yours sponges. Take your stencil and sponge White Craft Ink. Alternate the circles and layers of white ink used. Be random and don't be afraid to overlap.
Hope you are inspired to give it a try.
Until next time, stay crafty