SOCIAL MEDIA

Saturday, 27 July 2019

For the Love of Unicorns

Good Day Crafty Friends,

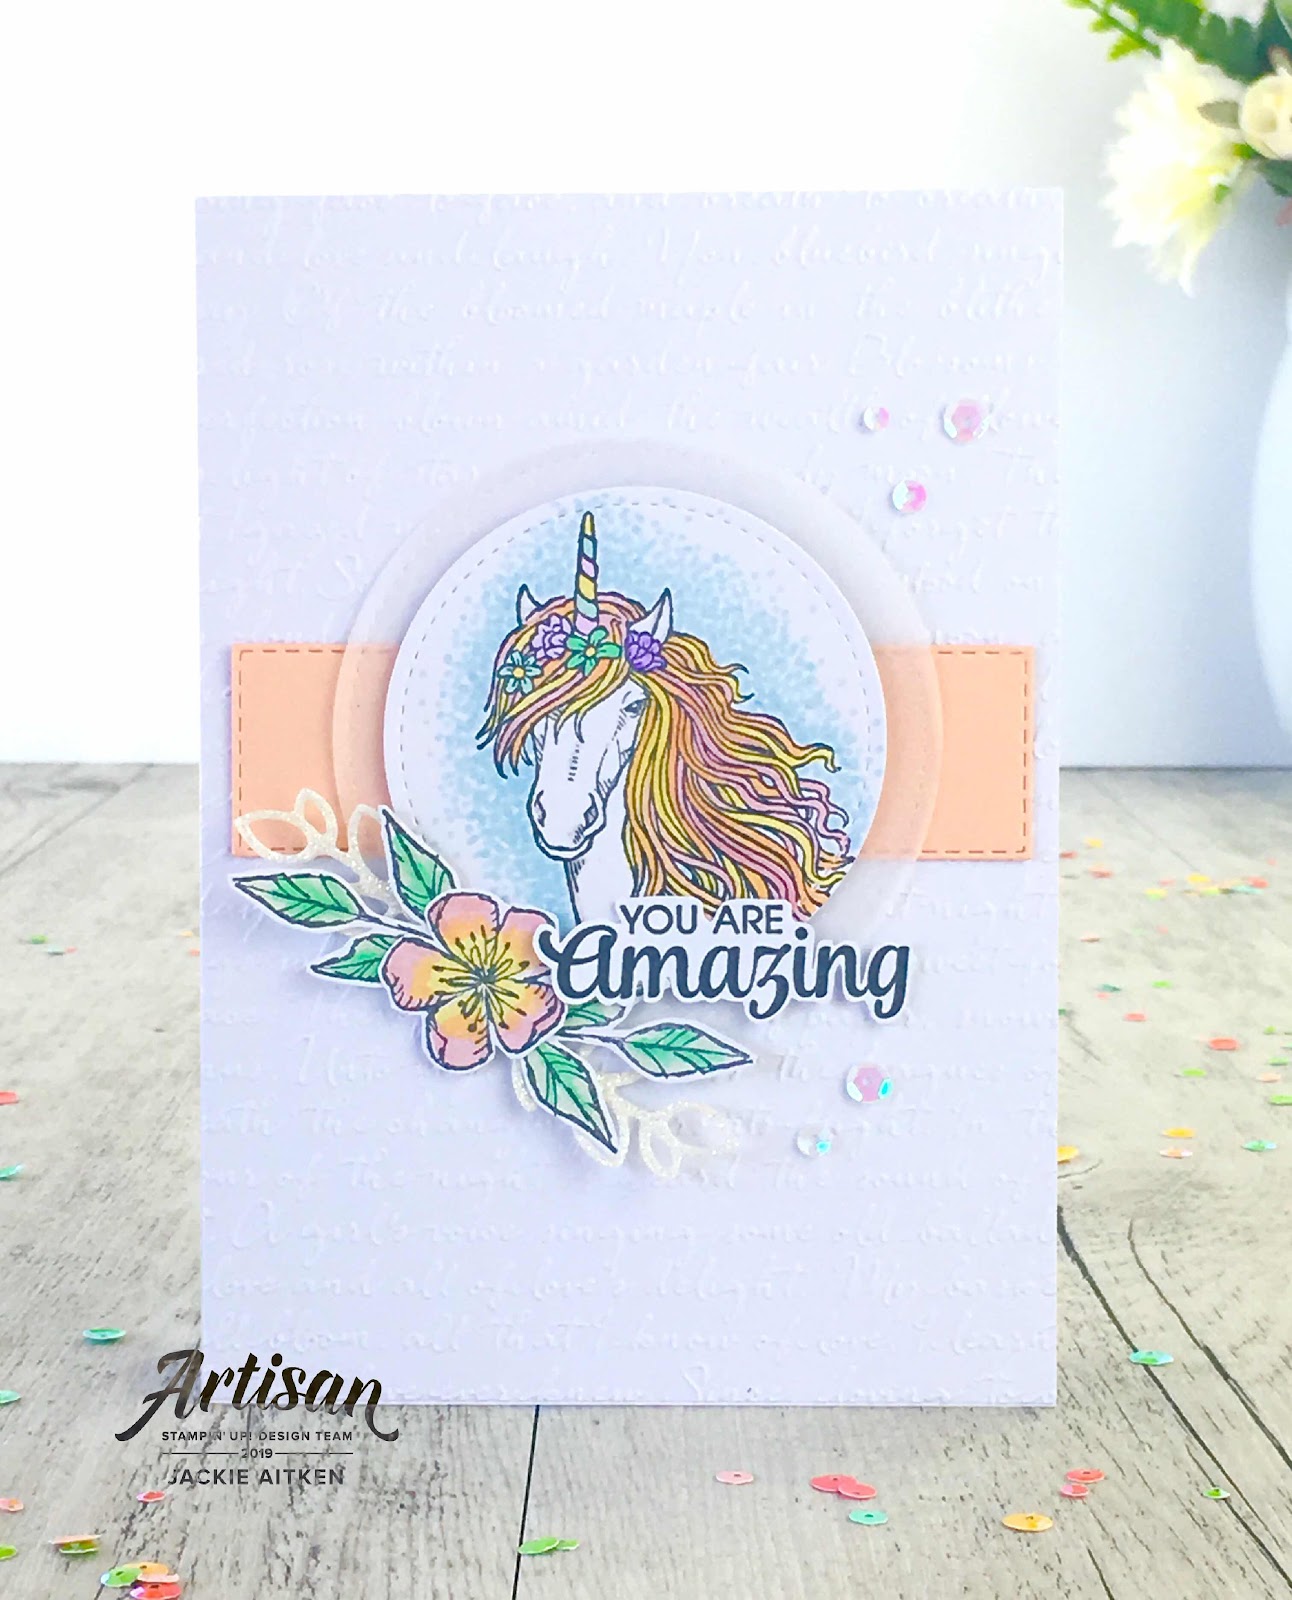
Are you a Unicorn fan or know someone who simply adores them? If the answer is yes, then the new stamp set - Leave A Little Sparkle is a must have. You can find this stamp set on page 136 of the Annual Catalogue.

I love whimsical images and colouring so this stamp set was right up my alley! Both of the Unicorn images in the cards I am sharing today have been coloured using Stampin' Blends, with the majority of the application going to the mane/hair.

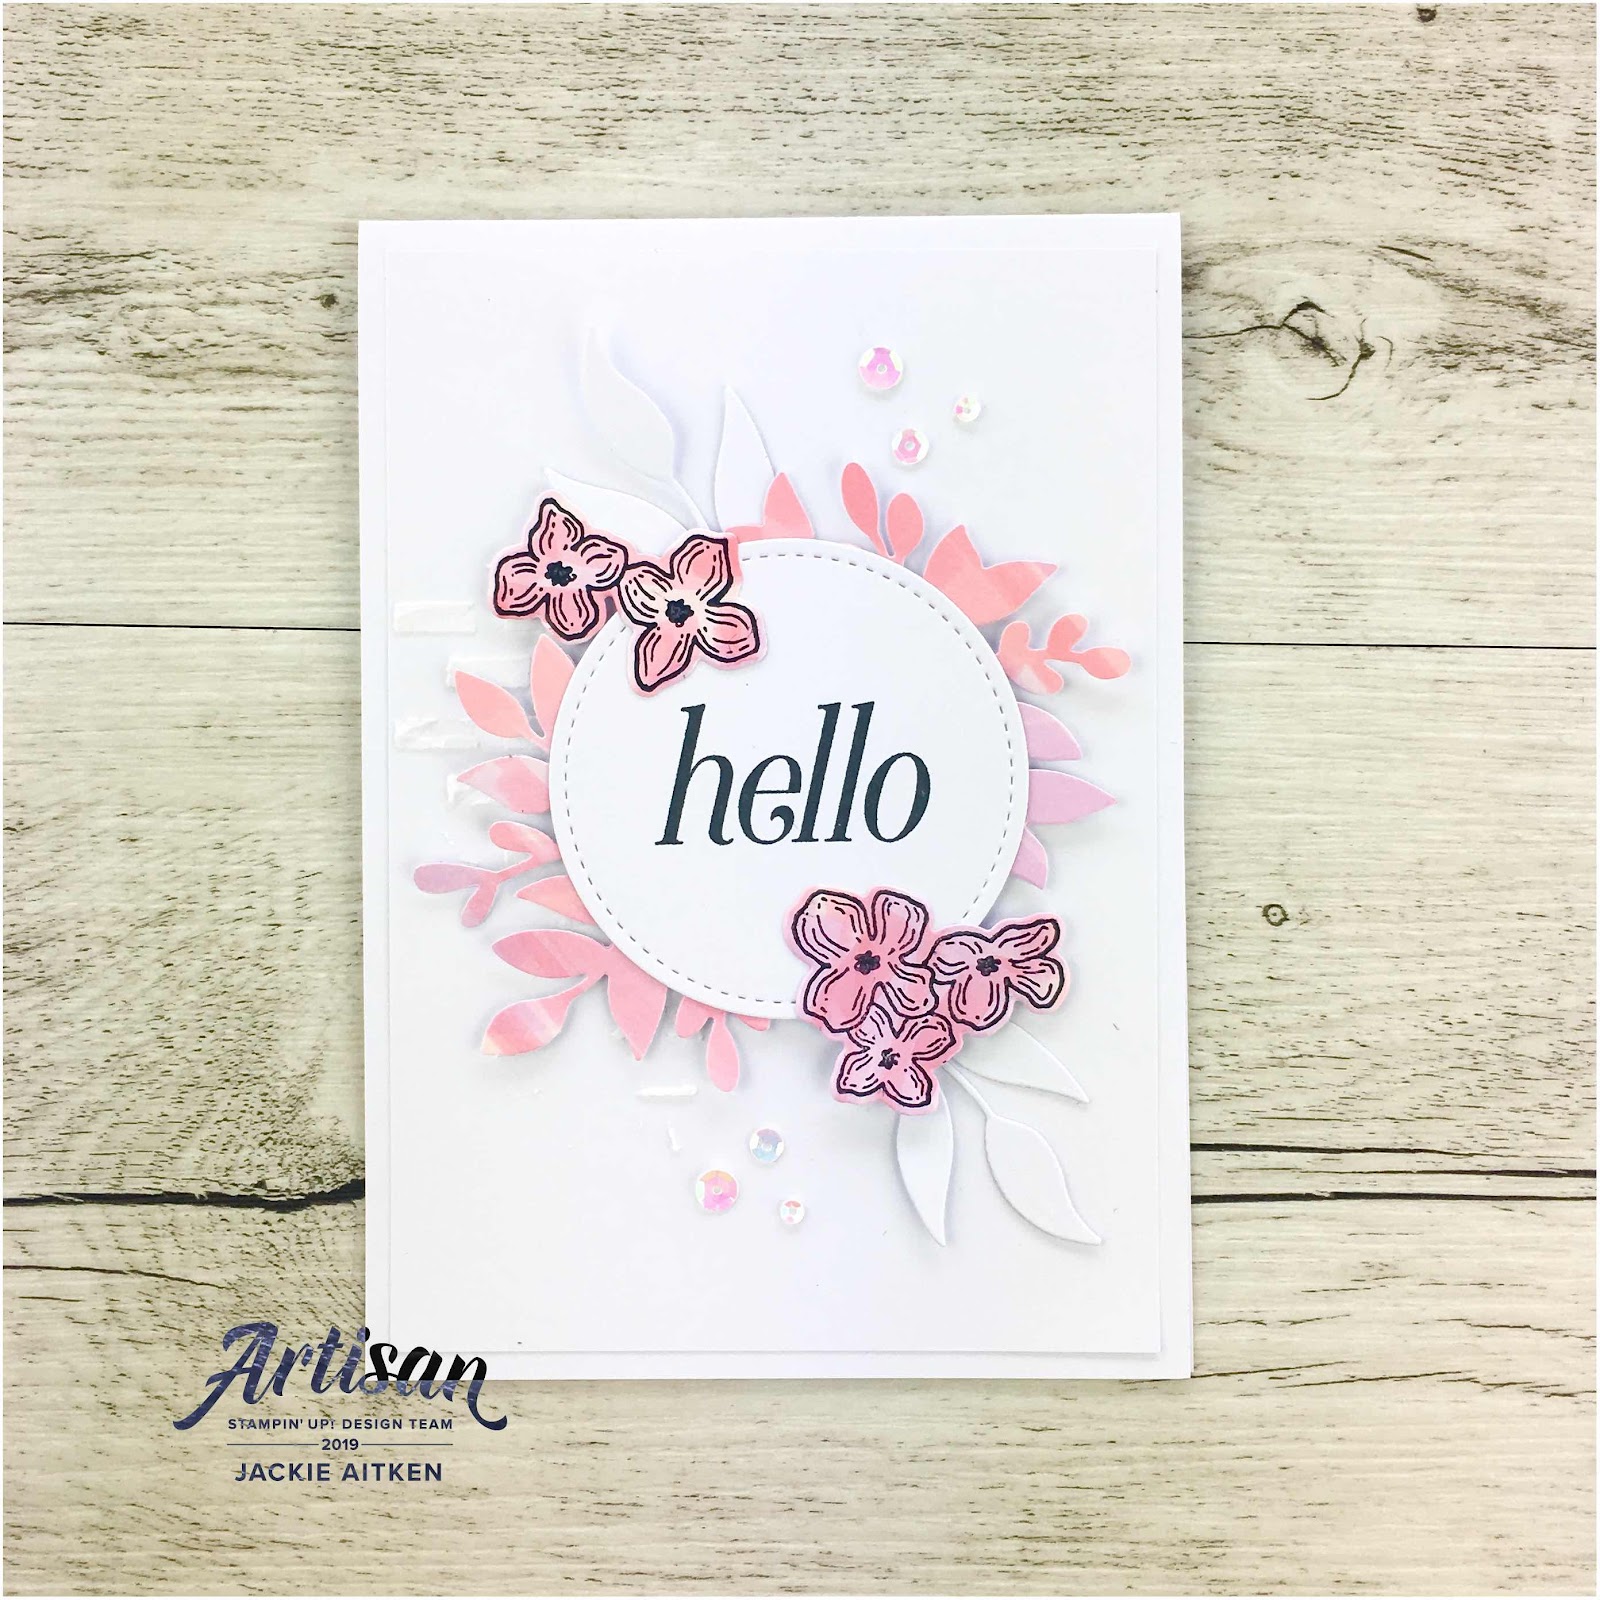
The first card is soft and pretty with a floral image, petal pink and glimmer die cuts and sequins. Perfect for the little girly girls in your life.


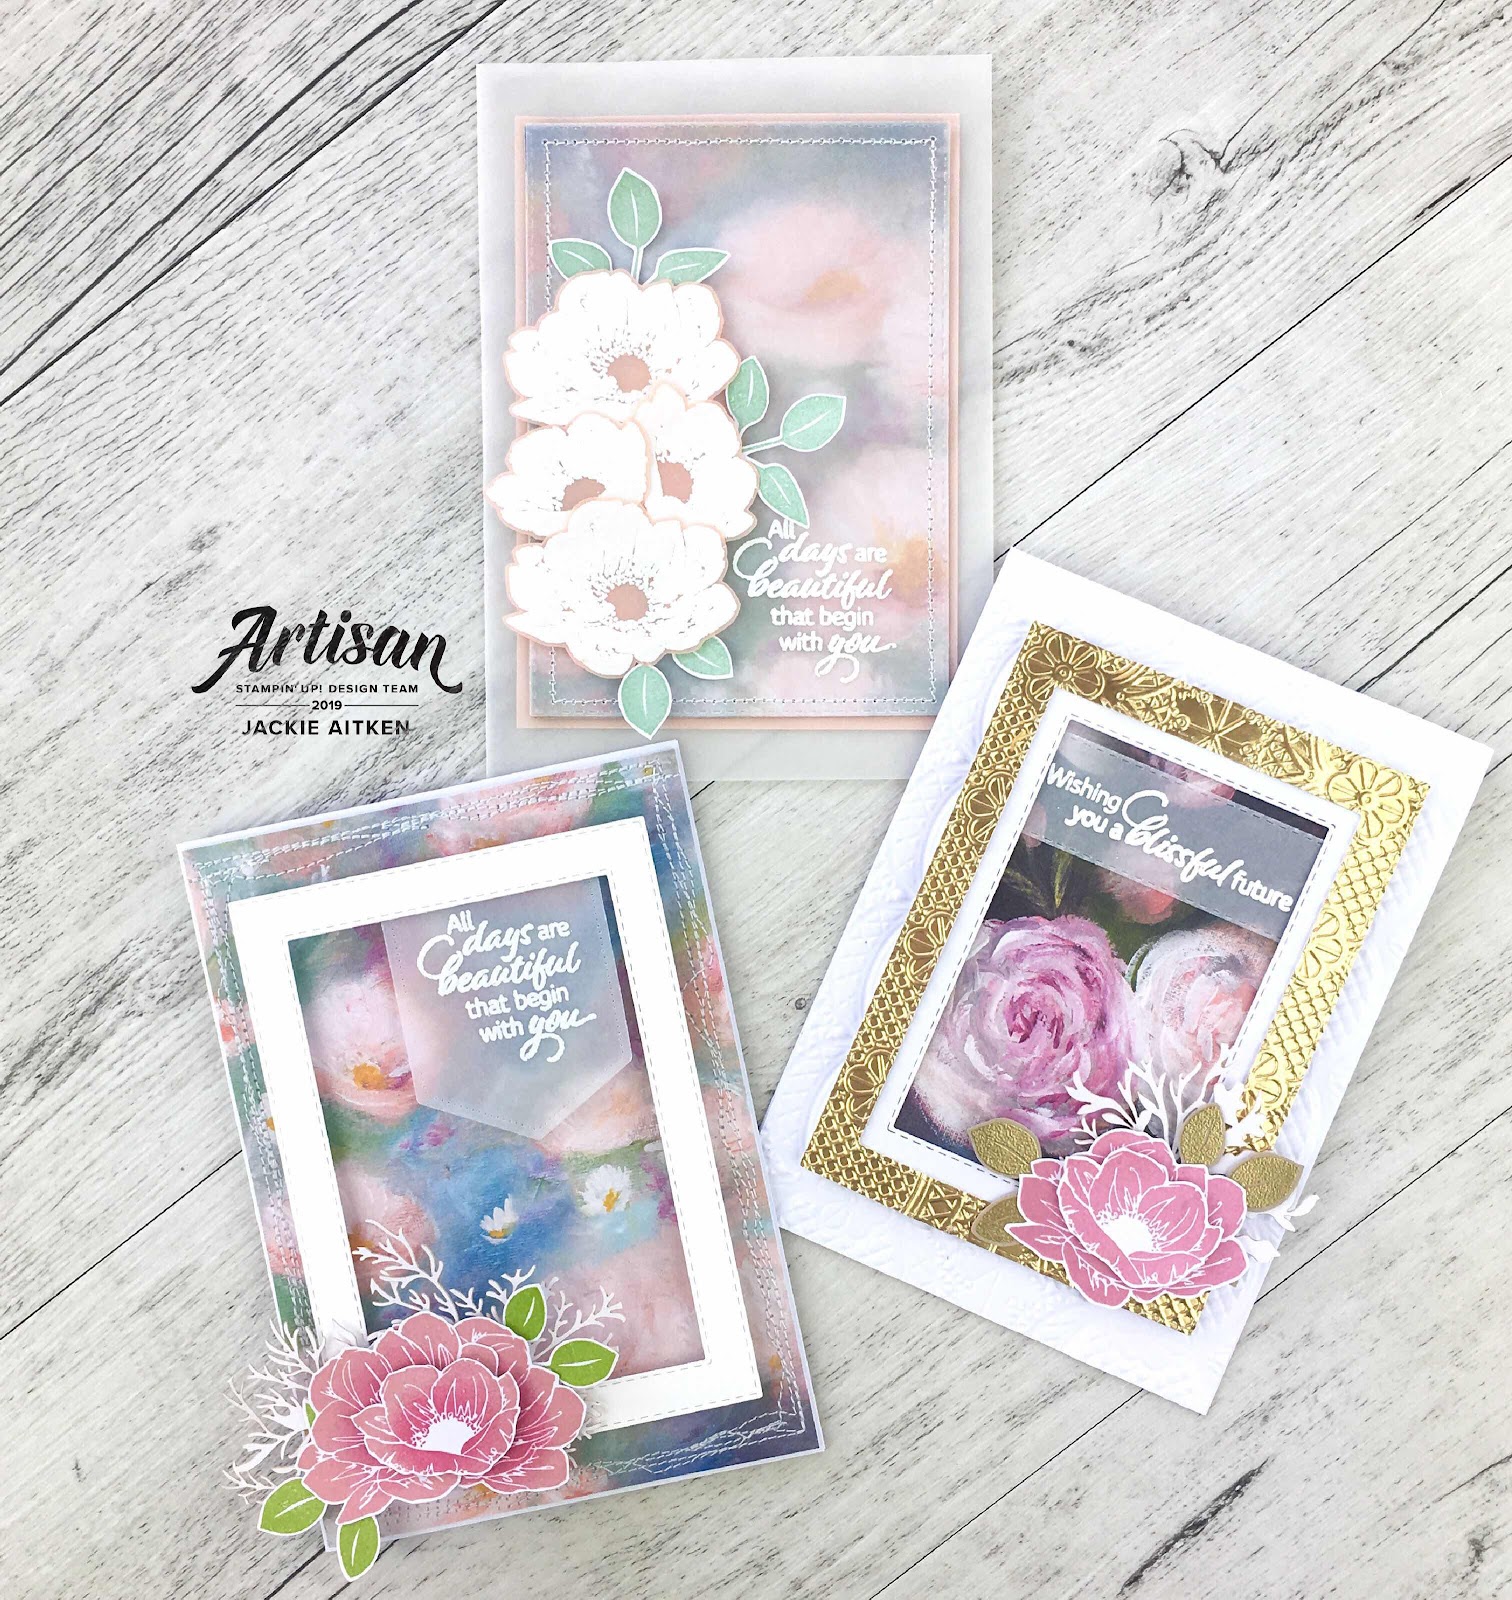
Apologies for the photo's - its almost winter here in Perth and the lack of natural sunshine makes it hard to see the stunning new embossing folder I used on both creations. Trust me when I say, the Scripty Embossing Folder is absolutely gorgeous.

Both cards have used a technique called stippling, which simply put is just applying a heap of dots with a marker to the outside of an image. Start off heavy and fade out the intensity of the dots towards the edges.

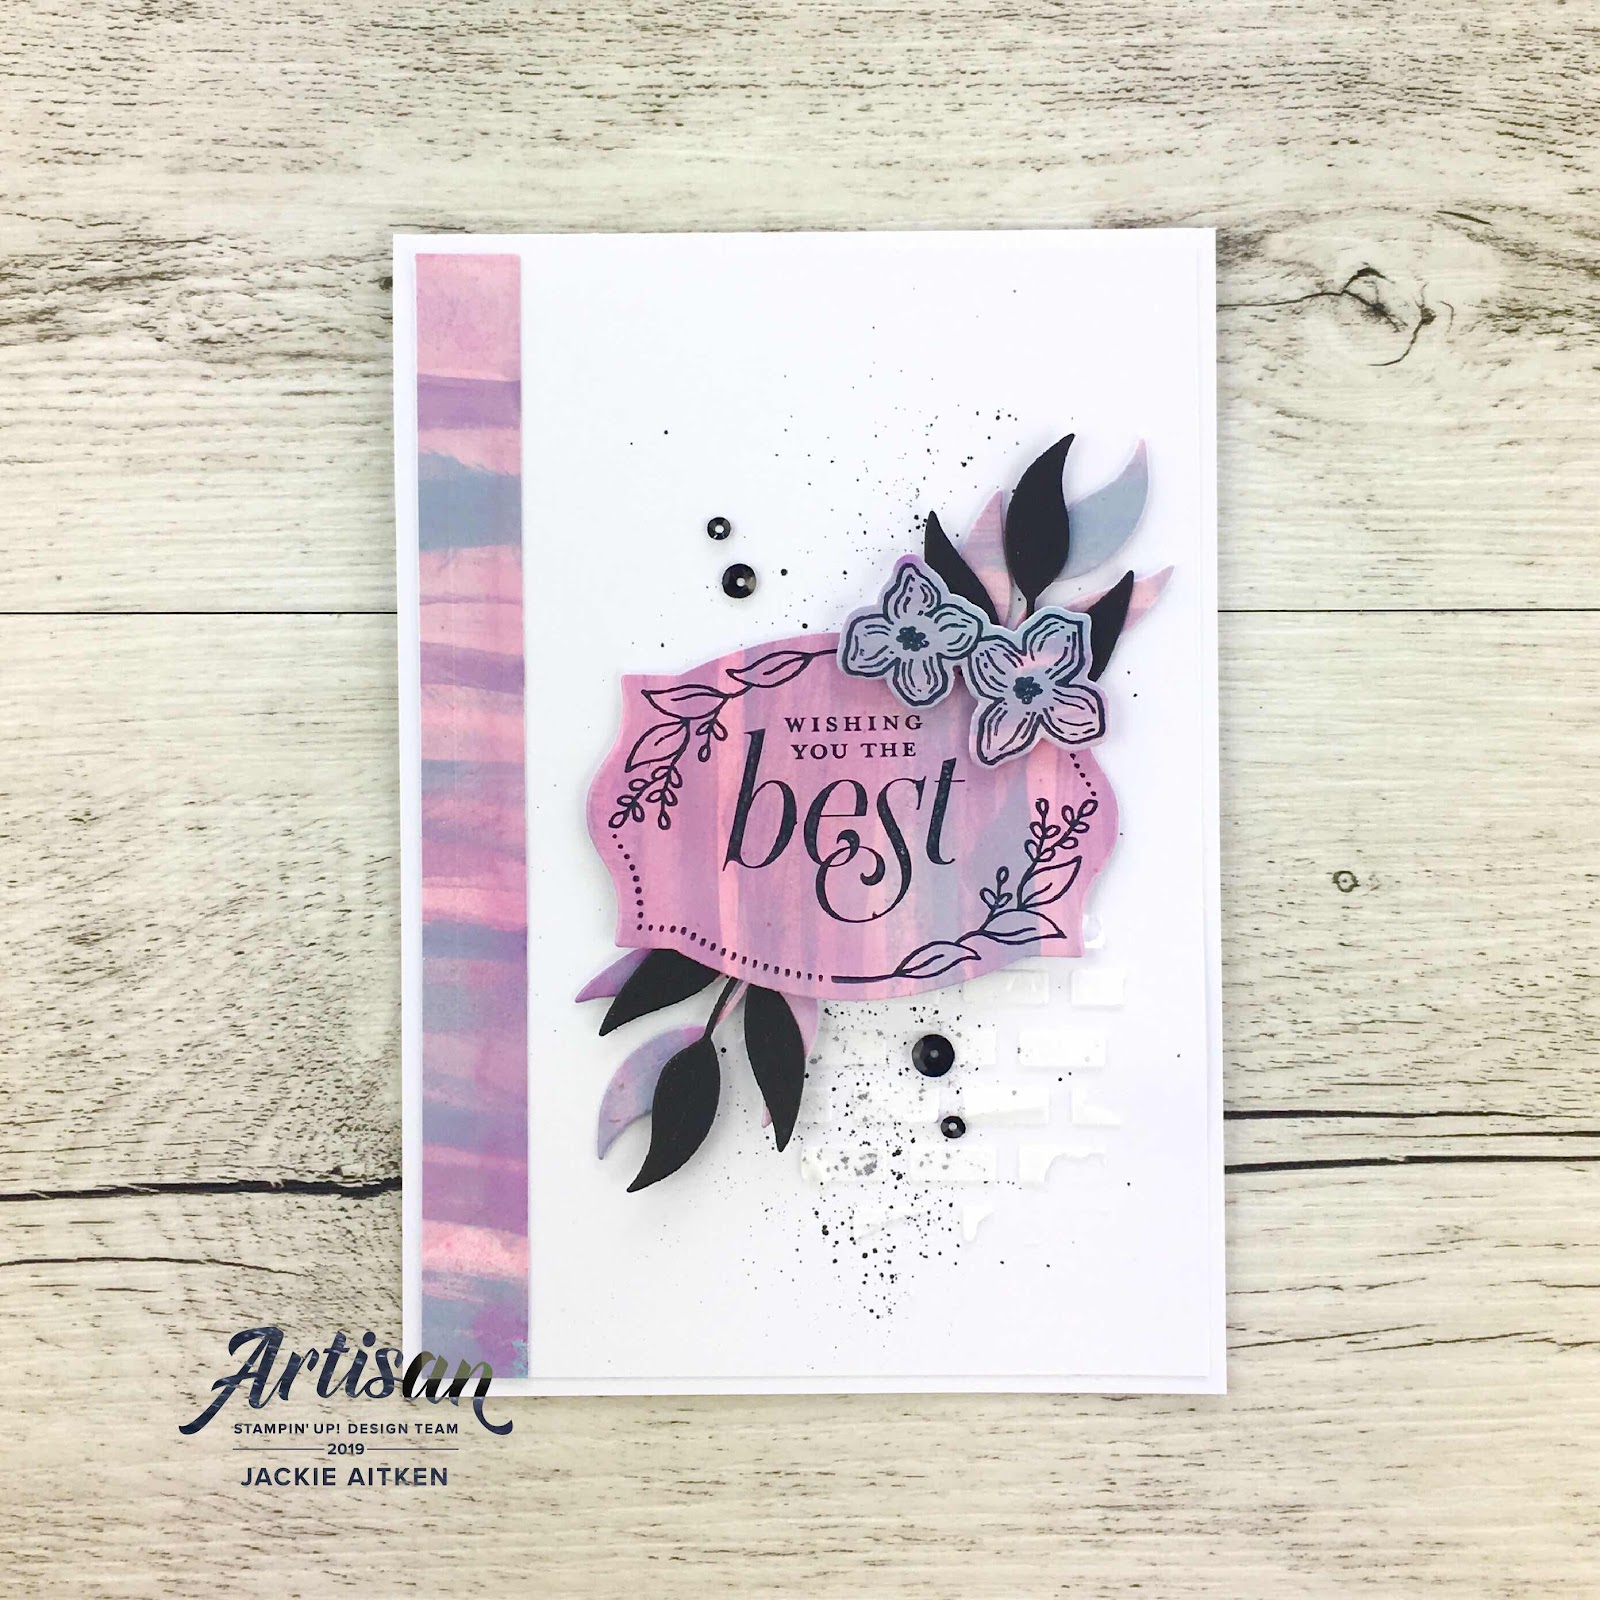
The second card is a little bolder in Highland Heather. The scallop edge around the Unicorn was created by die cutting four strips and adhering to the back of the card front.


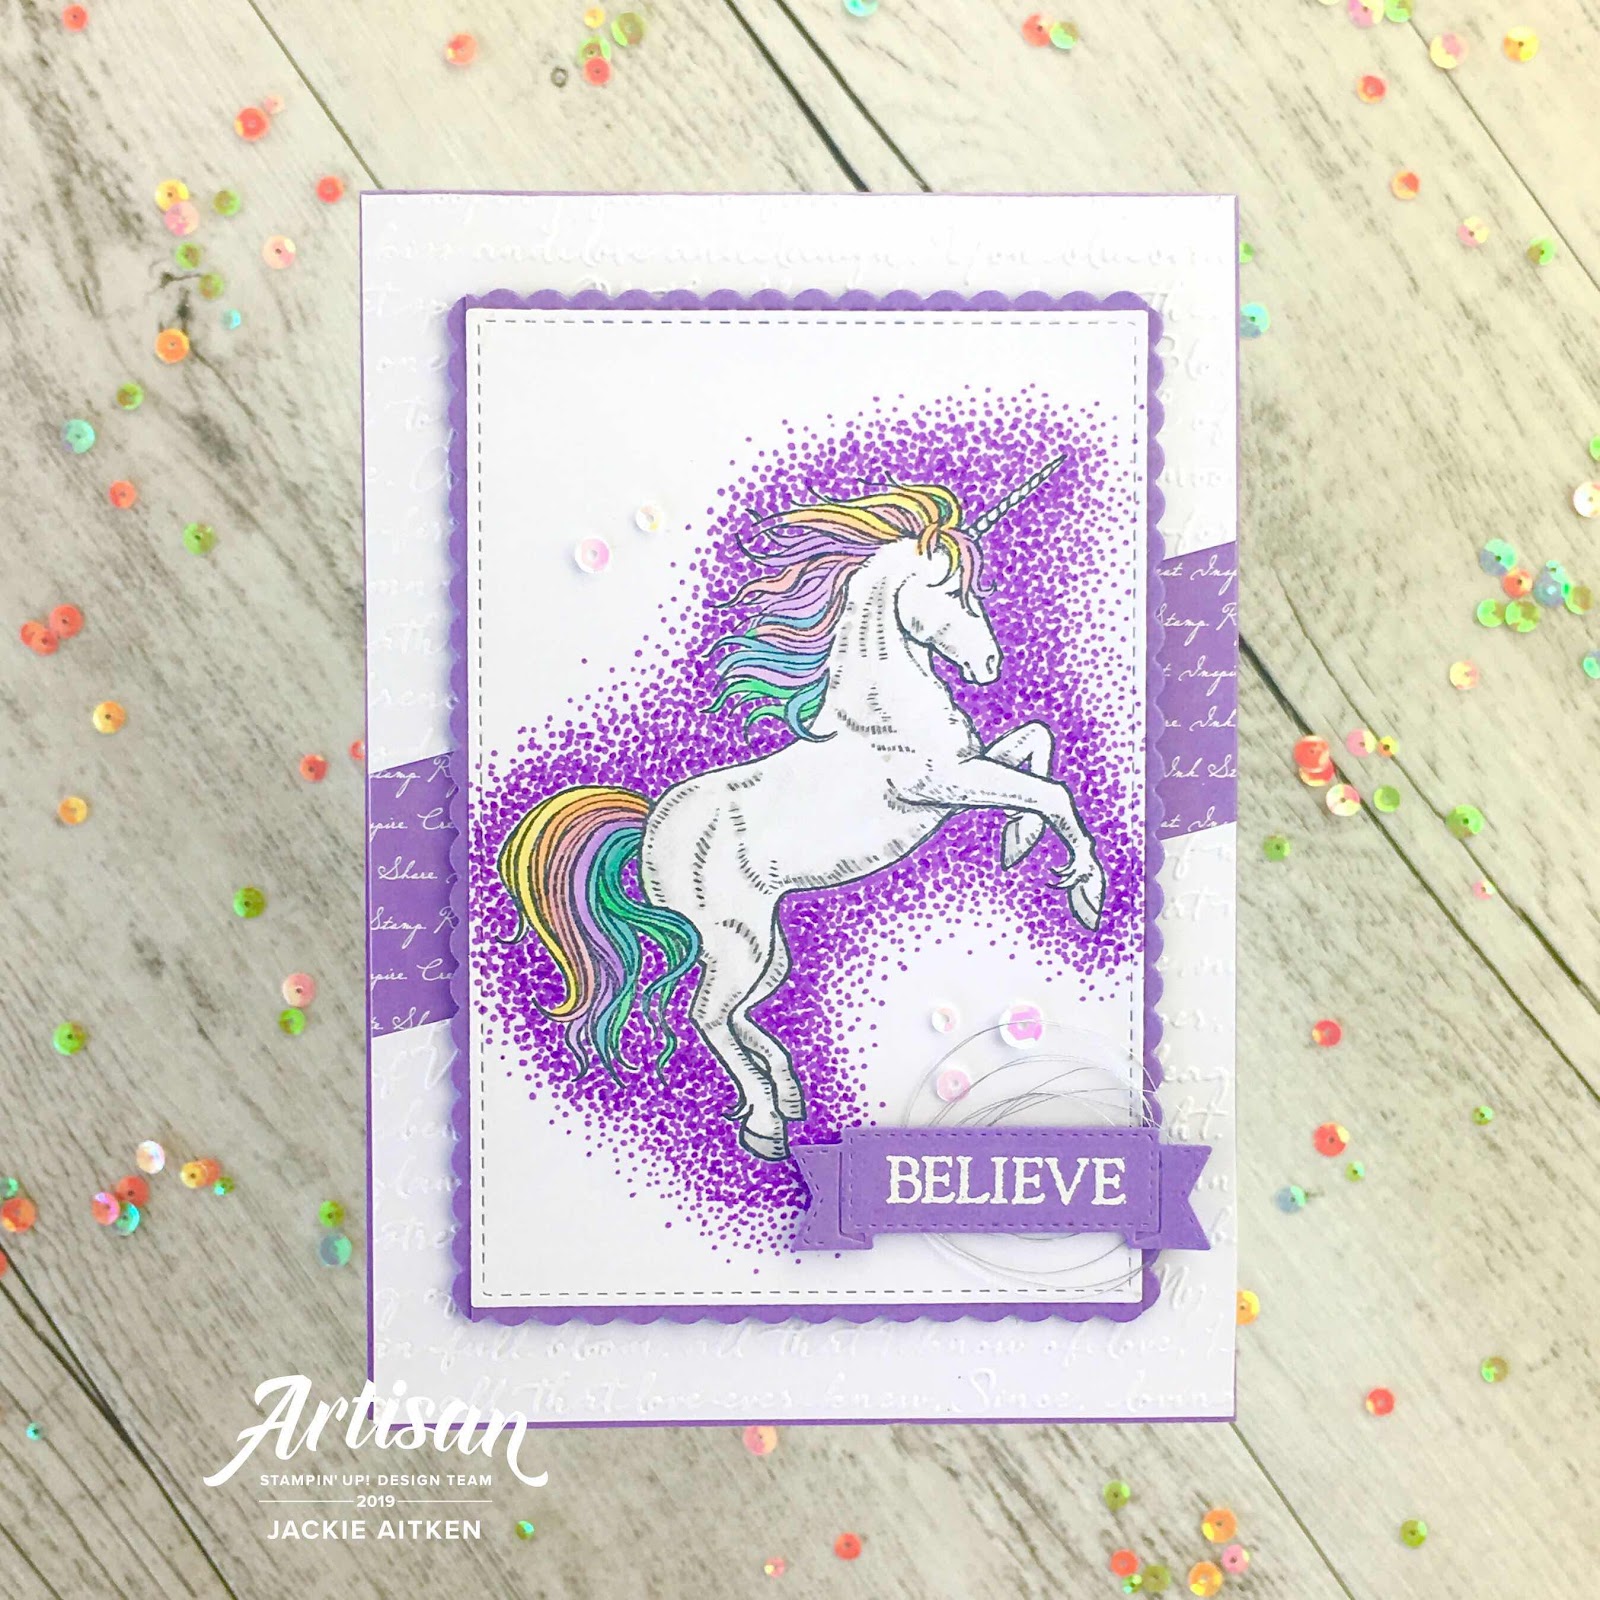
As mentioned above, I concentrated the majority of the colouring to the Unicorns hair. The body has had a light application of Smoky Slate to the edges and faded out using the colour lifter.

The sentiments in this set are so sweet and there are also two little embellishment stamps as well that work wonderfully.

That is all for me today. I hope you get time to get crafty and creative this weekend. Until next time, stay awesome and stay crafty


Thursday, 18 July 2019

Stampin' Up! Artisan Design Team - July - Perennial Essence

Good Day Crafty Friends,

Welcome to the 2019 Artisan Design Team Blog Hop for July. Can you believe this crew of talented artists have been creating wonderful projects together for over six months. We have officially pass the half way mark of our amazing journey, and wowsers, what a journey its been so far! We had a challenging start with a few cancelled projects but this amazing group of talent stood up to the challenge and we nailed the new assignments every single time. I am so proud to be part of the 2019 ADT, I love these ladies and cherish the bond we have created. I will be sad when this amazing experience is over, but forever grateful for the friendships this opportunity has given me.


Enough chit chat about that before my eyes start leaking lol. Lets get onto this spectacular Blog Hop. This month the Artisan Design Team are showcasing the gorgeous Perennial Essence Suite. You can find all the stunning elements in this floral packed suite on Page 107 in the 2019 Annual Catalogue. So many pretty components in this product suite and omg the Perennial Essence DSP Pack is just amazing.  For those who want it all, you can now order all the items in a product suite with one code, the Perennial Essence Product Suite code is #152166 and includes all the items featured on Page 107.


I have to admit I was a little intimidated by this gorgeous Monet inspired Designer Series Paper (DSP). Each sheet makes for a stunning framed art decor item (which I have done in my crafty space by adding left over pieces of the DSP to plain white frames). Also, I had never seen coloured vellum so this really freaked me out lol Everything is so pretty and delicate I seriously struggled with those first cuts. But cut I did and what do you know? After a little play, I was away and managed to create a whole heap of projects.

The first card I have to share with you today has an embossed gold Foil border, framing the piece of DSP like it were a picture hung on a wall. The Whisper White Background has been embossed with the Lace 3D Embossing Folder to match the embossing on the Gold Foil Frame.  The Gold Foil and Whisper White frames were created using the Stitched Rectangle Dies. The stamped images were inked with Rococo Rose and fussy cut, with the leaves gold heat embossed on Vellum Cardstock.

The sentiment was also white heat embossed onto Vellum and die cut using the Stitched Rectangle Dies.


The second card is where I went a little cray cray with the sewing machine. I am not a sewer and only own the machine for card making purposes lol. I admire those who can sew in perfectly straight lines. 

Hint/Tip
To achieve straight lines when sewing on cards, use a ruled pencil line as your guide - thanks to Melody Hyde (Stampin' Up! Concept Artist) for this awesome tip.

Again, using the framed art concept. This frame was kept white as I found it helped the white heat embossed sentiment stand out a little more prominently. The Stitched Nested Labels Dies were used to die cut the vellum sentiment, which was added to the backside of the frame before adhering to the DSP card front. The floral images were inked with Blushing Bride and then sponged in the middle with Melon Mambo. Granny Apple Green ink was used for the leaves. The detailed white foliage pieces you can see behind the floral images in both this and the first card I shared, are actually a Memories & More Card from the Come Sail Away Memories & More Card Pack. The laser cut seaweed inspired M&M card was ideal for these images as the die cuts are so delicate and complimented the stamped image perfectly.


The last card in this trio is mainly created with Vellum Cardstock. Yep that base is Vellum!! The quality and thickness enables it to stand and therefore perform like a standard piece of card stock. A panel of DSP has been covered with plain vellum and then this was sewn directly onto a panel of Petal Pink Vellum from the Perennial Essence Vellum Cardstock Pack. The floral images were white heat embossed onto the same Pink Vellum and then fussy cut. Mint Macaron stamped leaves were tucked under the flowers and a white heat embossed sentiment was added to the top panel of Vellum just to the right of where the flowers are placed.


When I went back through my photographs of creations using elements from the Perennial Essence Suite, I realised I sure did make a few cards with these amazing products. I really love the floral images in this stamp set and it also turns out I used the DSP quite heavily too. Yay!! Here are a few projects for further inspiration.


This next creation I have to share is a pocket card and combines a few other products outside the suite. I wanted to show you that the Perennial Flower Punch, which is part of the Perennial Essence Suite, can be used to create these stunning 3D flowers simply by punching plain white tissue paper. 


Once you have all the layers glued together - I used small dots of Multi Purpose Glue, I popped one of the fluffy Perennial Essence Floral Centers in the middle and voila - such a pretty, delicate and realistic looking paper flower. 

The Belly Band for this Pocket Card was decorated using the  Detailed Bands Die cut from Whisper White card. The fern image from the Daisy Lane Stamp Set has been stamped in Granny Apple Green and fussy cut. The floral images on the Pocket Card insert has been inked in Daffodil Delight with Grapefruit Grove ink sponged in the centre. A Stitched Circle die cut from Granny Apple Green cardstock was adhered to the top of the card insert, then a hole punched in the centre so that some Petal Pink Organdy Striped Ribbon could be added for the pulling mechanism.


Just in case you were still sitting on the fence with this fabulous Suite of Products, I have a few more projects to share with you (insert smiley face here) 


Okay, seriously, I hope you are still with me and I've not put you to sleep yet. Rest assured, that is all from me today. Thanks so much for stopping by and hopping with us. The Artisan Design Team appreciate the time you have invested to visit our blogs. 

Up next in this months Artisan Design Team Blog Hop is super fabulous and amazingly talented Jennifer Picard with her gorgeous creations - enjoy xx


2019 Artisan Design Team Blog Roll

Jackie Aitken < that's me >

You can find the products used to create the trio of cards and Pocket Card in today's Blog Post in the supply list below. If you live in Australia, you can shop for any of these items by clicking on the images below. Happy Shopping xx


Product List
Heat Tool
[129056]
$50.00


Until next time, stay awesome and stay crafty


Thursday, 11 July 2019

Just Add Ink #465 - Add Season

Good Day Crafty Friends

Welcome to this week's Just Add Ink Challenge - Just Add The Season. 

Image may contain: text

I was so totally stumped when thinking what to create for this challenge. Its winter here in Perth, and I am so not a winter person so thought I would create a card for my favourite season - Spring. Spring in Perth is the best time of year as it not too hot or cold to do outdoor activities plus all the wild flowers that bloom up north are truly inspirational.


My card uses one of the panels of Laser Cut Specialty DSP as a border and the image from Inspiring Iris. My Oma had a whole bed of Irises growing at the front of her retirement cottage and I remember the smell that filled my nostrils every time you left the cottage via the front door. 

The images were stamped and masked, then coloured using Stampin' Blends. Once the flowers were completely dry I took an old Pool Party Blend and coloured the white space.


A panel of vellum has been white heat embossed with the sentiment and then tucked into the oval border. To finish the card I added one of the cute little mini binder clips.

That's all for today, crafty friends. Be sure to stop by all the Just Add Ink Design Team members blogs for more inspiration using this weeks Season Challenge.

We would love for you and your crafty friends to play along, if you have a blog you can add your creation to the Just Add Ink gallery here. Don't have your own blog? No problem! Just send us an email  to  just-add-ink@hotmail.com with a photo attachment. We will upload it to our challenge entry blog for you.

Thanks so much for stopping by today. Until next time stay awesome and stay crafty.


Thursday, 16 May 2019

JAI #457 sketch

Hello Crafty Firends

Welcome to this week's Just Add Ink challenge #457. We have a fabulous sketch for you to play along with this week.
Image may contain: text

I normally like to flip the sketches that are in this orientation but decided not this time. Spice it up a little I reakon lol. I have used one of the stamp sets that was an all attendee giveaway at a recent 3 day Stampin' Up! event in New Zealand. Its called Daisy Lane and has a couple of different flower and leaf images to choose from. There are coordinating punches for two of the images in the Daisy Lane stamp set, but not the image I have used, these were fussy cut.


The decorative die cut strip that spans the width of the card is a border die from the Everything Is Rosy Product Medley. Before adhering to the card base, strips of coloured card stock were adhered to the backside of the die cut for a bit of interest.

The flowers have been stamped in Highland Heather and Bermuda Bay (first and second generation) and added them to the stitched circle with dimensionals. A few glitter enamel dots were added to finish the card.

That's all for today, crafty friends. Be sure to stop by all the Just Add Ink Design Team members blogs for more inspiration using this weeks sketch challenge.

We would love for you and your crafty friends to play along, if you have a blog you can add your creation to the Just Add Ink gallery here. Don't have your own blog? No problem! Just send us an email  to  just-add-ink@hotmail.com with a photo attachment. We will upload it to our challenge entry blog for you.

Thanks so much for stopping by today. Until next time stay awesome and stay crafty.


Sunday, 12 May 2019

Stamping Sunday Blog Hop - Favourite Retiring

Good Day Crafty Friends,


Welcome to the Stamping Sunday Blog Hop for May. This talented group of Designers hop once a month on the second Sunday. This month we are celebrating our FAVOURITE RETIRING items with a farewell Hop.

Its always a sad of time of year in the Stampin' Up! world, as we wave goodbye to favourite in colours, stamp sets and DSP. This year saw a lot of my favourites get the chop which made it hard to chose just one. I decided the bundle I would miss the most is Floral Frames. I adore the fonts, the framed die cut but most of all, I just love the foliage framelits.

I love to create my own backgrounds using fun techniques like Polished Stone. I will miss the Glossy Paper immensely so decided to incorporate it in today's creations.

This post is dedicated to the coolest bundle of 2019 - R.I.P. Floral Frames - may you rest well on my bookshelf.

jaxxcraftycreations, handmade cards, Floral Frames, Glossy Card, Stampin' Up!, Embossing Paste, Stampin' Blends, Stamping Sunday Blog Hop, Stamping Techniques,

I made two sets of cards using two different sheets of Glossy Paper. The first sheet had Stampin' Blends literally scribbled all over the paper in pink tones. The second sheet was a little more dramatic, using the wood grain technique by swiping the ink pads across the Glossy Paper with blue and purple tones. To blend the colours I spritzed with rubbing alcohol which had a few drops of Blushing Bride reinker added.

jaxxcraftycreations, handmade cards, Floral Frames, Glossy Card, Stampin' Up!, Embossing Paste, Stampin' Blends, Stamping Sunday Blog Hop, Stamping Techniques,

For these two pinky toned creations, I have started with an embossed card front using a Brick wall stencil (item #144103) and embossing paste (item #141979). The Stitched Shapes (item #145372)  framelits were used to die cut the sentiments from the Floral Frames Stamp Set. The floral images were stamped on the same sheet of Glossy Paper the die cuts are made from, die cut and added to the card with mini dimenionals (item #144108).

jaxxcraftycreations, handmade cards, Floral Frames, Glossy Card, Stampin' Up!, Embossing Paste, Stampin' Blends, Stamping Sunday Blog Hop, Stamping Techniques,

The next set of projects have utilised the second sheet of Glossy Cardstock with the blue and purple tones. I have kept the stamping simple with black ink directly on top of the Glossy card.
jaxxcraftycreations, handmade cards, Floral Frames, Glossy Card, Stampin' Up!, Embossing Paste, Stampin' Blends, Stamping Sunday Blog Hop, Stamping Techniques,

A few black elements have been such a ribbon, die cuts, ink splatters and sequins as it really pops against the purpley-blue tones and ties in nicely with the plain black stamped images and sentiments.

jaxxcraftycreations, handmade cards, Floral Frames, Glossy Card, Stampin' Up!, Embossing Paste, Stampin' Blends, Stamping Sunday Blog Hop, Stamping Techniques,


The panel on the left hand side of this card shows what the glossy sheet looked like before I stamped and die cut it. As you can see, it doesn't have to be perfect, especially when using for die cuts.

jaxxcraftycreations, handmade cards, Floral Frames, Glossy Card, Stampin' Up!, Embossing Paste, Stampin' Blends, Stamping Sunday Blog Hop, Stamping Techniques,

I just adore this little decorative die cut and had to use one for this simply decorated box. Again, using the purple-blue tones for the die cuts and flirty flamingo ribbon. The stamped frame was coloured with Stampin' Blends.

jaxxcraftycreations, handmade cards, Floral Frames, Glossy Card, Stampin' Up!, Embossing Paste, Stampin' Blends, Stamping Sunday Blog Hop, Stamping Techniques,

That's it from me today. I hope I have inspired you to get into your crafty space and show some of your favourite retiring or retired stamp sets some love by inking them up and making someone you love a handmade creation from the heart.

jaxxcraftycreations, handmade cards, Floral Frames, Glossy Card, Stampin' Up!, Embossing Paste, Stampin' Blends, Stamping Sunday Blog Hop, Stamping Techniques,

Thanks so much for stopping by today. Be sure to follow the Hop all the way through for loads of creative and inspirational projects that the Stamping Sunday Blog Hop Design Team have to share with you.


Blog Hop Participant List


You can find the items I used to create today's creations in my Online Store by clicking on the images in the Product List below. Happy Shopping x

Product List