SOCIAL MEDIA

Thursday, 13 June 2019

One Stamp At A Time - Something Old, Something New

Good Day Crafty Friends

Welcome to the One Stamp At A Time Blog Hop for June. This month the talented Design Team are celebrating the release of the new 2019 Stampin' Up! Annual Catalogue with a cool theme for this Hop - Something Old & Something New. 


There are always loads of fabulous favourites that carry over and appear alongside all the new delights in the Annual Catalogue, today's Hop is all about showing our followers how to create projects by combining old and new products.

I have chosen to showcase the new 2019-2021 In Colour DSP Packs, teamed with my favourite carry over bundle - Tropical Chic. If you are not familiar with the new 2019-2021 In Colours, let me introduce you;


Now that you are acquainted with the new In Colours, lets have a look at what I have created to share with you today.
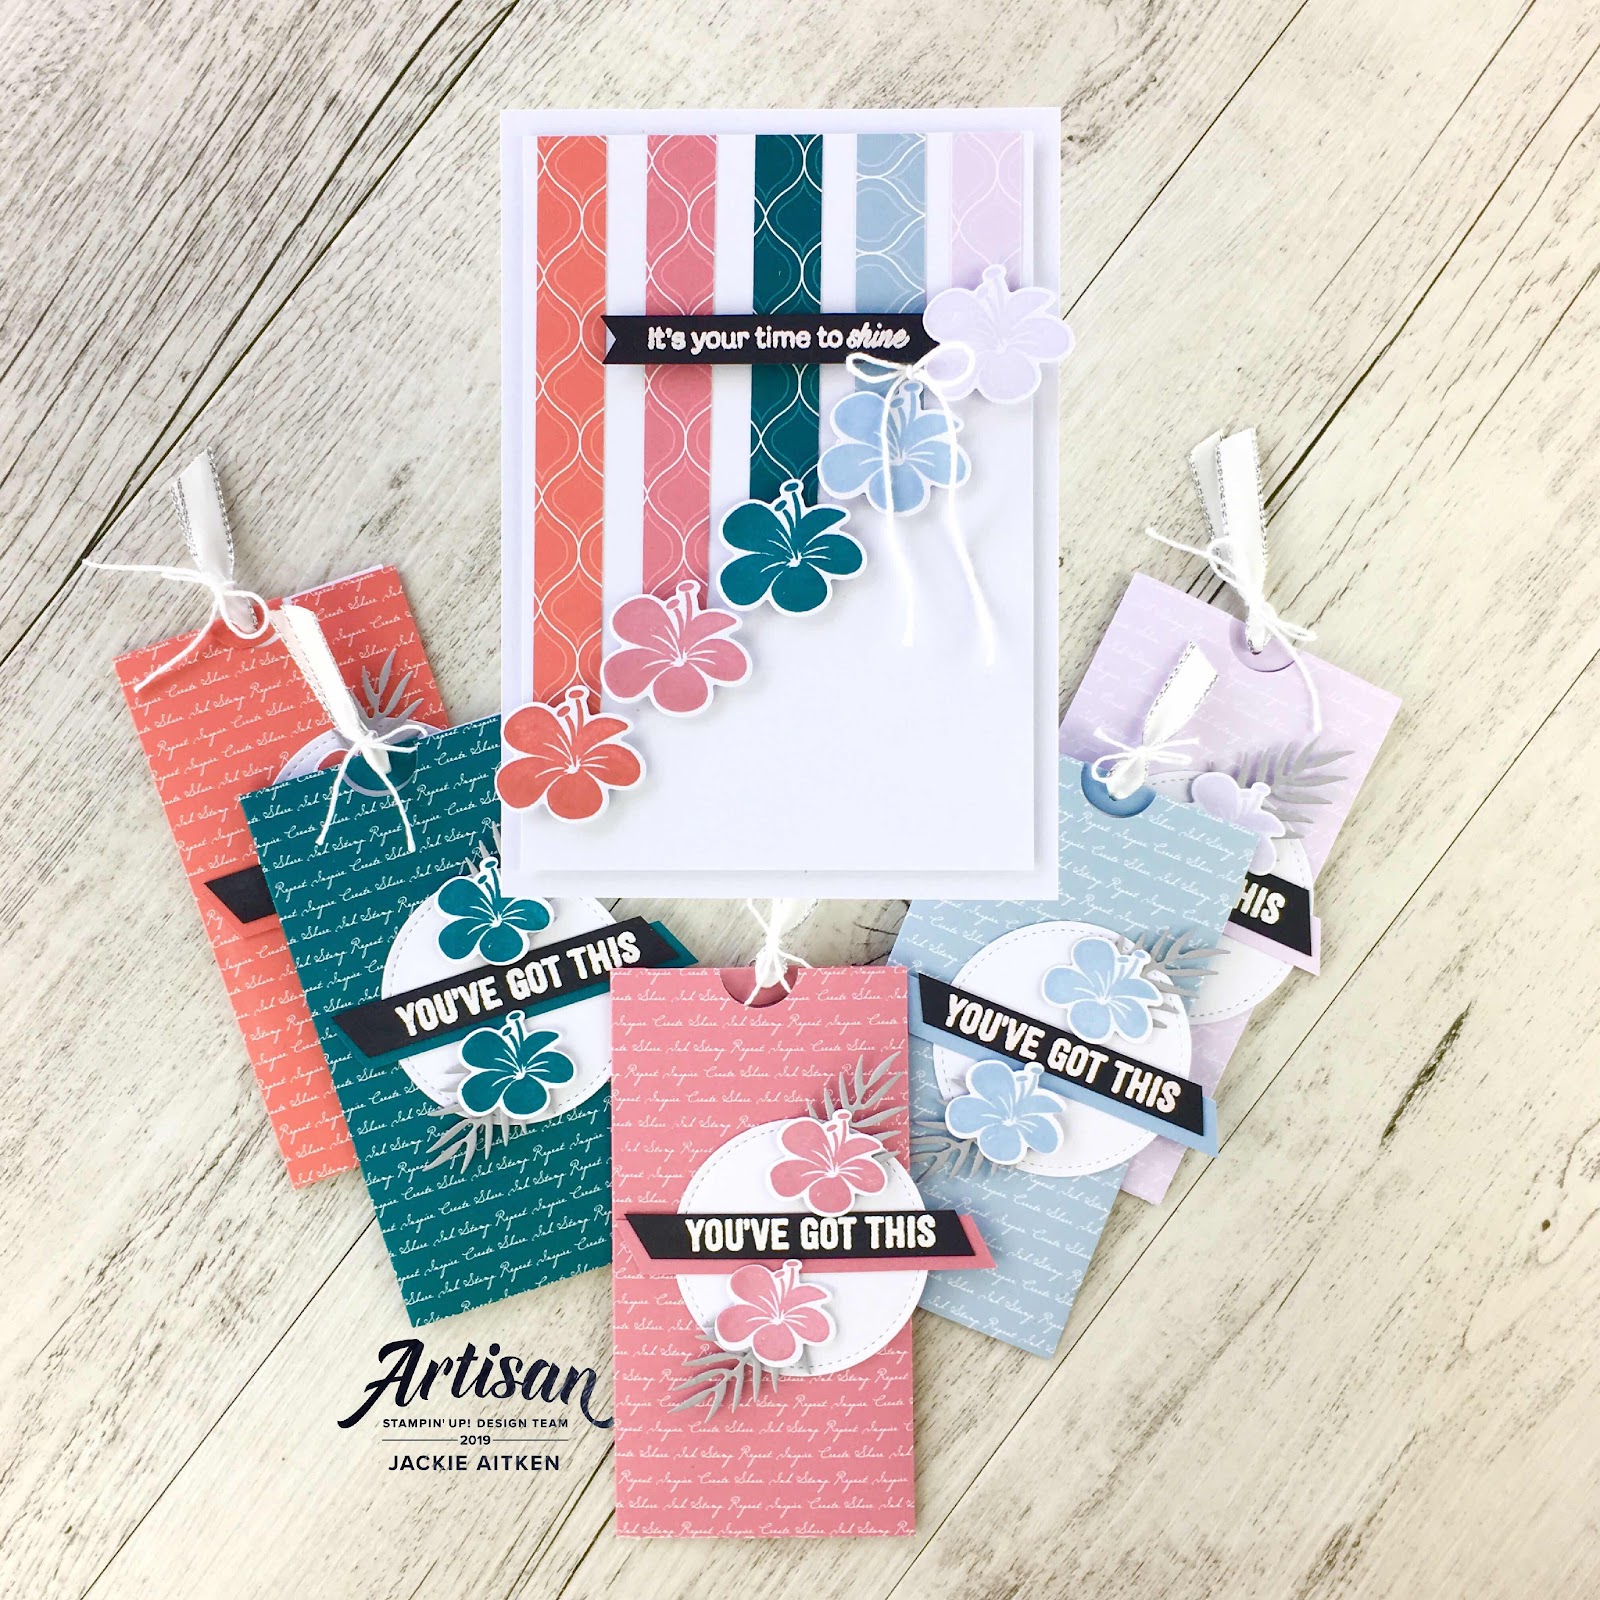

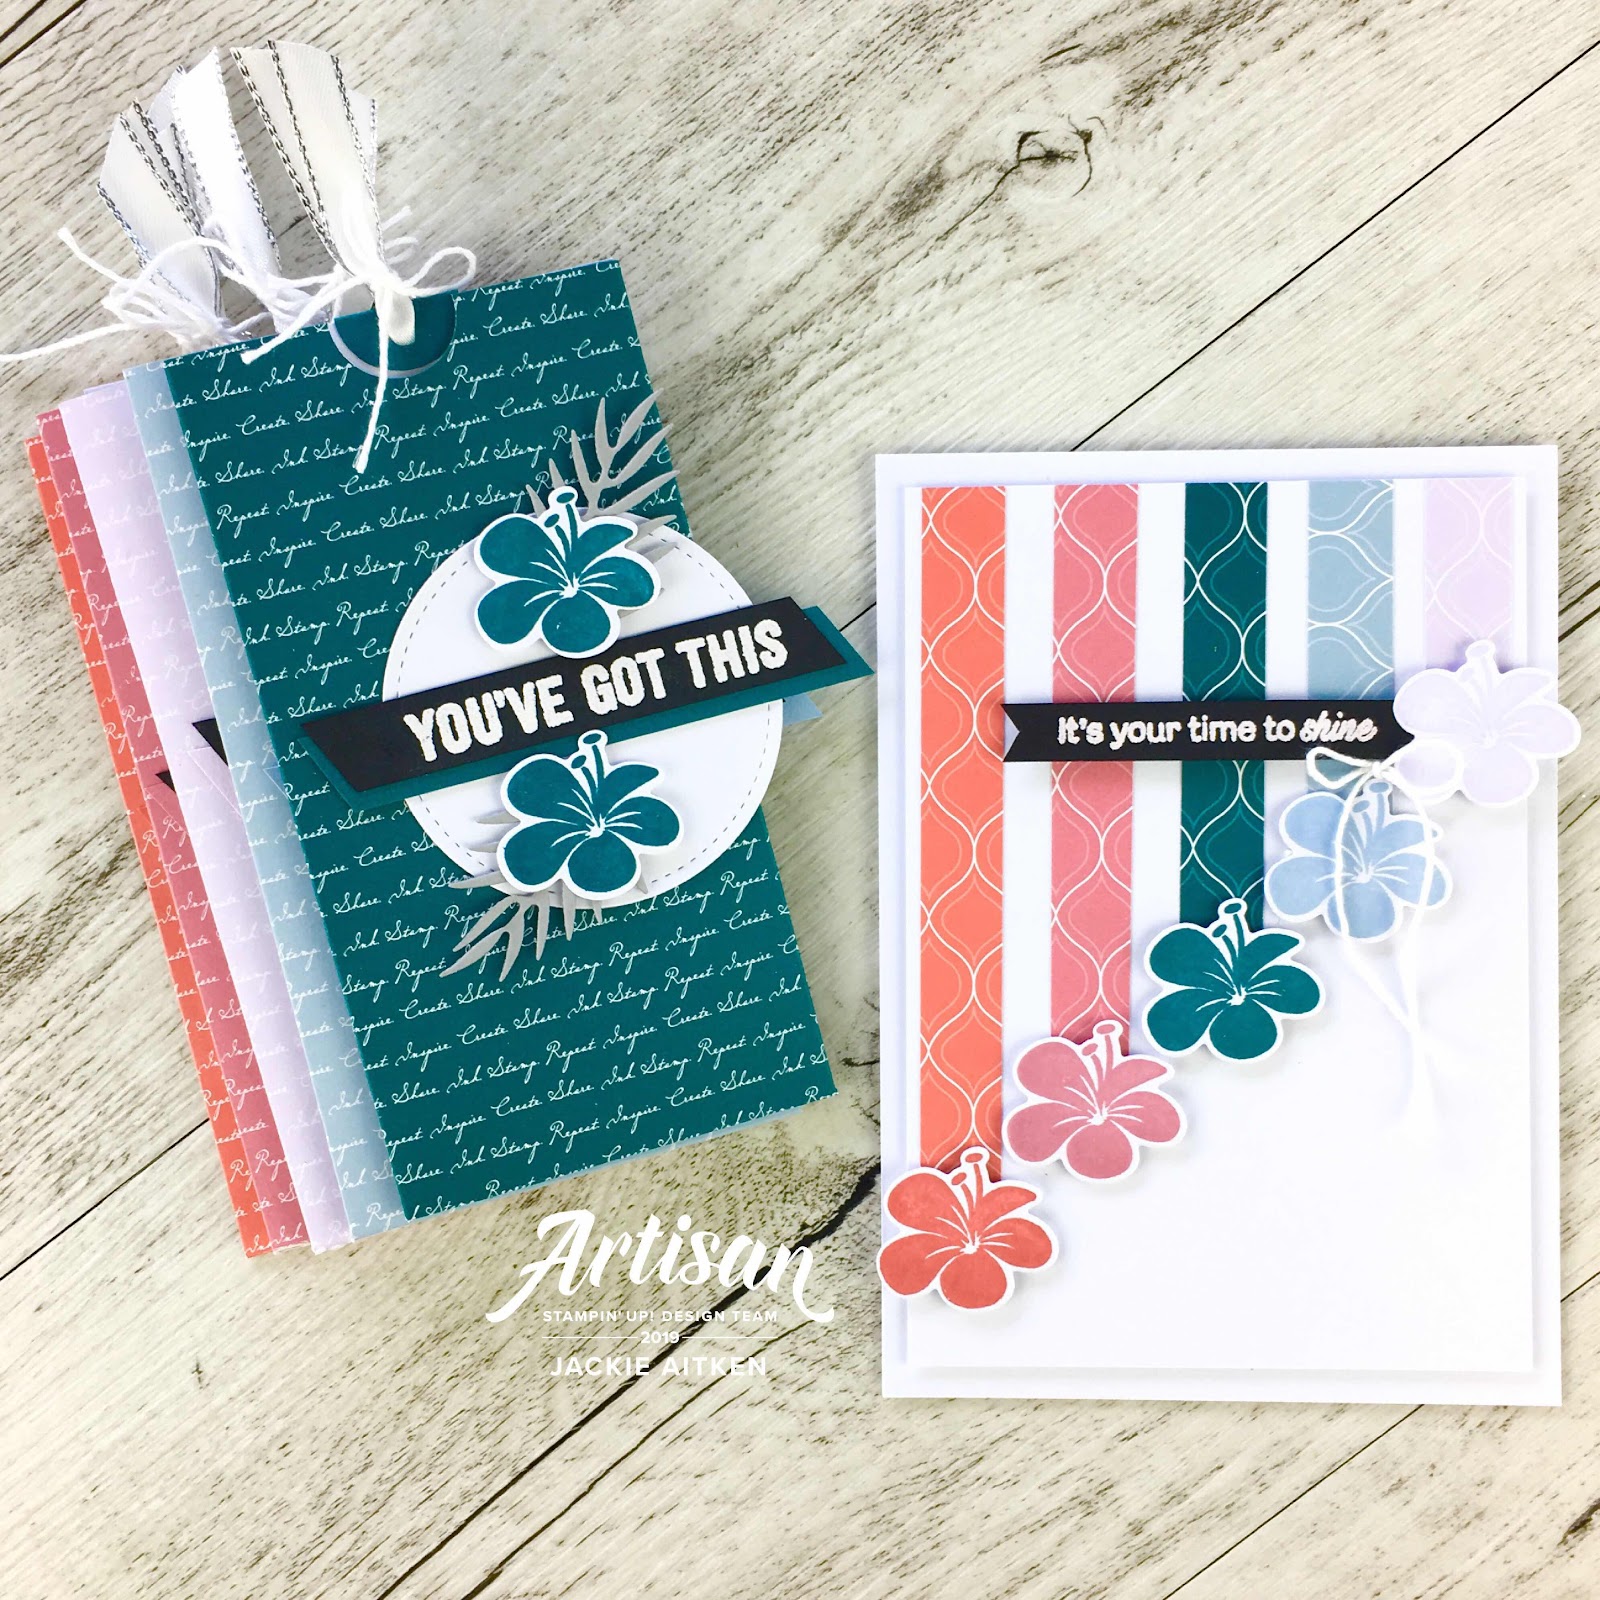
First up in my collection of projects is the card. This is a clean and simple layout using strips of DSP and the frangipani flower image stamped in the coordinating In Colours. I saw this marvelous card design on Instagram shared by Yessica Batista @makeamark16 and thought it is such a fabulously simple and effective way to showcase colour combinations.
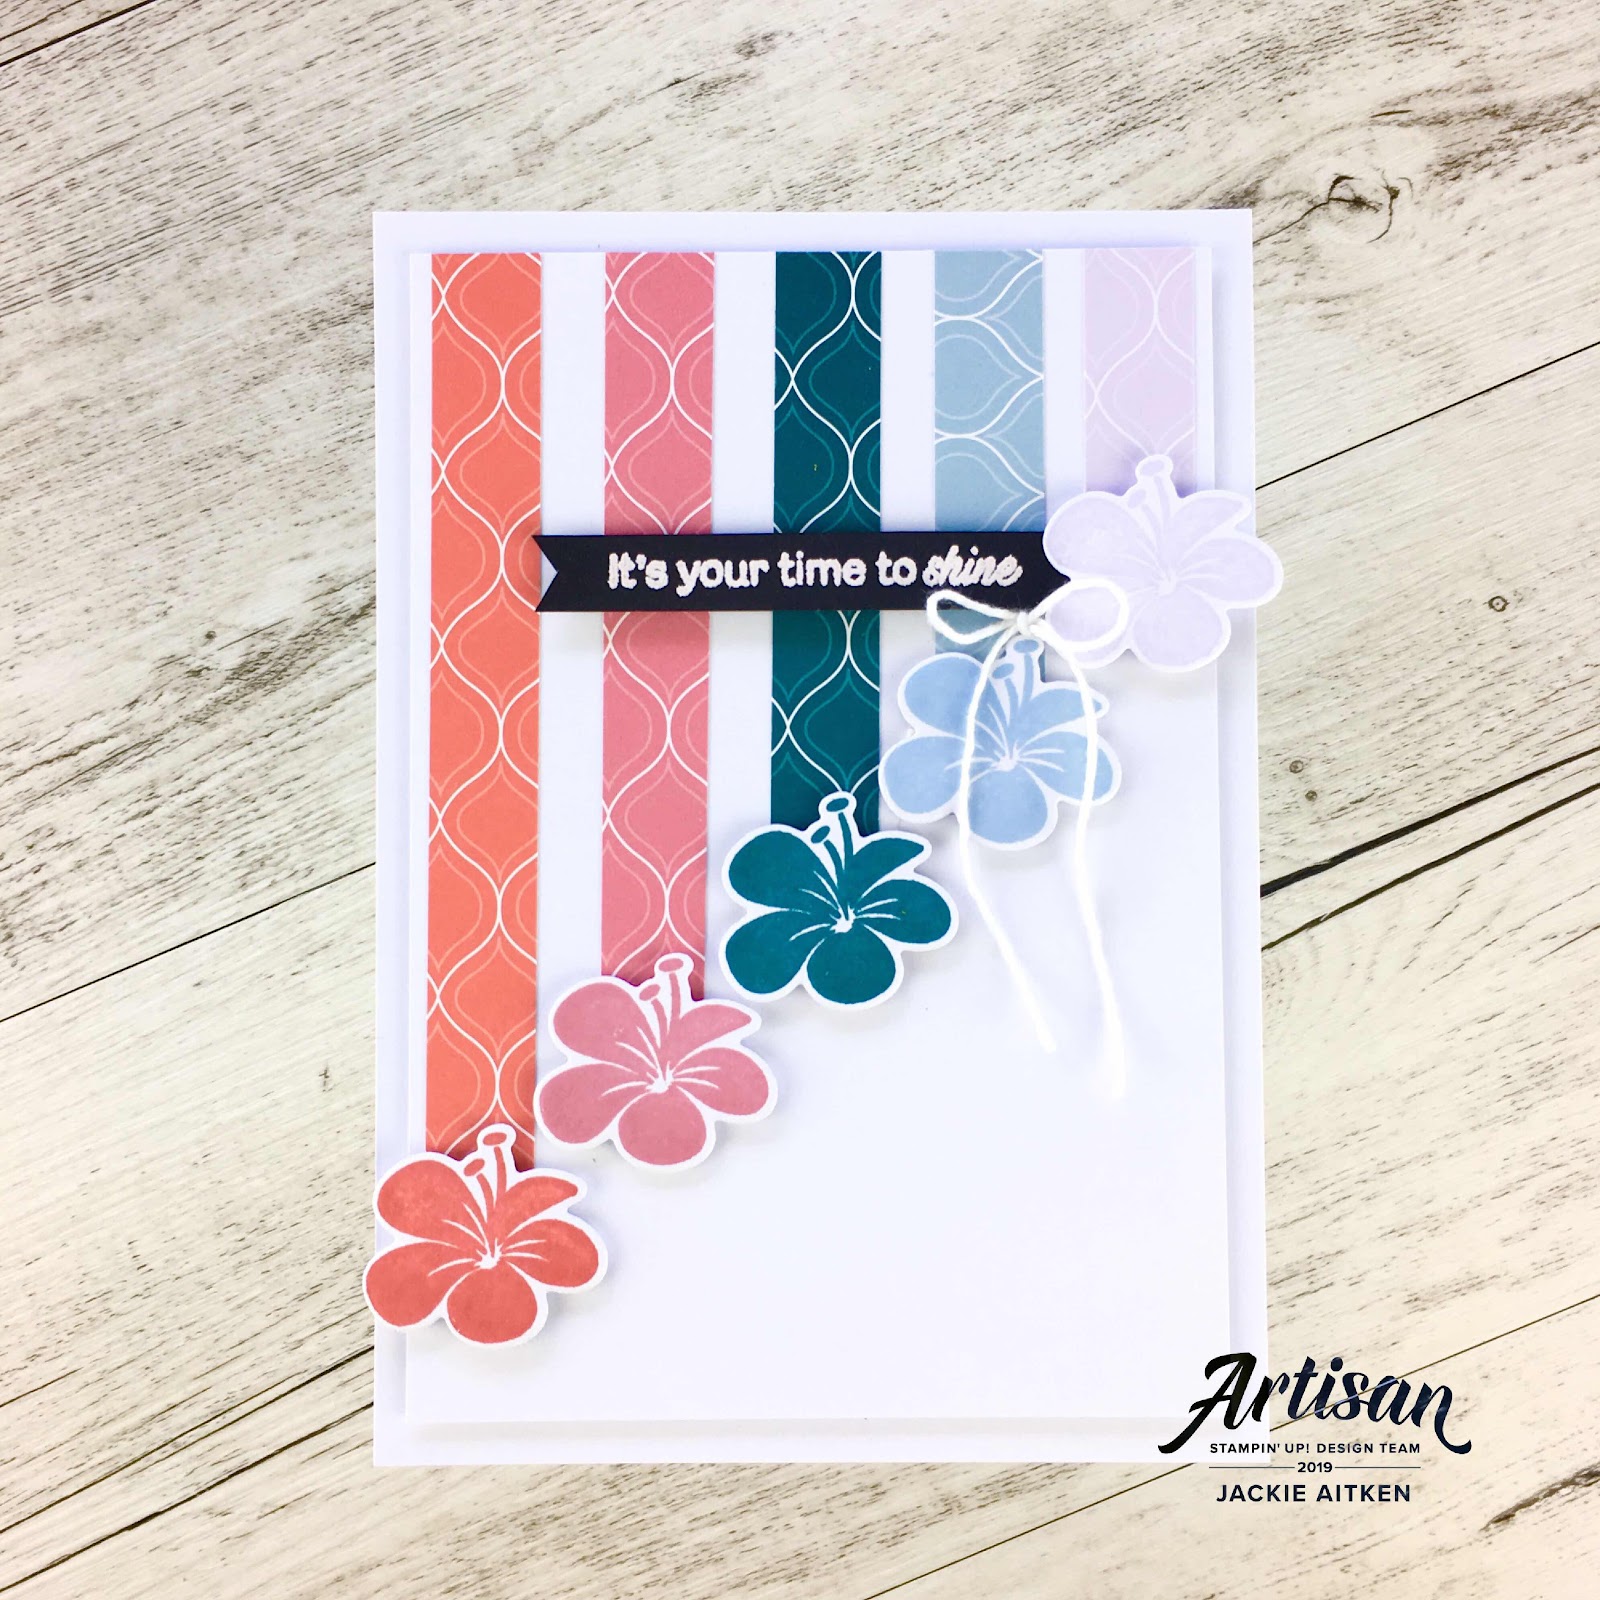

Up next is a set of mini pocket cards.  I have used a 6"x 6" sheet of 2019-2021 In Colour DSP in all five colours and created little pocket cards with inserts. With the envelope punch board now retired, I reverted to creating the pockets with a scoreboard, snips and adhesive.
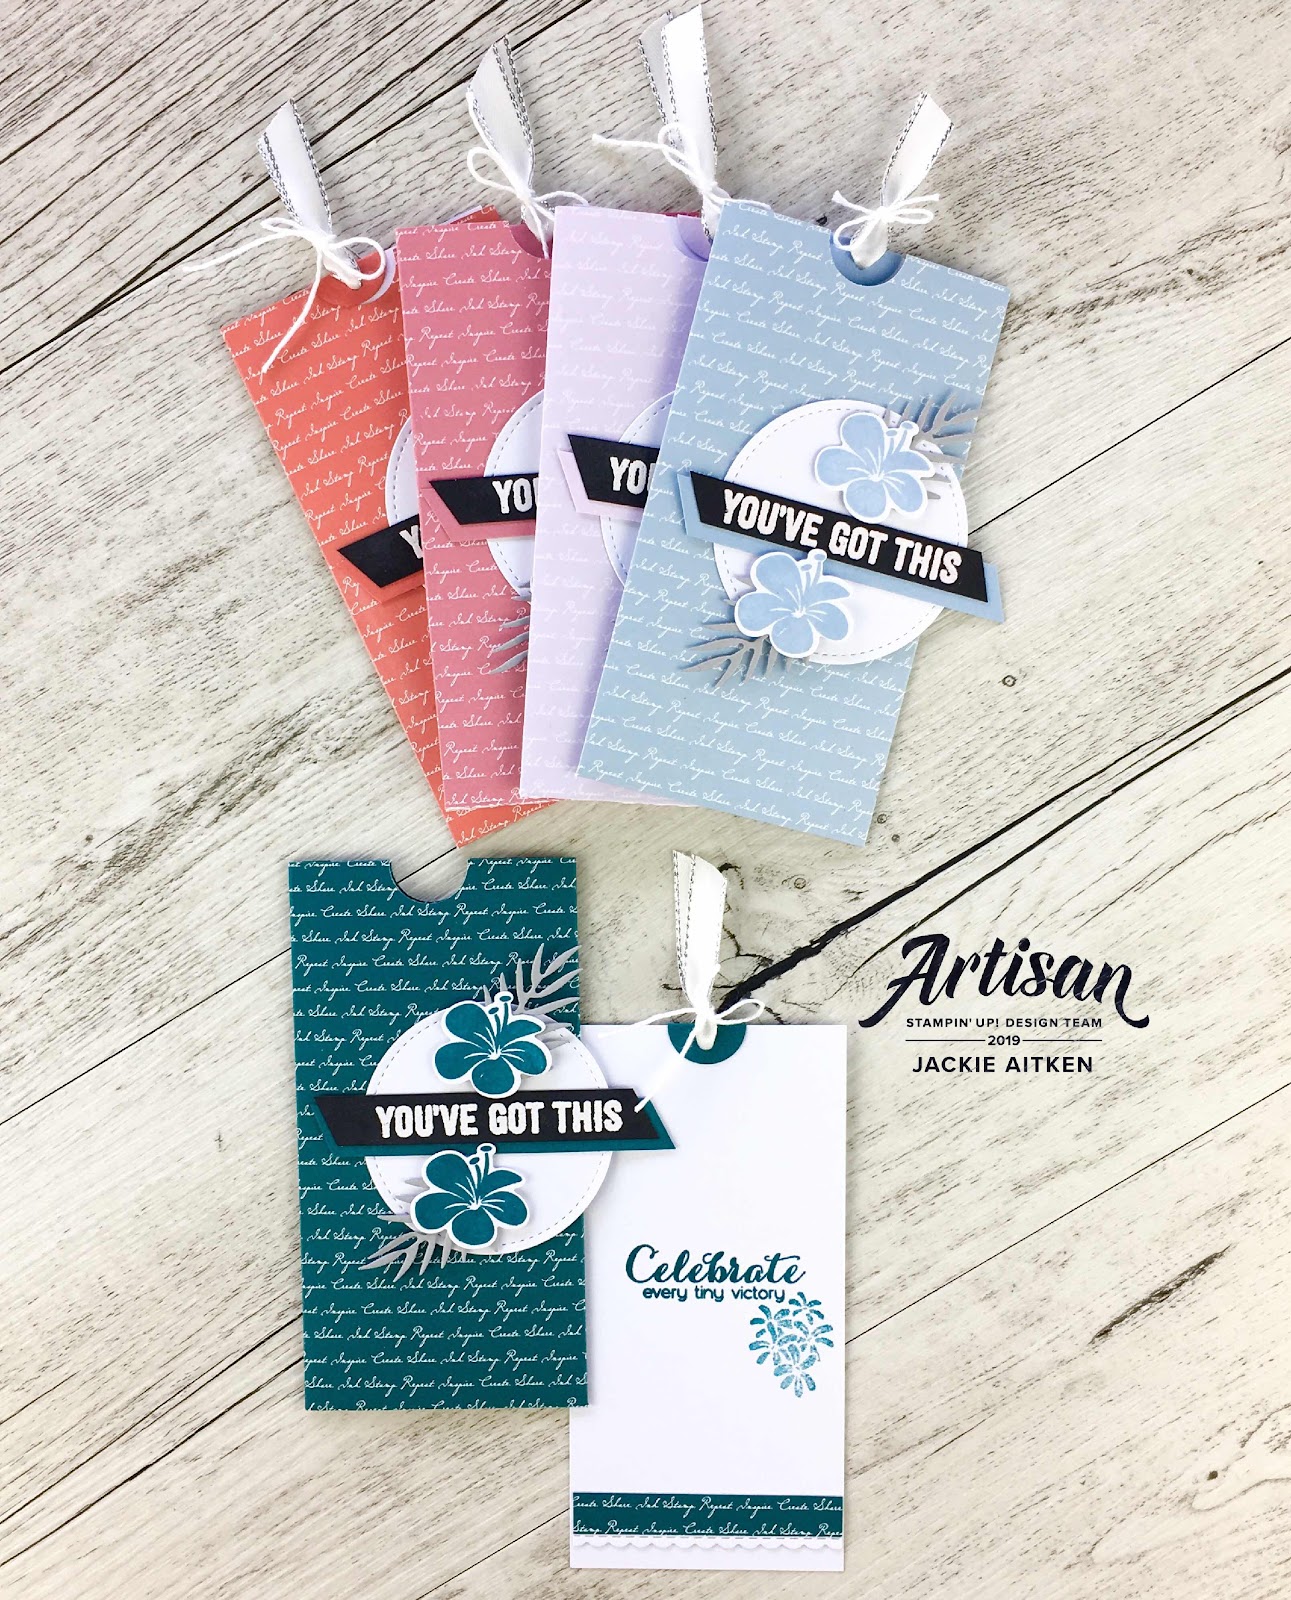

I love the scripty font on the new DSP Colour Family Packs and wanted to showcase how stunning it is in all five colours. The pocket fronts were kept fairly simple with a stitched circle die cut, two frangipani flowers to match the DSP colour and die cut foliage created with the Tropical dies and smoky slate card stock.
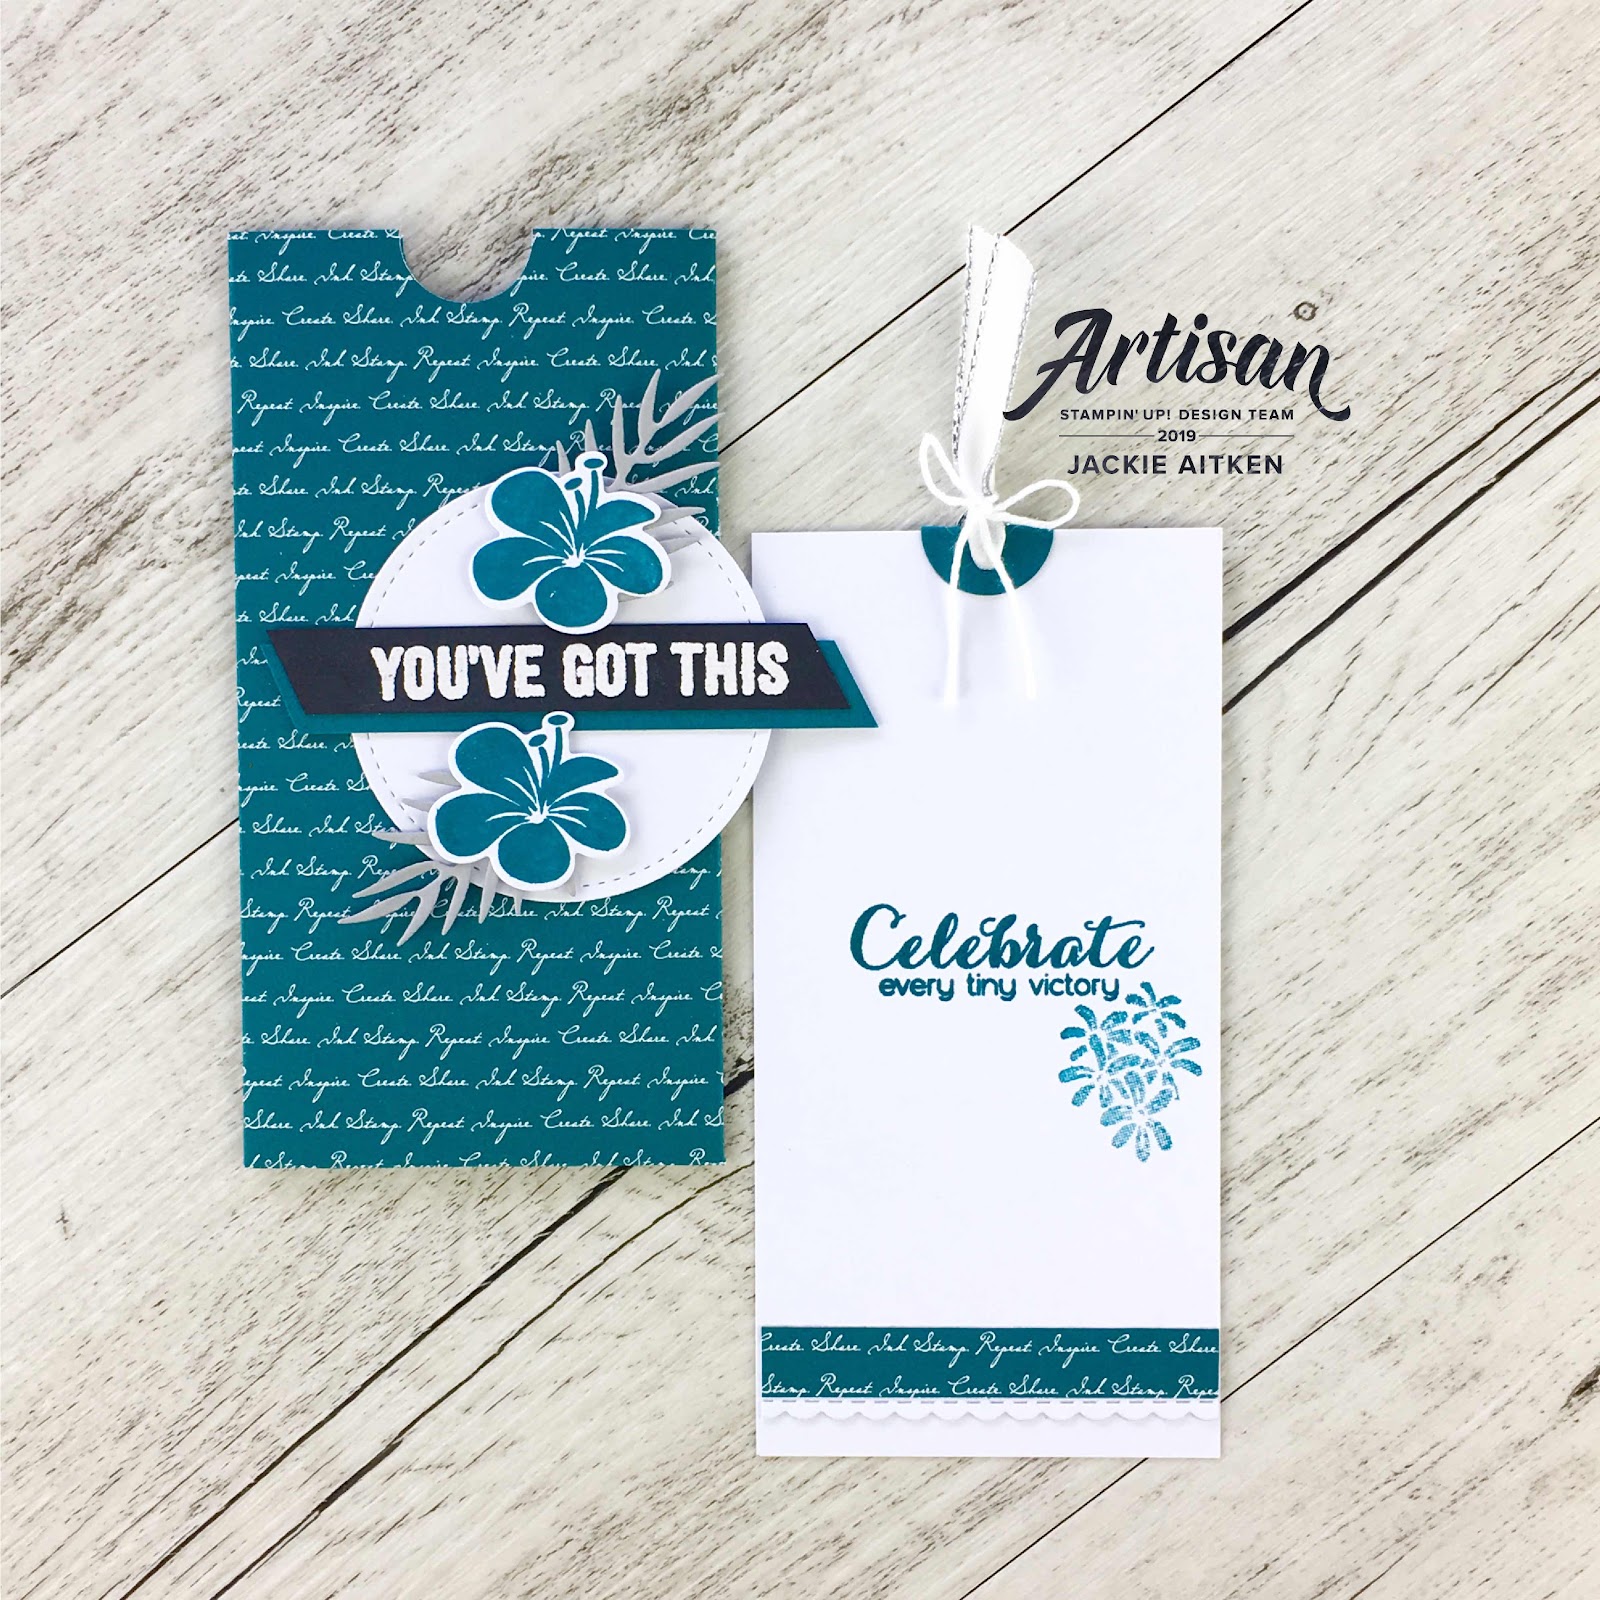

The inserts have been stamped with the sentiment and flower image from the Vibrant Vases stamp set. The offcut from creating the little pocket envelopes was used to line the insert. A small circle of In Colour card stock has been punched with the 1/2" circle punch and score in the centre. This circle was then adhere to the end of the insert and then punch with small hole punch. Whisper White Metallic Edge Ribbon and White Bakers Twine have been added to enable the receivers something to grab and pull the insert.

That is all from me today. Thanks so much for stopping by and hopping with us. The One Stamp At A Time Design Team appreciate the time you have invested to visit our blogs and see the creations we have to share with you. Be sure to follow the hop all the way through for loads of inspiration using products from the new 2019 Annual Catalogue.

Up next in the OSAT Blog Hop is Anna Helman and her amazingly creative projects - enjoy. A full participant list has been provided below.

Participant Blog Hop List


You can find all the products used to create the cas card and pocket cards in today's post by clicking on the images below.

Product List


Stay Awesome & Stay Crafty

Thursday, 17 January 2019

Just Add Ink Design Team Blog Hop - Add Something New

Good Day Just Add Inkers!!!

Happy New Year, Crafty Friends. I hope you and your families had  a safe and enjoyable festive season.

Image may contain: text


The Just Add Ink Design Team are starting off the New Year with a Blog Hop - Just Add Something New. Most crafter's receive (or buy themselves LOL) new crafty items for Christmas, so this is the perfect time to pull out your new goodies and join us as we share creations made with our new crafting goodies.

Stampin' Up!, All My Love Suite, Valentine's Day Card, Pocket Card,

The 2019 Artisan Design Team received the entire ALL MY LOVE suite for our first assignment - oh my word, I feel so spoilt!!! The ALL MY LOVE suite includes two stamp sets with coordinating framelits - that is a total of 26 stamps and 30 dies!! Plus matching Designer Series Paper, Ribbon Combo Pack and the ever sweet Heart Epoxy Droplets. So guess which products I am using for today's Just Add Ink Blog Hop lol

Stampin' Up!, All My Love Suite, Valentine's Day Card, Pocket Card,

Today's card is one of my favourite style of cards. Its my go to when I want something that is a little bit special but is still easy to create.

You simply need an Envelope Punch Board and piece of card measuring 7 7/8" x 7 7/8".

Place card stock into the Punch Board at 3 3/8", score and punch.

Flip card 90 degrees, this time lining up the previous scored line with the marker tab on the punch board, score and punch.

Repeat this process until all four sides are done.


Fold along score lines. Remove the "top" flap with your Trimmer. I often decorate my Pocket Cards directly onto the Pocket or you can add a belly band and decorate that.


The Pocket Insert measures 5 5/8" x 4 1/8" .     I just love the huge space the inserts allow for sentiments and written messages. They are also great for attaching gift cards either with punched tabs, partially adhered DSP strips or with a simple glue dot.

Thanks so much for stopping by today. The Just Add Ink Design Team appreciate the time you have invested to visit our blogs and view our creations. Be sure to follow the hop all the way through, as the Design Team have loads of crafty inspiration for you.  Up next in the Blog Hop is Kelly Kent with her beautiful creation - Enjoy x

No photo description available.


All the items used to create my card can be found in the product list below.


Product List


Friday, 30 November 2018

AddINKtive Designs - November - Pocket Card

Good Day Crafty Friends,

Hope you are having a fabulous day. I have a slightly different version of my Pocket Card to share with you all today. The base has been constructed using the Envelope Punch Board, just with the top chopped off slightly, creating a squarish version.


The front of the Pocket Card has been decorated to resemble a picket fence covered with flowers. The little fence was created using strips of whisper white card.

The Whisper White insert has had the top portion die cut using the Detailed Floral Thinlits. This panel was then adhered to another piece of Whisper White card exactly the same size and then the outer edge thinlit was used to cut both pieces.


The insert was then stamped with the sentiment from Stitched All Around stamp set in Highland Heather ink to coordinate with the flower adhered to the top left.

The Granny Apple Green die cut foliage has been created with the Petals and More Thinlits. The large die was cut twice and then snipped in several places to spread the pieces over the fence. All the flowers have been adhered with mini dimensionals.

This little pocket card has been created for someone who adores gardening and yes she has a white picket fence covered in Flowers. She also adores anything Watermelon related so I decided to include a handmade soap I created. 


I am totally addicted to Soap Making and am loving the challenge of coordinating my soapy creations with my paper, stamp and ink projects. I have been working with both natural and synthetic colourants to match the Stampin' Up! colour families and came super close to Granny Apple Green and a shade in between Flirty Flamingo and Melon Mambo for the Watermelon Soap Loaf.

How is your Festive Season preparations going? I ask because my next task after publishing this post is drag the Christmas decorations and Trees out. Is your tree up yet? Can you come and do mine lol. At least I can say my Christmas Card stash is almost ready for posting - yipeeeee! I will post photos of my loud, bright and Flamingo inspired Christmas decorations soon x

Thanks for stopping by today, until next time, stay awesome and stay crafty


Tuesday, 23 October 2018

Santa's Workshop Pocket Card - AddINKtive Designs

Hello Crafty Friends,


Hope you are having a great day. I have a super cute Pocket Card to share with you today, which has been created with the Santa's Workshop Memories and More card pack. 

I absolutely love making Pocket Cards, they are interactive, have two surfaces to decorate and are perfect for posting. You can find the tutorial for this style of Pocket Card over at AddINKtive Designs here. Just change out the DSP aspect and replace with this adorable M&M card.


Stampin Up, Christmas Card, Pocket Card, AddINKtive Designs, Signs of Santa stamp set, jaxxcraftycreations

The Pocket Card base was created from Basic Black cardstock using the tutorial mentioned above. To the Pocket Base, the large Santa card was trimmed down slightly and adhered with Tombow. Using one of the smaller Memories and More cards, die cut the large detailed framelit from the Stitched Labels Framelits.

The insert has been decorated with a strip of Pool Party card stock under a thin panel of Washi Tape. The sentiment from the First Frost stamp set has been inked in Memento Tuxedo Black ink and a little Elf adhered with mini dimensionals.

Stampin Up, Christmas Card, Pocket Card, AddINKtive Designs, Signs of Santa stamp set, jaxxcraftycreations

I also decorated one of the gable boxes with some elements from the Santa's Workshop Memories & More card pack. The gable boxes are simply stunning and with a little shredded paper and a snack bottle of Doterra Oil, they make the perfect quick and easy gifts for family and friends.

Stampin Up, Christmas Card, Pocket Card, AddINKtive Designs, Signs of Santa stamp set, jaxxcraftycreations


Thanks so much for stopping by today. I hope you get to spend some time in your crafty space this week(end). We have rain predicted here so you can guess where I will be.

Until next time, stay awesome and stay crafty