SOCIAL MEDIA

Wednesday, 27 September 2017

Colour INKspiration CI#18 Blog Hop - Colourful Seasons

Hello Crafty Friends,

Welcome to the Colour INKspiration #18 Blog Hop. You are visiting Jackie.  If you are following the blog hop, you would have arrived here from the very talented, Julia Quinn.  How stunning is her card with all those gorgeous flowers cascading down the brick wall!!

I am super excited to be joining the Colour INKspiration crew on a permanent basis.  Colour challenges are so much fun and I am extremely grateful to be on this journey with such lovely and extremely talented ladies.

When I saw the challenge inspiration picture, I instantly fell in love with the scooter. I always wanted a Pink Scooter when I was a teen, but this wasn't an option unless you brought brand new. I had a second hand Army Green scooter.  It was ugly, loud, but cheap to run and always got me from A to B. (maybe with a few friends on the back!)
Image may contain: people sitting, plant, motorcycle, flower and outdoor

Basic Grey, Sweet Sugarplum, Powder Pink and Sahara Sand is such a gorgeous combination. You also have the option of adding a green of your choice.
I chose to make a card I designed last year which was filled with succulents. I've revamped the Greenhouse and created a little Conservatory using the challenge colours.

stampin up, colourful seasons, stitched shapes, up and away thinlits, fancy fold card

The card is basically an envelope card, with four windows glued together to look like the top and front of a conservatory. To fold for posting you push the centre inwards and it folds into itself. The two flaps, top and bottom, that hold the sentiments, become the envelope. Or, you have the option of attaching a panel to the back for writing and then put the whole card folded into an envelope.

ORIGINAL SUCCULENT GREENHOUSE CARD HERE 
Back Wall and Floor
Onto Very Vanilla card, I have sponged Sahara Sand ink through the brick wall stencil -from the Party Pattern Decorative Mask set. I've also used the same mask set to create the rug on the floor, with the medallion stencil and Powder Pink ink. A Powder Pink stitched circle has been adhered with tombow to the centre of the medallion stencilling. Both the floor and walls have been attached to the card with Tombow.


Furniture
The chairs and coffee table were cut in basic grey card using the Colourful Seasons Thinlits. To make the coffee table - just cut two chair bottoms and adhere together. The coffee table openings were backed with Sweet Sugarplum card. The beverage is stamped in Sweet Sugarplum ink. To enable the card to be folded the furniture is attached to the floor with strips of acetate.


The standing lantern on the back wall has been made using the Brightly Lit Bundle, with flowers from the Hello Friend stamp set and the leaf die from Eclectic layers Thinlits.

The Sweet Sugarplum flower boxes on the back wall, were created using the Hearth and Home Framelits window box cut down. The same flowers and leaf die that were used to create the lantern have been used to fill the flower boxes.


The flower basket outside the conservatory is the Hot Air Balloon from Up and Away Thinlits, cut down. The exterior is cut from Sahara Sand card and backed with Basic Grey.  The basket is filled with flowers from the Hello Friend stamp set inked in both Powder Pink and Sweet Sugarplum.
The sentiments from Colourful Seasons were stamped in Sahara Sand on panels of very vanilla card. These panels have then been added to layers of Sahara Sand and Powder Pink before attaching to the very vanilla card front. The whole card is then put onto a Sahara Sand card base.
A few rhinestone jewels have been added to some of the flowers on the back wall to finish it off. 

fancy fold card, stampin up, colourful seasons stamp set, stitched shapes, conservatory card


Folded for posting, wrapped in Powder Pink ribbon with a bow and gold sequin trim.


INKspired to join the challenge? It's so easy. Firstly, get some INKspiration by hopping around to see what all of the Colour INKspiration Crew have to show you. Then you have 12 days from today to make and upload your creation to the Facebook Colour INKspiration Group. You don't have to have a blog to participate but if you do you can link back to your post. Make sure you use all of the challenge colours. Not a member of the Facebook group yet? Just click here and ask to join Colour INKspiration, add the group to your favourites and share it with your crafty friends so they can join in the fun too. We can't wait to see what you create with these gorgeous colours.

Hope you join us and play along.  Up next in the blog hop is the super talented Nikki Spencer and her stunning creation. Enjoy!
https://nikkispencer-mysandbox.blogspot.com/2017/09/colour-inkspiration-18.html

Thanks so much for taking the time to visit today, until next time, stay crafty


Tuesday, 12 September 2017

Joy of Sets #006 - Letter T

Hello Crafty Friends,

Hope your day is going well. Its challenge time again over at Joy of Sets, and this week we are using the Letter T as our inspiration.

I decided to use the Tranquil Tulips hostess stamp set. I adore Tulips and this set was one of the first to hit my wish list when I saw it at convention in April.


I started with a whisper white background and sponged some crumb cake ink through the Brick Wall stencil from the Pattern Party Decorative Masks set. The Tulips were stamped in Powder Pink, the other floral image from the Tranquil Tulip set was stamped in Bermuda Bay and then fussy cut.


The small flower from Jar of Love was stamped in Sweet Sugar Plum, die cut and adhered with mini dimensionals. Small dimantes were added to the centres. I also used two small flowers from the falling flowers stamp set. These were heat embossed in white powder and sponged in Powder Pink and Bermuda Bay.

A few strips of Old Olive card stock were cut for the foliage and added to the vellum jar.  Using the Jar of Love bundle, the jar was stamped in black Momento ink and then die cut. An additional vellum jar was cut and coloured from behind using a sponge and Bermuda Bay ink.


A Doily has been folded and added to the card front before adhering the Vellum Jar and Floral Arrangement. Pink bakers twine was wrapped around the jar's opening. The sentiment from Floral Phrases was stamped in Old Olive ink, curled slightly, then attached with dimensionals and some retired glimmer paper was tucked underneath.
 
Why not join us and play along with this weeks challenge. Find a stamp set that has the letter T in its title and create a card. Don't forget to share it with us at Joy of Sets Challenge Blog
 
Image may contain: text
Until next time, stay crafty


Thursday, 31 August 2017

Just Add Ink #375 - Sketch


Hello Crafty Friends,

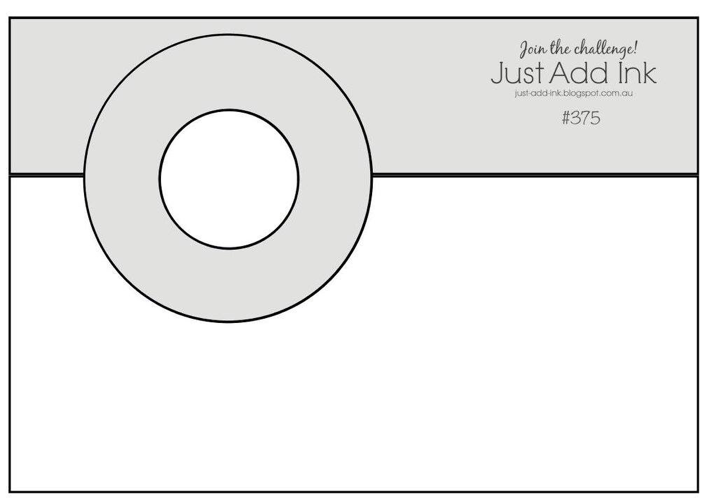
Hope your Friday is treating you well. It's challenge time over at Just Add Ink and Kim has challenged us with a sketch.  I loved the simplicity of this sketch,  I decided to rotate the orientation, to create two tent fold cards.

http://just-add-ink.blogspot.com/2017/09/just-add-ink-375sketch.html

The first card has a glossy white card front. Using a stencil from the Party Pattern Decorative Masks, I sponged Black Momento Ink, lighting the saturation gradually towards the centre. Then I removed the mask and lightly sponged Flirty Flamingo and Daffodil Delight inks.


The card front was adhered to a layer of black card before adhering to the Flirty Flamingo card base. A vellum circle was cut using the Stitched Shapes and glued to the card front with a dab of Tombow.

The sentiment from Birthday Delivery was white heat embossed on black card and a layer of silver glimmer card was attached to the bottom.  The flower and leaves were die cut using the Eclectic Layers Thinlits and adhered to the vellum circle.


The inside of the flower is also glossy card with Flirty Flamingo & Melon Mambo inks applied with an aqua painter.
 
The second card uses the large flower and a leaf from the Falling Flowers stamp set. I stamped the images in Archival Black onto Shimmery White card and water coloured with Powder Pink, Blushing Bride, Wild Wasabi and Daffodil Delight. The centre image was stamped first and then masked and repeated to create the panel in the sketch.
 

I used the Circle Stitched Shapes to cut the two circles and raised with dimensionals for the outside ring and foam strip for the inside ring. The sentiment from Teeny Tiny Sentiments, was white heat embossed on black card and punched using the window word punch (now retired)


As always, the amazing Design Team have created and shared some stunning projects using this weeks challenge sketch, be sure to check them out here. Why not join us and play along.

Until next time, stay awesome
 
Thursday, 17 August 2017

Just Add Ink #373 - Just Add Stencils


Hello Crafty Friends,

Hope your day is going well.  Guess what..... It's challenge time over at Just Add Ink. Yipeeeeee!!! This weeks challenge was a fun one for me, I ended up making four totally different cards using the challenge theme - Just Add a Stencil. That's why I love participating in challenges. They encourage me to create outside my comfort zone.

If you don't have a stencil to play along with this weeks challenge, you could always make one. Just use some die's, or punches, to cut shapes from acetate or similar plastic and voila - your very own stencil.

http://just-add-ink.blogspot.com/2017/08/just-add-ink-373stencils.html


I love stencils and find them fun and easy ways to create unique backgrounds. I chose to use the brick wall stencil from the Pattern Party Decorative Masks.
 
Using Sahara Sand ink, I partially sponged a portion of the whisper white background. I also sponged the Sahara Sand Stitched Oval, so that the brick wall sponging lined up with the background.


The little church has been made using the Hometown Greetings Edgelits. I cut the church away from the rest of the die cut and heat embossed it in gold.  (You could just die cut the church from Gold Foil) 


The flowers were cut using the Eclectic Layers Thinlits, in Powder Pink, Vellum and Sahara Sand card. A delicate lace doily was tucked behind the Stitched Oval.


The card front was adhered to a layer of Old Olive, then some linen thread was wrapped around before mounting to fun foam for extra dimension. This was then adhered to the Sahara Sand card base.


The sentiment from Festive Phrases,  was stamped with Crumb Cake ink directly onto the card front.  A linen thread bow and a few rhinestones were added to finish off this rustic wedding card. It is now in the post making its way to rural Queensland for a country themed celebration.

The Just Add Ink Design Team have created some absolutely beautiful projects using this weeks challenge. Make sure to check them out - great inspiration for using stencils and all round stunning cards. Why not join us and play along?!
 
Until next time, stay awesome


Sunday, 13 August 2017

Happy Birthday Gorgeous & Stencil

Hello Crafty Friends

Another quick blog post for today as I wanted to share a card that uses a stencil, sponges and ink to make a subtle background. I have used the decorative masks brick wall stencil and lightly sponged some Lemon Lime Twist and Soft Sky Ink in the centre of a Whisper White card front.


The Happy Birthday sentiment from Happy Birthday Gorgeous stamp set was white heat embossed on black card and then adhered to a layer of Pool Party card. Floral images were stamped in Archival Black ink and again sponged with Lemon Lime Twist and Pool Party inks. Some Pool Party ribbon was attached under the Sentiment panel and the Floral images on top

The card front was added to a layer of Soft Sky card before adhering to a Thick Whisper White card base.
 
Until next time, stay awesome


Layering Die Cuts

Hello crafty friends,

Todays card uses the new Eclectic Layers Thinlits and a few thinlits from other bundles, with the awesomely fun Embossing Paste and Decorative Masks. I am onto my second pot of embossing paste it is seriously so much fun and love the texture it provides.


I mixed a little Pool Party Ink with some embossing paste and using one of the four decorative masks applied a small amount diagonally across the whisper white card front.

Floral and leaf die cuts were made using the Eclectic Layers thinlits, Jar of Love and Falling Flowers. I used three different blue toned card stock - Dapper Denim, Pool Party and Tempting Turquoise.

The Thanks sentiment from Jar of Love was inked in Dapper Denim and stamped onto the Whisper White card front. The card front was adhered to a layer of Pool Party and Dapper Denim before adhering to the card base.
 
Until next time, stay awesome


Wednesday, 26 July 2017

Embossing Paste and Decorative Masks - stencils

Hello Crafty Friends,

I know, second post today, apologies for that, I am playing the catch up game, having been extremely busy with work. Plus, I have been meaning to share for weeks now.....
 
Two words - Embossing Paste!!! So much fun. I had a little play with both heat embossing and embossing Paste to create some unique textured backgrounds.

Using one of the decorative masks to apply embossing Paste off the corner of the Powder Pink card front, I then applied silver heat embossing using a splatter image stamp and Versamark. 


The background Die from May Flowers Thinlits was cut in Powder Pink and laid over the centre edge of the embossing Paste. 

The Floral image from Remarkable You was inked in Archival Black and coloured using Powder Pink ink with an aqua painter. 

The card front was then cut down and backed with silver foil card. A strip of Shimmery Silver was tucked underneath the sentiment along with a silver Doily. 

The sentiment "Thinking of You" is from the Colourful Seasons stamp set, inked with Black Momento onto Powder Pink card 


I may have gone a little crazy with my embossing paste. To say I love the stuff is an understatement! Thinking I may need to order another container very soon. Its so much fun, makes me feel like an artist with all my tools, and colouring the paste with my inks is just the bee's knees. Best I go make some cards with all the card fronts I have applied embossing paste to thus far.
 
Until next time, stay crafty