SOCIAL MEDIA

Wednesday, 18 April 2018

Display Board Stamper Blog Hop - Sea of Textures, Lilypad Lake, Painted Glass

Hello Crafty Friends,

Welcome to the Onstage April 2018 Presenter & Display Board Showcase Blog Hop. Thanks for joining us.


You are currently visiting Jackie Aitken in Western Australia.  If you are following the hop, you may have arrived here from talented, Kim Oliver. There are quite a few Demonstrators from all over the globe participating in this hop, so be sure to hop all the way through, for loads of inspiration using some of the new products from the new Annual Catalogue.

I was lucky enough to be a Display Board Stamper at my second ever Onstage, in Perth, Western Australia. I was so nervous I couldn't hang my samples, so my wonderful Upline, Sarah Klass, stepped in and hung them for me while I received Check In training. Below is a picture of my Display Board.


My generous box of goodies contained three stamp sets: Sea of Textures, Painted Glass and Lilypad Lake. The new Subtle Embossing Folder and the Lovely Label punch were in there too. I also received the new in colour DSP and matching embellishments, which was so exciting to see, but so hard to keep the excitement to yourself lol.
Below are the samples I created for my Display Board. WARNING: Lots of photographs to follow, so I will keep the chit chat to a minimum.
SEA OF TEXTURES STAMP SET

Sampler - Netting made with Linen Thread
sea of textures, stampin up, sampler

Fancy Fold - Shadow Box Card with Acetate Window. On opening and closing the sailing boats move.
stampin up sea of textures, waterfront, fancy fold, shadow box acetate window

Shaker card with a sponged card front.
sea of textures, stampin up, shaker card, rainbow sponging

Shaker Card, sponged background, silver heat embossed images and White Sand.
sea of textures, stampin up, shaker card, vellum and heat embossing

Another Shaker Card - the new adhesive backed sequins are stunning.
sea of textures, rainbow sponging, stampin up, shaker card

Stamped background, sponged side panel with vellum "bubbles".
sea of textures, stampin up, octopus card

Two Original Fancy Folds Designs - Shadow Box Card & Aquarium Box Card.
stampin up, waterfront, sea of textures, fancy fold, window cards, aquarium card

LILYPAD LAKE STAMP SET

Another Shadow Box card with acetate window. Sponged background and reverse stamped images.
lilypad lake, stampin up, shadow box card, fancy fold, sponging technique

Sponged panel with stamped images coloured using Stampin' Blends.
lilypad lake, stampin up, sponging technique

The sailing boats are so cute, I had to make a nautical themed card, complete with a life buoy.
lilypad lake, stampin up, nautical card, blueberry bushel dsp


PAINTED GLASS STAMP SET


A 12 x 12 Scrapbook Page Layout

Again, some white heat embossed images that have been water coloured. The butterfly has been fussy cut and adhered with mini dimensionals.
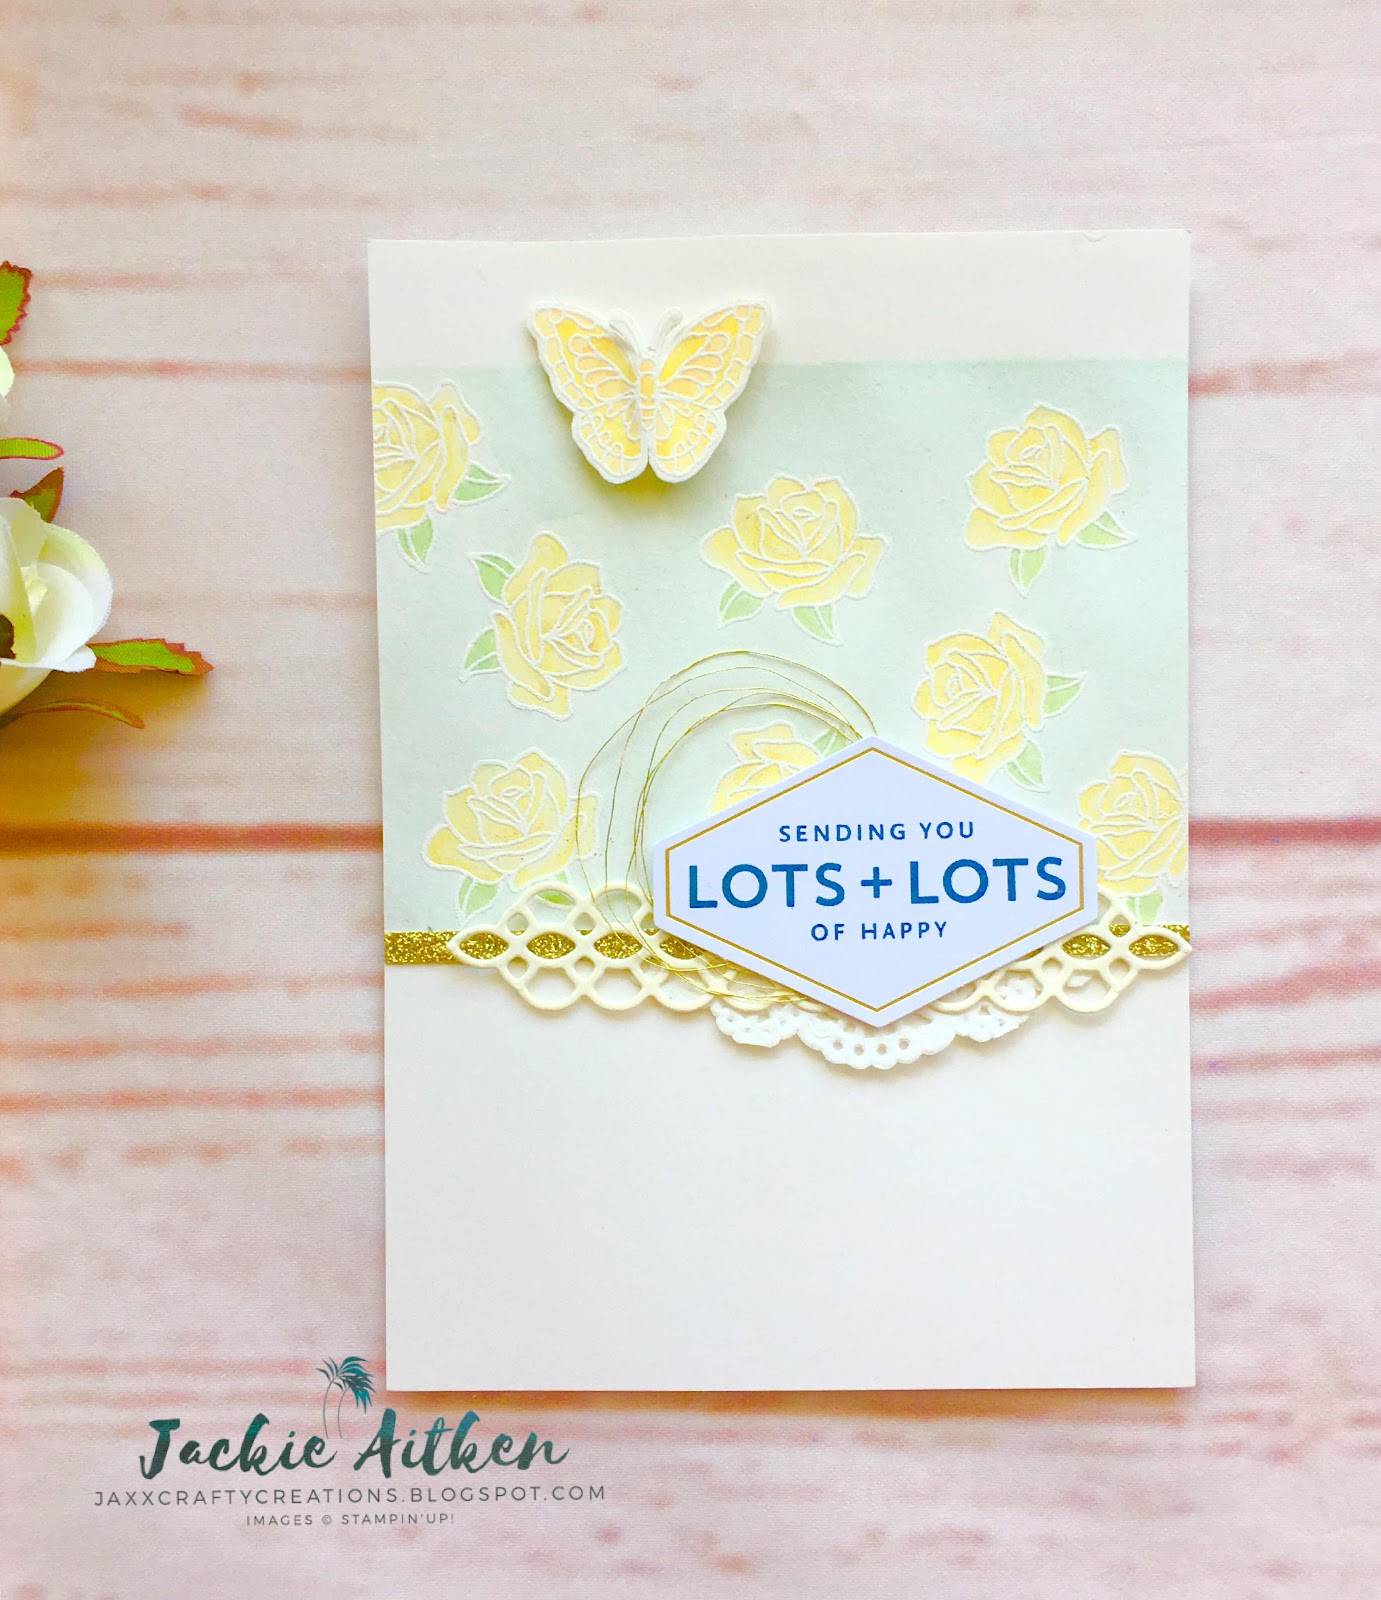
painted glass stamp set, stampin up, roses and butterfly cards, watercolour
The roses on this card are also white heat embossed, on Vellum. Colour has been applied to the back with Stampin Blends.
painted glass, stampin up, roses, coloured vellum, stampin up

Also in my box was the Lovely Label Punch. I have sponged a piece of Shimmery White card stock, used a portion to create the panel on the left and the remainder, was punched and used as a base for the roses.
painted glass, stampin up

Another Shadow Box Card with the Gold Foil exterior embossed using the new Subtle Embossing Folder. The Medallion image has been Gold heat embossed and portions of the stamped image, fussy cut and layered.
painted gkass, stampin up, subtle embossing folder, shadow box card

For those that are familiar with my work, will know I struggle to use DSP. I tried incorporating the stunning In Colour DSP pack I received with the cards I was creating, but it just wasn't working.  Then, I had a light bulb moment. I love making Pocket Cards, so what better way to show the DSP.
The next few creations feature the new In Colour DSP Pack & Binder Clips along with products that are carrying over into the new Catalogue.

Pineapple Punch
stampin up, pineapple punch, pocket card, cake soiree
inside
stampin up, pineapple punch, pocket card, jar of love, cake soiree
Lovely Lipstick
stampin up, lovely lipstick dsp, pocket card
inside
stampin up, lovely lipstick, pocket card
Call Me Clover
pocket card, call me clover dsp, berry burst. stampin up
inside
stampin up, call me clover, celebrate you thinlits, berry burst, pocket card

That's it folks!! I can hear you sighing lol I know - I'm a sharer!

Next up in the blog hop is my lovely and talented friend, Nicole Wilson. I was lucky enough to share the board with Nicole, so can vouch for how stunning her creations are in real life. Enjoy xx

 https://nicolejuliewilson.blogspot.com/2018/04/onstage-april-2018-presentation-display.html

Thank You so much for hopping with us today, your time to view our projects is greatly appreciated.


Interested in some of the Fancy Fold cards featured in today's post? Tutorials are available!! Just click on the image below to be taken to the AddINKtive Designs Tutorial Shop.


Wednesday, 11 April 2018

Perth Onstage - Display Board Samples - Sea of Textures

Good Day Crafty Friends,

Today is the day I can finally share what I have been working on for the past few months - My Display Boards for Onstage Perth. 

Such an exciting opportunity to be selected as a Display Stamper. I received a box of new catalogue goodies in February and got to work straight away. I completed most of my creations within the first week of getting the box. 

I loved creating my projects and am so proud I did it, but the night before Onstage I got so nervous I worked myself into a tizzy! Lol The morning of Onstage was the worst. I was so worried others wouldn’t like my work, I felt like I was going to vomit lol 


I also volunteered for Check In, which was a blessing, as it enabled me to take my mind off my display board samples and just have fun. I loved giving all the lovely demo’s in my queue a warm welcome and their goodie bag! 

Anywho, onto a few of my creations. I was given three stamp sets to showcase. I made quite a few projects using the Sea of Textures Stamp Set. 


A couple of shaker cards


I had to do some fancy folds - the Octopus really needed to be put into some underwater scenes. I am in the process of writing tutorials for the following two cards - Three Sided Aquarium and Window box card. The little sailing boats move as you fold it close!!


Some simple stamping with a sponged edge - this one also has vellum "bubbles".


Another shaker card, this time with White Sand instead of Sequins.


And I couldn’t help myself but do a sampler - think this was my favourite project using this Stamp Set. All the fussy cut images were stamped and then clear heat embossed. The fish net was made using Linen Thread and a tutorial on Pinterest.


I actually made another three cards using this stamp set that didn't make the "cut" - I could only display between 15-20 items and had to cull some of the projects to allow room for the other stamp sets I received.
 
I will share the remaining cards in posts over the coming days. Until next time, stay crafty
http://addinktivedesigns.com/shop/


Tuesday, 20 March 2018

Magical Day Fairy Castle - AddINKtive Designs

Good Day Crafty Friends,

It’s time to share this month’s creation for the AddINKtive Designs Team. I am so excited about this fancy fold card as I absolutely adore it!  Bronwyn has been extremely busy creating loads of new tutorials, all fancy folds and some with multiple interactive components in the one card! 
The PDF tutorials have detailed step by step instructions with clear photographs. All cards in the Tutorial Shop are designed using Stampin' Up! products and fold flat for posting. Check out all the amazingly detailed fun fancy folds over at AddINKtive Designs here.

http://addinktivedesigns.com/shop/

I chose to use Bronwyn’s Castle Bridge Fold Card Tutorial to create this Fairy Castle themed version. Any excuse to use those chubby unicorns!! lol You can find the tutorial I used to create this fun, fancy fold here.

stampin up, magical day stamp set, fairy castle card, fancy fold, bridge fold card

To get the clouds and brick detail to really pop on such light coloured Card Stock, I sponged White Craft Ink onto the cloud and brick wall stencils and then applied White Embossing Powder and Heat Set. 

stampin up, magical day stamp set, fancy fold, fairy castle card, bridge fold card

I also added an extra tower in the middle of the fold. This was created using the smaller towers as a template and extending the shape.

I have used lots of White and Sweet Sugar Plum Glimmer Card Stock so the Castle sparkles and shines from all angles.

The Mermaids in the windows had their long locks chopped and then reattached closer to the window frame so that it looks like their hair is blowing out the window. 

All images were stamped in Memento Tuxedo Black Ink and Coloured using a mixture of the light coloured Stampin’ Blends.

I cannot wait to make a Dragon & Knight version of this amazing Fold. 
Until next time, stay crafty
http://addinktivedesigns.com/shop/


Wednesday, 27 September 2017

Colour INKspiration CI#18 Blog Hop - Colourful Seasons

Hello Crafty Friends,

Welcome to the Colour INKspiration #18 Blog Hop. You are visiting Jackie.  If you are following the blog hop, you would have arrived here from the very talented, Julia Quinn.  How stunning is her card with all those gorgeous flowers cascading down the brick wall!!

I am super excited to be joining the Colour INKspiration crew on a permanent basis.  Colour challenges are so much fun and I am extremely grateful to be on this journey with such lovely and extremely talented ladies.

When I saw the challenge inspiration picture, I instantly fell in love with the scooter. I always wanted a Pink Scooter when I was a teen, but this wasn't an option unless you brought brand new. I had a second hand Army Green scooter.  It was ugly, loud, but cheap to run and always got me from A to B. (maybe with a few friends on the back!)
Image may contain: people sitting, plant, motorcycle, flower and outdoor

Basic Grey, Sweet Sugarplum, Powder Pink and Sahara Sand is such a gorgeous combination. You also have the option of adding a green of your choice.
I chose to make a card I designed last year which was filled with succulents. I've revamped the Greenhouse and created a little Conservatory using the challenge colours.

stampin up, colourful seasons, stitched shapes, up and away thinlits, fancy fold card

The card is basically an envelope card, with four windows glued together to look like the top and front of a conservatory. To fold for posting you push the centre inwards and it folds into itself. The two flaps, top and bottom, that hold the sentiments, become the envelope. Or, you have the option of attaching a panel to the back for writing and then put the whole card folded into an envelope.

ORIGINAL SUCCULENT GREENHOUSE CARD HERE 
Back Wall and Floor
Onto Very Vanilla card, I have sponged Sahara Sand ink through the brick wall stencil -from the Party Pattern Decorative Mask set. I've also used the same mask set to create the rug on the floor, with the medallion stencil and Powder Pink ink. A Powder Pink stitched circle has been adhered with tombow to the centre of the medallion stencilling. Both the floor and walls have been attached to the card with Tombow.


Furniture
The chairs and coffee table were cut in basic grey card using the Colourful Seasons Thinlits. To make the coffee table - just cut two chair bottoms and adhere together. The coffee table openings were backed with Sweet Sugarplum card. The beverage is stamped in Sweet Sugarplum ink. To enable the card to be folded the furniture is attached to the floor with strips of acetate.


The standing lantern on the back wall has been made using the Brightly Lit Bundle, with flowers from the Hello Friend stamp set and the leaf die from Eclectic layers Thinlits.

The Sweet Sugarplum flower boxes on the back wall, were created using the Hearth and Home Framelits window box cut down. The same flowers and leaf die that were used to create the lantern have been used to fill the flower boxes.


The flower basket outside the conservatory is the Hot Air Balloon from Up and Away Thinlits, cut down. The exterior is cut from Sahara Sand card and backed with Basic Grey.  The basket is filled with flowers from the Hello Friend stamp set inked in both Powder Pink and Sweet Sugarplum.
The sentiments from Colourful Seasons were stamped in Sahara Sand on panels of very vanilla card. These panels have then been added to layers of Sahara Sand and Powder Pink before attaching to the very vanilla card front. The whole card is then put onto a Sahara Sand card base.
A few rhinestone jewels have been added to some of the flowers on the back wall to finish it off. 

fancy fold card, stampin up, colourful seasons stamp set, stitched shapes, conservatory card


Folded for posting, wrapped in Powder Pink ribbon with a bow and gold sequin trim.


INKspired to join the challenge? It's so easy. Firstly, get some INKspiration by hopping around to see what all of the Colour INKspiration Crew have to show you. Then you have 12 days from today to make and upload your creation to the Facebook Colour INKspiration Group. You don't have to have a blog to participate but if you do you can link back to your post. Make sure you use all of the challenge colours. Not a member of the Facebook group yet? Just click here and ask to join Colour INKspiration, add the group to your favourites and share it with your crafty friends so they can join in the fun too. We can't wait to see what you create with these gorgeous colours.

Hope you join us and play along.  Up next in the blog hop is the super talented Nikki Spencer and her stunning creation. Enjoy!
https://nikkispencer-mysandbox.blogspot.com/2017/09/colour-inkspiration-18.html

Thanks so much for taking the time to visit today, until next time, stay crafty