SOCIAL MEDIA

Thursday, 21 December 2017

Just Add Ink #391 - Tree's, Twine or Tags

Hello Crafty Friends

Its almost Christmas!!! Only a few more sleeps now. I am so excited. I am one of those that stay up until midnight on Christmas Eve to open my presents. I have done it since I was a child, the suspense kills me, so I get it out of the way and get to sleep in on Christmas Day. Now, that's the best present anyone could ask for in my book.

Its challenge time over at Just Add Ink, and this week we have the final challenge for 2017!!! This week Kim has asked that we Just choose two from either Twine, Trees or Tags.

https://just-add-ink.blogspot.com/2017/12/just-add-ink-391just-choose-two.html

I chose to use all three elements for this challenge. Tags, with trees and twine. These were all very easy and fast to create. I love personalised tags with my Christmas wrapped gifts and this years theme is predominately pink - some of the gift wrapping has pink flamingos with santa hats! These tags will go nicely with the last minute gifts that will be purchased over the next few days.  Here is a picture of my Christmas Tree.


 Onto my challenge creations - I made four pink gift tags - two long or regular size and two small.


I love the tree image on the Merry Little Christmas DSP, and seeing its about to retire, I decided it was time to use the remainder of my stash. Combined with a few die cuts, some stamping and twine, these tags took less than an hour to make.


To a Powder Pink card base, a slightly smaller piece of DSP in Black and White Buffalo Check was adhered with tombow. The Powder Pink front has a stitched frame cut to reveal a piece of the tree DSP tucked behind. The sentiment from Happy Birthday Gorgeous was stamped in Momento Black ink, die cut and adhered over the dsp on the inside of the stitched frame. To finish it off, the To and From were stamped and Black and White Bakers twine added.


This tag has a Whisper White card base and a Powder Pink front. Again a stitched die frame was removed from the Powder Pink card stock and some DSP placed behind the reveal. The Merry Christmas sentiment from At Home with You stamp set was inked in Momento Black and die cut using Stitched Framed dies. Black card die cut trees were attached behind the sentiment and loops of silver twine added. To and From were stamped at the top and Black & White Bakers twine for hanging.

 
The two smaller tags use some of the off cuts. The heart tag was created by folding a piece of Powder Pink card in half, die cutting a shape from the front, adhering DSP in the reveal then stamping the sentiments and adhering the off cut heart with dimensionals. A small black card stock tree die cut was placed over a Black & White bakers twine which has been adhered in a heart shape. The fourth tag literally uses scraps left over from making the other three tags, adding a neutral twine bow to finish it off.


I hope you find time to play along with us this week, you can add your creation to the gallery here. I would like to take this opportunity to wish all my crafty friends a very Merry Christmas. Make loads of memories and cherish those that you love. Stay safe out there and see you in the New Year.

And finally, a very special Merry Christmas to "Sally" & Jan - part of the Just Add Ink Design Team. (For those who do not know - Sally is Jan's special pooch) So from my boys to Sally, The JAI Design Team and all my crafty friends and their fur babies.............

Merry Christmas and A Happy New Year

Lol - they don't look overly impressed, may have something to do with the treat in Mums hand that is not being given to them or the fact they have these foreign things around there necks...don't worry I only put them on for the photo and they get to destroy them on Christmas Day xx
 
Stay Crafty
 
 
Tuesday, 15 August 2017

Joy of Sets Challenge #004 - Letter B - Bella & Friends


Hello Crafty Friends,

Hope your day is going well. We finally have some sunshine in my neck of the woods - wahoo! Double wahoo as its challenge time over at Joy of Sets Blog Challenge. This fortnights challenge is The Letter B.


The card I submitted as part of the Design Team over at JOS, uses the Bella & Friends stamp set. I absolutely adore this set and often pull it out for children birthday cards.


I started with a Thick Whisper White Card Base, to which I added two panels of retired Dsp with a Black cardstock shadow line in between the two. Bella has been stamped in Archival Black ink and coloured using Stampin' Up! Water Colour Pencils.

Using the Circle Stitched die and Glossy card, I sponged some Soft Sky and Lemon Lime Twist. I used the Layering Circles scallop die to cut a matt in Black.  Bella was fussy cut and adhered to the die cut circle.


The sentiment "Its Your Day!" from the Happy Birthday Gorgeous stamp set was heat embossed in white on black card. The "Hooray" from the same stamp set was inked in Black Momento, lightly sponged with Soft Sky ink and then punched using the Balloon Bouquet Punch. I added an extra balloon, punched from a Perfect Days Memories & More card and tucked it behind.

Some clouds were lightly sponged and added with foam strips as they are higher than the dimensionals used to adhere Bella. Some Black & White Bakers Twine was added to the Balloons and Fine Tip Glue to Bella's Bone, Hat and the Flowers.


Why not join us and play along with this fortnights letter. Be sure to check out the inspiration provided by the Design Team. I can't wait to see all the amazing creations the partipants enter.

Until next time, stay awesome
Wednesday, 9 August 2017

A Stencil from Jar of Love

Hello Crafty Friends,

Hope your day is going great. Only one more sleep before my pre-order goodies from the new Stampin' Up! Catalogue arrive. They are sitting in the courier depot just an hour away (sigh) The new catalogue will be available to view September 1st, so keep an eye out on my sidebar, I will add it as soon as I can. So many Christmas goodies!!!

Today, I made my own stencil using some scrap card and a small Die from Jar of Love. I then used my cardboard stencil and layered in some Sweet Sugar Plum with a sponge dauber onto Whisper White card.


Using a few different Framelits/Thinlits in my collection I cut the branch, large heart and sentiment banner and then fussy cut the Floral images.

I used Jar of Love and Happy Birthday Gorgeous for Floral images and  Teeny tiny sentiments for the greeting. Some Sweet Sugar Plum ink was applied in an ombré effect, to the Sunshine Wishes Heart Die cut.

I added a little bow made from neutral Bakers Twine and heat embossed the sentiment in white powder into Sahara Sand card.  A few pearls and it's done! 

Until tomorrow...its blog Challenge day! Stay crafty

 
Tuesday, 8 August 2017

Falling Flowers Birthday

Hello Crafty Creators,

Hope you are having a fabulous day. Do you go through fads with colour combinations? I certainly do! This weeks colour crush is Powder Pink, Tempting Turquoise and Lemon Lime Twist.


This card uses these colours along with some black and white but looks great with other neutrals such as Sahara Sand and Crumb Cake. 

On Whisper White card, I stamped the images from the Falling Flowers stamp set, in Black Momento ink and then using a "swoosh" stamp from the timeless textures stamp set, inked in Powder Pink, Tempting Turquoise & Lemon Lime Twist inks, randomly Stamp over the black images. 


I added a few flowers using a small stamp inked with Black Momento ink to fill in a bit more of the white space. 

The sentiment hugs and kisses was heat embossed in white on black card - I just repeated the single sentiment across the width of the cardstock to look like one long sentiment. 

The Happy Birthday sentiment is from the Happy Birthday Gorgeous stamp set, this was also heat embossed in white onto Powder Pink card with a strip of Lemon Lime Twist card behind the sentiments. 
 
The card front was mounted to a layer of Lemon Lime Twist before adhering to the Powder Pink card base. A few rhinestones and its finished.
 
Until next time, stay awesome
 
Friday, 7 July 2017

Jar of Love Birthday Team Swap

Good Day Crafty Friends

Our team had its monthly team get together a few weekends ago, and we all had to case a card, colour scheme, layout etc from the new Annual Catalogue.

As easy as that sounds for most, I have difficulty casing cards as I usually don't like all the elements. I can easily be turned off a cards layout and design elements simply due to choice of colours/combos. 

After flicking a few pages in I found the perfect colour combo I wanted to use on my swap card. There were others but until my new shipment of card stock arrives my choices were limited when cutting for ten full cards.

I had seen the Jar of Love and Heart from the Sunshine Wishes bundles used together by fellow SU demonstrator Ilina Crouse so I decided to use this concept and a colour scheme from the catalogue.

Using a Sweet Sugar Plum card base I added a layer of Soft Sky and Lemon Lime Twist card stock with tombow. The Whisper White card front was embossed using the Hexagon Dynamics EF.  I clear heat embossed the heart die cut using Versamark and the  Sunshine Wishes Thinlits. 

The flowers and leaves were stamped in Lemon Lime Twist and Sweet Sugar Plum, then die cut using Jar of Love Bundle. I also cut a strip of Sweet Sugar Plum card stock using the Heart border die from Jar of Love to tuck behind the sentiment. The little flower die cut from Softy Sky is made using the Paisley & Poises Framelits, I thought it needed the touch of blue to coordinate with the sentiment card stock. The Happy Birthday greeting is from the Happy Birthday Gorgeous stamp set.


The card on the right was picked by Tracey Wilson. I adore the colours and the simple background stamp. I loved Tracey's card so much I changed my wish list and ordered the Falling Flowers Bundle!

Until next time, stay crafty x
Tuesday, 20 June 2017

Happy Birthday Gorgeous - Friend

Hello Hello Crafty Friends

The wonderful thing about having a craft studio is being able to create a handmade card that is individually personalised with the recipient in mind.

I have an absolutely wonderful friend (who I met through Stampin'Up!) that drives over an hour away to craft with me. She lives up in the big smoke - Perth,  and I down in the sleepy beachside suburbs. 

Every time she visits she brings gifts - magnetic A4 sheets for my Dies - a true Crafty friend who understands my pain at not being able to purchase locally. We had a team show box swap recently and she made us all a neat little treat box. She also made the most beautiful gift bag for me for some die cuts I had requested. I suspect my lovely friend has been watching tutorials by the talented Sam Hammond - Pootles, UK SU Demo lol


When I sat down at my crafting counter I saw Sharon's cute gift bag and it made me think of how wonderfully generous and thoughtful she is, I knew I wanted to die cut the word friend on the card front.

Using Shimmery White Card Stock, I sponged Daffodil Delight, Lemon Lime Twist, Bermuda Bay & Pacific Point. After the ink was dry I applied the images from the Happy Birthday Gorgeous stamp set with Versamark and white embossing powder.

I took some letter Dies and taped them together on the back side before running them with the sponged card front through the Big Shot.

The die cut card front was mounted to a layer of basic black card with foam strips for extra height. The sentiment is from the Paisley & Posies Bundle and was white heat embossed on Lemon Lime card backed with basic black. This was adhered to the card front with dimensionals. 
 
Until next time, stay crafty

Monday, 19 June 2017

Jar of Blooms - JAI#364

Hello Crafty Friends

I have had a wonderful week off, during which time we celebrated our youngest fur baby and Hubby's birthdays. We were blessed with the most amazing weather for this time of year in Perth and enjoyed every minute soaking up the winter sun.


I was excited to get back into my crafty space today. This is not hubby's card, but a card I made for the Just Add Ink Challenge #364 Click the link or picture below to play along with the challenge or to check out the other entries.

http://just-add-ink.blogspot.com.au/2017/06/just-add-ink-364inspiration.html 

Wow wee this was an all round hard one for me as I kept wanting to use the new supplies that I had just ordered - but these goodies, including my new embossing paste, wouldn't be here until next week. 

So I just made do with the things I already have in my ever growing craft stash.


I started with a Smoky Slate card front. To this I Stitched some vellum that had been embossed with the brick wall Embossing Folder and underneath that layer I slipped a small piece of Whisper White that had been stamped in Smokey Slate ink with the hardwood background stamp.

The Jar was cut from Silver Foil cardstock using the Jar of Love Framelits. Using a scrunched up piece of paper I tapped it into Versamark and then randomly onto the Jar and heat embossed in gold. 


The flowers from Happy Birthday Gorgeous and leaves from Remarkable You stamp sets, were white heat embossed on Whisper White card stock. Then using sponge daubers with Daffodil Delight & Lemon Lime Twist inks to colour.

The little Lemon Lime Twist strip of card stock was heat embossed in gold using the Bless Your Heart sentiment from Jar of Love. Finally to add a teeny weeny bit of copper I threw in the copper ribbon bow.

Before I depart to the mess that was my tidy craft room before entering this morning, I wanted to share my news


Wahooooo! Last weeks entry won!! I was so blown away, I did a happy dance all around the house lol

Till next time, stay crafty  x
Monday, 5 June 2017

Happy Birthday Gorgeous - JAI #362

Hello Crafty Friends

I am doing it again....entering another challenge! It was no where as hard as I thought it was going to be, although I did not enter my photo very well I did manage to link everything properly, Yay! And, I got a special mention for my entry, not too mention some lovely comments. Today's card is for another Just Add Ink Challenge #362


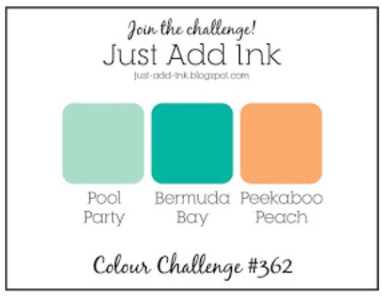
This weeks challenge is a colour combination - Pool Party, Bermuda Bay and Peakaboo Peach. I'm not a big user of Peakaboo Peach unless I am sponging so was a tad intimidated having to incorporate it with two of my favourite blues to make a card.

http://just-add-ink.blogspot.com.au/2017/06/just-add-ink-362colour.html 
 
 
The Happy Birthday Thinlit is an easy go to for any birthday card. So this was a good starting point for me when thinking about what to create for this card.


The Bermuda Bay card front was stamped using small sentiments from the Tabs for Everything set, with Versamark and then heat embossed with clear embossing powder.
 
The Happy Birthday Thinlit was then used three times, once to cut the Bermuda Bay card front that had just been heat embossed, and once each in Peakaboo Peach and Pool Party card stock. Put the Pool Party die back into its hole and then layer the Peach and Bermuda over the top, adhering with Tombow.
 
Behind the die cut space I used strips of Pool Party ribbon to provide a bit of texture as it looked odd just plain. 


The Floral images from Birthday Blooms was stamped in Archival Black ink and coloured using Bermuda Bay for leaves and Peakaboo Peach for the flowers. The larger image that these pieces were fussy cut from can be used for another project.

The sentiment "forever young" and the border, both from the Happy Birthday Gorgeous stamp set, was stamped in black and heat embossed with clear powder and adhered with foam strips. I placed a few Peakaboo Peach enamel dots in the corners for a little bit of extra Pop of that colour. 

Do you like my new photo background? Its two large tiles I picked up from a job site we worked on recently. 

Until next time, stay crafty
 
 
Thursday, 1 June 2017

Happy Birthday Gorgeous - You Make Me Smile

Good Day Crafty Friends

Our team of crafters had a shoe box swap recently - I love these events!!! So fun to catch up with my Stampin' Sisters, eat some yummy homemade deliciousness, make each other's cards while chatting over coffee or tea - perhaps a dance to Tina Turners Nutbush...more card making and chatting. 

We all choose a card to make and then prepare ten lots of everything required to make our chosen card. It's so much fun! Like musical chairs, we move from station to station creating ten cards of our choice from the selection team members have put together.


A fairly simple card using four colours - the new in colour Berry Burst, Sahara Sand, Powder Pink and Whisper White.
 
The floral images are from the Happy Birthday Gorgeous and Jar of Love stamp sets. The sentiment "You make me smile" is from the Colourful Seasons set.
 
The Whisper White card front was stamped using Sahara Sand ink and the little "nut" image, then a strip of Sahara Sand cardstock that was embossed with the Hexagons Embossing Folder and adhered over the top. The Whisper White circle was die cut using the Layering Circle Framelits which was added to a Scalloped edge layer in Berry Burst card stock.
 
The flowers from the Happy Birthday Gorgeous set are a two step stamp - the outside was inked using Berry Burst and the inside using Powder Pink. These were stamped and fussy cut and then adhered to the card in various places using dimensionals.
 
The little leaf under the bigger flower is from Jar of Love and was inked using Sahara Sand and die cut using the matching dies for this bundle.
 
The Whisper White card front was adhered to a layer of Berry Burst card stock and then attached to a base of Sahara Sand.
 
Until next time, stay crafty x
 
 
Wednesday, 31 May 2017

Remarkable You & Detailed Floral Thinlit

Good Day Crafty Friends
 
It was another stunning day in Perth today, and being such fabulous weather for winter, I got out and enjoyed the sunshine by helping hubby on a set of apartments he is working on. My better half is in the construction industry and I often go to work with him, especially on the larger jobs. Its great for the crafting budget but cuts into my crafting studio time something chronic!
 
I finished off this card last night before bed as it needed to be posted today to ensure its timely arrival for a special birthday next week.


I started with a Thick Whisper White card base and attached to this a layer of Lemon Lime Twist. For the card front I inked the Background Wood Grain stamp in Crumb Cake and stamped onto whisper white. Using the layering Oval thinlits to cut the void in the card front and also the border for the lattice piece. The lattice piece is cut using the Detailed Floral Thinlits from whisper white card.
 
I attached the card front to the lemon lime twist later with dimensionals. The scalloped oval border was adhered to the card front using Tombow.  The Calla Lilies from the Remarkable You stamp set were heat embossed in gold and water coloured using Lemon Lime Twist.


The sentiment "make a wish" is from the Happy Birthday Gorgeous stamp set and was heat embossed in white on basic black card.  I tucked in behind the sentiment with the Calla Lillies, a small gold foil doiley and die cuts from the Colourful Seasons bundle in gold foil and Lemon Lime Twist.
 
I am finishing off another two birthday cards tonight which hopefully, life allowing lol, I will post tomorrow. Until then, stay crafty x


Monday, 29 May 2017

Happy Birthday Gorgeous Stamp Set

Good Day Crafty Friends,

Thanks for stopping by. Today I have a few more cards to share using the Happy Birthday Gorgeous stamp set - both a little florally. 
The card below starts with a Sahara Sand card base, with a layer of the new in colour Lemon Lime twist, topped off with a stamped layer of Whisper White.

happy birthday gorgeous stamp set, stampin up, floral card, jar of love 

Using a pencil I lightly drew a circle onto the whisper white card front to enable stamping the shape easier. Two of the flowers were raised with dimensionals, both with the die cut stamped leaf image from the Jar of Love bundle. I used the following inks: Crumb Cake, Pool Party Tempting Turquoise, Sweet Sugarplum, Powder Pink and Lemon Lime Twist.

jar of love, happy birthday gorgeous, stampin up, floral card

Again with a card base of Sahara Sand I added a layer of sweet sugar plum card stock before adding a layer of whisper white. I stamped a splatter image in sweet sugar plum onto the whisper white before adhering the embellishments.
I die cut a circle from Sahara Sand card stock that had been stamped with the Wood grain back ground stamp in white craft ink. A stitched frame circle was adhered using dimensionals and to that I added the flowers from the Happy Birthday Gorgeous stamp set, the leaves from the Jar of Love bundle and the heat embossed sentiment from the Blooms & Wishes stamp set.
Hope you get time to get into our crafty space and try out some new goodies or pull some old favourites off the shelf and put them to use.

Until next time, stay crafty


Happy Birthday Gorgeous - Stamps

Hello Crafty Friends

I just love experimenting with new goodies. I knew as soon as I saw the Happy Birthday Thinlit I had to have it and the stamp set was an added bonus. 

It wasn't until I opened the cased and inked up the stamps did I find that I really really liked the images and especially all the awesome Birthday sentiments in fonts I adore.


For the card above, I started with a card base in Sahara Sand. On Whisper White card stock I masked a line with painters tape across the centre of the card front. I stamped the images using Sweet Sugar Plum, Powder Pink, Pool Party, Tempting Turquiose, Peakaboo Peach, Crumb Cake and Lemon Lime Twist. I also stamped two extra "nuts" in crumb cake and fussy cut them.

The sentiment was stamped in Crumb Cake after the removal of the painters tape, and then the two fussy cut pieces were adhered with tombow.

The card below also has a Sahara Sand card base with a whisper white card front. The images were stamped using Sweet Sugar Plum and Powder Pink for the flowers, Lemon Lime Twist and Crumb Cake for the other fauna. I stamped the sentiment from the Colourful Seasons stamp set in Crumb Cake ink onto some Sahara Sand card stock. A few fussy cut additions were added and topped with a few pearl embellishments.


I loved the colour combination in the above card, I used it again in a card I designed for a team shoe box swap. I will share that card in a future post. Until next time, happy crafting x


Sunday, 21 May 2017

Happy Birthday Thinlit

Hello Hello Crafty Friends
 
Had a very busy weekend here as the weather for this time of year in Perth has been gorgeous. This extends the amount of time I spend outside my crafting studio....but you cannot complain about that. Sunny and warm days with delightful evenings minus the bugs lol
 
I did manage to quickly whip up one card as I couldn't resist trying the new Happy Birthday Thinlit teamed with the Detailed Floral Thinlit.


I adore black and pink together, and thought this simple colour combo would look striking with these two die cuts. The Happy Birthday Thinlit was die cut twice, once in Powder Pink and then again in Black card stock. I stacked the two by using tombow glue sparingly.
 
To break up the two different dies I added a delicate doily and a two little die cut flowers made using the Jar of Love bundle.
 
As you can see in the picture below, I have treated the die cut to some fine tip glue pen. This makes it glossy and helps catch the eye, so the viewer is drawn first and foremost to the happy birthday enabling the background to be a little more subtle.


Again, such an easy card to make and especially fast if you don't bother with the glossy effect on the die cuts. The Happy Birthday Thinlit allows for fast and easy birthday cards production, and the font and size of the image is just the perfect size to use stand alone or with the co-ordinating stamps and/or other dies.
 
The Happy Birthday Gorgeous bundle includes the Happy Birthday Thinlit and co-ordinating stamps. The stamp set has beautiful fonts, two step floral images and lovely sentiments that can also be used individually or with the Happy Birthday Thinlit.
 
Looking forward to making many more birthday celebration cards with this amazing Thinlit and sharing them with you. Till next time, happy crafting x